About Me

My photo
My name is Gavin McClements. I am a wargamer and family man, living in Los Gatos, which is a suburb of San Jose, CA. Building terrain is one of my favorite aspects of the wargaming hobby - in fact, lately I've become more interested in making my battlefields "pop" than in actually playing.

Sunday, June 14, 2015

HO-Scale Japanese Garden Diorama pt.1

I love making terrain, and my wife loves calligraphy, scrapbooking, and pastel colors (Spring and early Summer are her favorite seasons). She is busy nightly with her crafts, while I have really only just recently gotten back into my creative mode. Our 15th anniversary is coming up, and since I was buying some fun stuff from Scenic Express, I chose this as an opportunity to get some of the "brighter" colored items and give them a test run.

I proposed the idea to her and she loved it, so one of our rare dates without the kids, we set about locating the perfect start: the case. It wasn't long before we found it at the Container Store:
http://www.containerstore.com/shop?productId=10022884&N=&Ntt=display
Roughly 10"x5", the stackable "steps" inside are completely removable - and at only $10, it was a no brainer.

I started off with some trees, which allowed me to monkey with some of the different techniques I have been linking here.
A little 1/2" foamcore from Michaels, and I had the beginnings of the scene.
I use this grout material that I got at Home Depot years ago - it has a fine texture similar to buttercream frosting - I mix it in a bowl with a TINY amount of water, and I mean just enough to get it wet. It spreads nicely at that point, and it has adhesive in it already, so I have never felt the need to use white glue with it.
I coated it on the trees, the slopes, and any areas that I thought might need it. For the steeper slopes, I used foamcore offcuts under it - this doesn't really shrink much with drying, but I didn't want to push my luck. A few rocks from the fairy garden out front, and some air dry clay for the banks, and it was ready for a good dusting in sand. When I posted this WIP on Facebook, most of my friends (who really don't understand my hobbies at all) asked if I was making a cake...
My biggest dream for the garden was the use of the SuperLeaf products I had purchased - but given that I was making these trees from scratch and the polyfiber I had was green, I needed a solution to get the foliage onto the armatures. This was the look I wanted, after all:
What I really wanted was some kind of gauze that I could distress (like you would do to a cotton ball to make smoke or something) and stretch across the tree frame - but a quick visit to the local RiteAid came up with nothing (well, a few things, but they got relegated to the first aid kit once I discovered how unsuitable they were). I ended up discovering some Fine Mesh Gauze, which didn't distress like I was hoping it would, but seemed viable nonetheless.
Once the gauze was on and primed along with the rest of the board, I trimmed them a bit with scissors.

[NOTE: I want to do THIS next time with steel wool, which might give better body than the gauze...]

The steps were made from air dry clay. The wall in the back left was made from Pegasus Hobbies bricks. The cobblestone walkway was done with plasticard and was inspired by this:
By the way...I could look at "Japanese Garden" image searches on Yahoo and Google all day...well, maybe half of a day, before I just had to jump up and create something...

Some primer, some paint, and now I had this:
The green for the pond was a Moss color I got at Michaels...I love it. I am hoping it shows through the Realistic Water nicely...and you can see my Fall work in the background for my 6mm terrain.

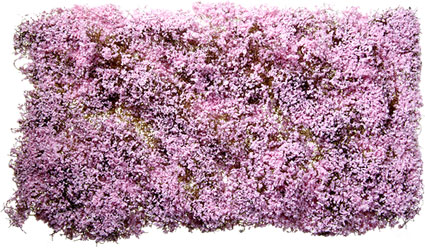
The real fun began as I started to add color to the project. I flocked the grass in "Green Grass" fine flock from Woodland Scenics - I mottled in a bit of other colors, but figuring it would be covered by clump foliage and flowers, I didn't vary it too much. The colors were mostly from Scenic Express' Spring and Summer flower assortments - basically colored turf, and it was wonderful.

This is with the excess flocking still on the base:
The next step is to get the color on the trees, and once that is done, I'll need to do the water portion.

As I was unsure about how to stop the water effects from coming off the end of the board, I looked about and found this easy tutorial on how to accomplish that:
The Terrain Studio is such a great channel - this is his method that I feel was personally uploaded just for me - so I was quite happy when he put it up.
This is another option - I may combine the two when I pour mine.

I also found a good discussion on water and how it is modeled here. Basically, I can do "dirt" and flock all day long, but I don't tend to do water much - so this helps:
http://www.diorama-dreamland.at/index.php?id=26

Of course, TerranScapes has an excellent video on his Water Effects works:

I'll get more up as I get closer to finishing this.

Wednesday, June 3, 2015

Campaigns in a handbag

As I surf the 'Netverse looking for Warmaster goodies, I came across this cool Campaign write up:

http://adventuresinminiaturegaming.blogspot.com/2009/09/warhammer-fantasy-map-campaign-rules.html

He writes more about it, but this core seems solid. It would take very little to modify it to Warmaster, and (yes, I have these tiles) it certainly looks doable.

Friday, May 15, 2015

Making Trees - inspiration

Now that my bocage project is done, I want to make more trees to round out my table. I actually own more than I can use, but colors, man, colors! So many tables are drab...and Spring and Fall (and heck, even summer!) offer such natural beauty!

As there are more ways to make trees than there are rulesets to play in 28mm...

I did some research, as always, and finally decided that these two videos were what I wanted to replicate. The first is by an Aussie (?) who is clearly a master woodworker and into making terrain "on the cheap". The second is a more conventional project.


I made the jig from the first video for pines, and hand-twisted wire trees to replicate the second. I hope to have something to show soon.

As mentioned, there are so many other worthwhile tutorials out there - here are a few more.

This is a great option for Wargaming trees, as opposed to some of the more complex "train terrain" versions out there:
http://www.beastsofwar.com/terrain/terrainscaping-awesome-tabletop-trees/

This is a neat series about one modeler's attempt at trees
http://troubleatthemill.blogspot.com/2012/11/into-woods-part-1-bases.html
http://troubleatthemill.blogspot.com/2012/11/into-woods-part-2-undercoat-and-scatter.html
http://troubleatthemill.blogspot.com/2013/01/into-woods-part-3-foliage.html
http://troubleatthemill.blogspot.com/2013/01/into-woods-part-4-more-ways-of-sticking.html
http://troubleatthemill.blogspot.com/2013/01/into-woods-part-4-slight-digression.html
http://troubleatthemill.blogspot.com/2013/01/into-woods-part-6-another-slight.html
http://troubleatthemill.blogspot.com/2013/04/into-woods-part-7-willow-trees.html
http://troubleatthemill.blogspot.com/2013/04/into-woods-part-8-magic.html

A simpler blog:
http://paint-forge.blogspot.com/2015/04/how-to-home-made-trees.html

This link has a really cool way of making trees from aquarium plants - he wrote it for 15mm:
http://18charlie.com/15mm-trees-part-one/

This gent in the UK models for 28mm, but his scenery is gorgeous:
http://wargamingwithsilverwhistle.blogspot.com.ar/2015/05/trees-orchards-buildings.html

These guys do a cool series of How-To's - the 6mm version is featured further down:
http://www.architectsofwar.com/Howto/BigTrees.pdf

A really good option that uses steel wool (I tracked this one down after reading the one above...)
http://archive.brushthralls.com/terrain/tree-templates.html

This is more for dioramas, but the concepts are the same - and since I'm currently working on a diorama for my wife, well...
http://fantasygames.com.pl/blog/making-trees-tutorial/


And for realism over usefulness:
http://www.fcsme.org/bcarl/how_to_make_scenic_express_supertrees.htm


Some articles scaled specifically for 6mm, or for "Canpoy"-style groves:
http://www.6mmacw.com/forests.html
http://www.architectsofwar.com/Howto/forests.pdf
http://1000footgeneral.blogspot.com/2011/06/megawood.html
http://verytinywars.blogspot.com/2014/11/making-3mm-forests.html
.

Building 6mm Bocage Hedgerows with popsicle sticks and clay, Part 2

A quick link to Part 1.

Before I show you the rest of my project, let me say that I love seeing new products, and Shawn Morris at the Terrain Studio has some very cool Youtube tutorials (his latest seems to be this amazing WW2 European field for 15mm; see below).

Skip to 2:30 to see a walkthrough of some items from Scenic Express that look like they might be fun to use.  4:20 is where he talks about the plowed fields - I bought 2 on this recommendation and am looking forward to seeing them in action.


Back to the Hedges!

Here are the Hedgerows with 2 layers of paint: Beastial Brown and Graveyard Earth. The third, lighter color was Country Tan by Apple Barrel - I've never really been happy with the highlight color to go onto the Earth color. Khaki was recommended to me, but this was what I had on hand. I also hit the scouring sponges with a bit of English Ivy color, also from AB.
As you can see, the sand that I sprinkled on during the clay phase is mostly still there. The primer I painted on was quite thick, and basically glopped it on. The rocks are highlighted with 2 colors of gray.

Finally, the fun part. I mixed up a few different colors of flock, including Woodland Scenic's Green Grass, and some tans, browns, and an Earth mix. A 50/50 water/PVA solution is the usual suspect here:


The English Ivy, once dried, barely showed. I hope to go back with a lighter Leaf color just as an accent.
You can clearly see that there was indeed shrinkage with the clay, and it is evident on many of the ends of the hedgerows. This is probably the most frustrating part of the project for me. It is certainly something I can live with, but it is there nonetheless.

The other thing is that I made some of the berms very narrow. This worked artistically, but when it came time to add the clump foliage, didnt give me a lot of room to balance some of the pieces very well. Still, it turned out OK, I think. See for yourself:

As I ran the Hob-e-Tac along the berms and let it sit, I started sorting the clump foliage. When you pull the pieces out of the package (or the bins I keep them in, in my case), there are all sorts of dingledangles and gribbly bits hanging off them. I pulled a lot of this off and made three piles: bigger pieces (for where the berms were flatter or wider and could accommodate a larger  piece), small bits (for the narrower spots), and the leftovers (for filling in places, or covering left over glue bits).

Here are some 15mm scale shots, with models from Khurasan:
Here are some 6mm scale shots, with bits from my Eldar Epic collection:
Of course, some obligatory storage shots:

There you go. I cannot wait to get them onto the table!

ps another blog of a similar project:

Sunday, May 10, 2015

Super Leaf - or how to make Spring trees

I made some fun purchases at Scenic Express last week. One of them (some of them?) were Super Leaf packs in many Spring colors - pinks, purples, etc, so I can continue in my quest to add color to my boards. I already have Fall colors for my trees, but I decided that Spring has great color and I wanted to experiment.

A Japanese Flowing Cherry tree:

 Flowing Dogwoods:

Purple Leaf Plum Trees

One problem I found with my desire to add Spring trees to my table was the apparent lack of ways to do so. I usually either buy trees off Ebay, or use various methods combined with Clump Foliage to make them - but this didnt seem like an option for Cherry, Dogwood, or Plum trees.

I found this product: http://www.sceneryexpress.com/JAPANESE-CHERRY-LEAF-PETALS-16OZ-SHAKER/productinfo/653-6542/ and shortly after found this review by TerranScapes...but as you can see, it still doesnt really give a good example of how to make these trees (yet?). Skip to 2:16 for the review...or follow the link he adds in the upper right hand corner as the video starts.


I'm still at a bit of a loss on how to do this, even though I have this neat product - because it doesnt seem thick enough to make trees with in my usual way.

More research is needed. I'm wondering if anyone has experience with this product?

NOTE: I found a new item in Catalogue #17, called "Pull Apart Plant Cluster" (an example is here):

It looks to be an undercoating, if you will, in the vein of the Polyfiber product. I may look into this.

Thursday, May 7, 2015

Warmaster resources

Not sure if these are relevant still or not, but this seemed like a good place to mark some of the things I've found over the past month while surfing the internet.

The best place to get the game itself. Look for "Warmaster Living Rules" :)
http://www.darkagepress.com/WarmasterDownloads.html

The Specialist Games forums - this is a link to a lot of what I have below:
http://www.forum.specialist-arms.com/index.php?topic=403.0

THE most inspiring Blog I've found on Napoleonic building as mini-dioramas - and because of this, my wallet went KA-BLAM over at Total Battle Miniatures and Levin Miniatures!
https://sologeneral.wordpress.com/terrain-and-scenery/

Campaign rules and a repository of Warmaster rules supplements
http://www.darkagepress.com/WarmasterDownloads.html

This seems to be a fully functional army builder online, with links to some of the Warmaster PDFs.
http://wm-selector.appspot.com/

This guy has some neat entries on terrain and Warmaster units he has done.
http://warmasterdk.blogspot.com/?m=1

Another repository of Warmaster files, including counters for gaming
https://sites.google.com/site/wmplaytest/work-in-progress-1/publications

In case you don't have models and want some counters to play with:
http://ordinarygaming.blogspot.com/p/warmaster-counters.html

Some reviews of 6mm Buildings
http://declaresir.blogspot.com/2015/04/contemplating-ecw-terrain.html?m=1

A fantastic PDF on making small-scale forests - like, FORESTS, not individual trees clumped around each other :)
http://architectsofwar.com/Howto/forests.pdf

My foray into 10mm Warmaster - Wood Elves


[EDIT] This was originally a dual post about Wood Elves and Vampire Counts, but I separated the VC into their own post...

It's time. I've wanted to own some 10mm armies for some time now - mainly for Mayhem, but also for Warmaster since it is the more dominant game locally.

I decided to get Wood Elves because I'm an elfy-kind of guy, and for the bad guys, well, I love vampires, so Vampire Counts was an easy choice.

Of course, any time you enter into a new game system, the army list you write up to buy may not be what you end up playing with. This can be for a number of reasons, but I find it usually stems from lack of knowledge, unfamiliarity with what actually works, or just being attracted to the bling (or all of the above!). Since finding army lists was a challenge, I wrote up some lists of what I thought I'd need, and then sourced out the models.

Athens Fantasy was KEY to my feelings of success (I suppose "success" will only be determined once all my moving pieces arrive and are assembled into what will, ultimately, be my final product).

He also wrote a list for Wood Elves which I combined with This and this. The Wood Elves Warmaster army list is here.

One problem I found with selecting the different manufacturers was the lack of pictures on different websites. I turned to the web for help.

Ultimately I settled on these quantities. For ease of reference, I will link the model's entries on their respective website - I apologize for any broken links in advance.
WARMASTER - 10mm Wood Elves

2 units of Dryads
  • 6 bases, 18-30 models [3-5 per base, TBD]
4 units of Glade Guard
  • 12 bases, 120 models [10 per]
2 units of Wardancers
  • 6 bases, ~30 models with dogs [5-ish per, TBD]
3 units of Wild Riders
  • 9 bases, 27 models [3 per, because of model's size]
3 units of Treekin
  • 9 bases, 18-27 models [TBD, models undecided]
3 units of Warhawk Riders
  • 9 bases, 9 models [1 per]
2 units of Waywatchers
  • 2 bases, 10 models [5-ish per]
2 units of Treemen
  • 2 bases, 2 models [1 per]
2 units of Giant Eagles
  • 6 bases, 6 models [1 per]
1 Dragon
  • ?


HEROES:
2 Generals (1 mounted?), 2 Heroes, 2 Wizards (1 on a Unicorn?), 2 Branch Wizards (magical Dryads - models TBD)

My Order list [NOTE: I love variety, and have mixed and matched excessively, compulsively, and in some cases, maybe foolishly...]:

Miniature Resellers links:
Eureka Minis in Australia
[163.75 from the US store, and 124.03 from the Aussie store [qtys in US were limited] - $43AU for S/H!]
Eureka mini's USA branch
Copplestone Castings in the UK [$43.18 USD w/shipping]
  • Evil Characters [TM9] x2 - for Heroes, etc
  • Heroes on Horseback [TM16] x1 - for Wood Elf Heroes
  • Rangers [TM17] x1 - to sprinkle into Waywatchers, etc
Kallistra in the UK [$117 UK pounds w/shipping and "Buy 6-pay for 5" sale]
  • Historical Miniatures:
  • EEM The Impaled  [H-3019] x1 - for fun
  • 100YW Men-at-Arms [H-901] x3 [4 bases per] - for my Grave Guard based on this link (I'll paint skin/faces as white with black gaps and hope for the best)
  • 100YW Command [H-908] x1 - because Command :)
  • Fantasy Miniatures:
  • Skeleton Warriors [301] x5 [4 bases per] - for my main Skeleton horde
  • Zombie Horde [307] x3 [4 bases per] - my main Zombie horde
  • Undead Command [309] x1 [30+ figs] - Command/Heroes and fun
  • Tormented Spirits [308] x1 [4 bases, 16 figs] - for Ethereal Host, combined with Pendraken Wraiths
  • Skeleton Cavalry [302] x3 [4 bases per] - Black Knights
Pendraken in the UK
Pendraken's models through the War Store (US) [I placed this via email request to Neal, since some of the SKU's werent on their website] [$76.90 USD w/shipping]:
  • FE4 (Wood Elf Command) x1
    FE10 (Wood Elf Hero) x1
    AC24 (Mixed Ghouls) x6
    FU14 (Wraiths/Spirits) x2
    FU5 (Undead Command) x2
    FU26 (Undead Hero) x1
    FU13 (Undead Vampires) x1
    AC12 (Swarm of Bats) x6
    SYW12 (7 Years War Civilians) x1
    SYW10 (17/18th Century Carriage) x1
    AC2 (Helpless Maidens) x1
    AC4 (Zombies rising from the Grave) x1
    AC23 (Crucified Mummy) x1
Magister Militum in the UK [$37.38 USD w/shipping]
Khurasan Miniatures in the US [$24.65 USD w/ Shipping]
  • 15mm Fantasy items: 
  • Vampires [MYST-200] x1 [2 models] - for Heroes
  •  Zombie Wolves [MYST-202] x3 [6 models per] - for Dire Wolves
  • Jon Laney, Werewolf [MYST-203] x1 - for Hero or to lead DWs
Microworld Games - 6mm in the US [$23 total w/ shipping]
 > Because Kerynne.com offered some great ideas
Splintered Light 15mm minis in the US [$34 total w/ shipping]
DRYADS: I want the bases to look a little like this from Kerynne's site:

I also added 2 dragons from Ebay for silly prices...I got a High Elf on Dragon and a Chaos Dragon as well. I think this is looking pretty complete. Now that it's all headed in my direction, I get the tak of assembling, painting and basing, etc...I'll report back as I get more action done on the forces.

[EDIT 6/5/2015 - Rebel Minis just announced a "line" of 10mm figs for their Mighty Armies game, which currently consists of Wood Elves and Orcs. Well, damn! I'll be picking up an army for fun's sake!]

Friday, April 24, 2015

Building 6mm Bocage Hedgerows with popsicle sticks and clay, Part 1

I've been in a bit of a gaming slump lately - but decided to break out of my cage this weekend by creating some 6mm bocage or hedgerows (I don't play WWII or historical games - this is just to decorate roads to make them more interesting).

The most useful blog I found for how-to-do-it inspiration was this:

http://dereksweetoys.com/2013/02/making-bocage-hedges-for-6mm/comment-page-1/

I also found a tutorial on how to use air-dry clay for the hedgerows, so I went to Michaels and got some. But first...

I decided I wanted to get it "right" if I was going to build some, so I did some research and stumbled upon this excellent PDF:
http://www.cmhweb.org/Files/Terrain/Building_Bocage_Hedgerow_in_25mm.pdf

Ideally, I wanted these to line roads or fields, and so strips made sense. I had a collection of popcicle sticks on hand; a quick application of a grinding stone on the edges gave me this:

I found some bamboo skewers at the local Safeway grocery store for $3.00:

These I trimmed to different lengths. I wanted to use them as anchors for the clay, as seen in one of the links above. You can see the popcicle stick in the upper right for scale. I was making 20 of these lengths:

Then I got out my hot glue gun and put the skewers onto the popsicle sticks. Some I double-layered; the gaps would serve as places to put trees, or just shallower areas:

Here are the 20 stands I prepared, as well as 10 quick "manicured" taller hedges made with skinny pot scrubbers from the dollar store:

The next morning, I gathered my materials and prepared to break out the air-dry clay. I have to admit, I hate doing things that I don't know how to, so I was nervous about using the clay.


http://www.wikihow.com/Use-Air-Drying-Clay


Yea, I looked it up. Yes, I felt like an idiot after reading how simple it was...

This is the clay I bought at Michaels. It was $10 USD for 2.2 lbs (1 kg). I chose it because it was black (which a) was available, and b) would allow me to be more careless with the primer in case I missed some spots...unlikely), and because of the "low shrinkage" claim. Sorry for the blur:
I went to work. It was mid-morning on a Saturday - the kids were upstairs playing Minecraft, the wife was still asleep, and the dogs were curled happily at my feet. I spent about an hour happily slapping clay onto the bases I had created.

By the way: the black clay stained my fingers quickly, but I am happy to report that when I was done, a quick soap-and-water scrub in the sink removed all evidence.
I sprinkled some coarse beach sand on the berms as I finished each. This was because I wanted some texture when I slapped the primer on; we'll find out if this was silly or not soon enough. I also added some small-scale trees I got off Ebay years ago from China.


This is the actual process I used as I put the clay on. I clamped it on over the skewer, allowing it to "grab" onto something.I also pushed some larger rocks in on some sections - these I also got at Michaels.

The process was messy, fun, and really quite simple. Once I had finished my 20 stands, I had only used, what, 20-25% of the clay pack? Needless to say, for this project, 1kg was much overkill, but I have many more ideas of things I can use it for. I put the clay in a ziplock bag and put it inside of  a tupperware-style container.


Here is the finished pre-painting result. I'm pretty excited to get these finished up.

Wednesday, November 12, 2014

D&D Attack Wing


I decided, on a whim, to pick up the new D&D Attack Wing (http://wizkidsgames.com/dnd/) when it came out last month.

I just discovered a fan site for this game: http://dndaw.com/ which is good because there isn't a lot out there for it as of now.


I wrote this initially on TMP, but this is an attempt to expand on my initial thoughts:
http://theminiaturespage.com/boards/msg.mv?id=364403

"I've collected and played the X-Wing game for almost a year now, and I think it's a fun, light game that offers a great evening of entertainment with my friends.

All things considered, however, I am a Fantasy guy at heart, and so buying the D&D Attack Wing was SUCH an impulse buy when I saw it at the FLGS yesterday. I have heard a lot of people knock the Star Trek Attack Wing, commenting on model quality and game balance – but…DRAGONS. I bought the starter set.

The model quality is ace. I like that the cards are all "normal" sized except the damage cards, which are half-sized like XWing. The spells and upgrades look fun, the addition of additional flight levels (flying, grounded, and the in-between "swooping") is neat. There are many different Area of Affect types (cones, lines, bursts), as well as Melee and Ranged attacks.

Another neat thing is the concept of Duration Tokens, which allow you to use a special ability, and then have a mechanism to track when it is available for use again. Armor is like Shields in X-Wing, but better (they stick around unless "broken" somehow); the Range Ruler has 4 range bands instead of 3, and there are movement sticks out to 6 Straight. Yes, Barrel Rolls are included :)"

My birthday has come and gone (I am now the answer to Life, the Universe, and Everything"...) and I managed to get the entire Wave 1 for this game. The model quality is decent - the larger models are impressive, while the Troops are on the slightly underwhelming end of the scale - but they're good enough to use out of the box.


My initial attempts to get this game on the table were foiled, as my friends wanted to still play X-Wing. I acquiesced, BUT the red dragon still managed to make a cameo appearance!

Finally, however, good things come to those who wait. We randomly picked a scenario and got the Hobgoblins escorting an armored wagon through brigand country. It played very well, with my only complaint being that flying units and ground units can pass through each other easily, but still the game will not allow bases to overlap. The red dragon at the end positioned himself quite cleverly behind my wagon, preventing my own troops from getting close enough to push it (and thus win the game) - my opponent was very savvy in his move, but I should have been able to still get close enough. Maybe they were cowed by his close proximity overhead?

Regardless, ground units were fun and a neat addition to an already good game system.

Armor is neat. It makes scary units (like red dragons) continue to be scary units...though, in this picture, my green dragon took a fistful of fire from the ballista and got wiped out in one hit...

After the first game, we chose another random scenario, this time pulling the invasion of the master wraith's lair. The clutter you see at the center of the board is "terrain", obstacles that were dropped from 2 feet above the playing surface, per the scenario rules, to give some rubble to the battlefield. More on this later...but wraiths ignoring terrain was very cool (for me, the wraiths!).

Initially I discovered that ground units can be at such a disadvantage versus fliers...as the red dragon raced past my wraith and I couldn't swing...until I realized that my wraiths COULD fly (gee, maybe the flight stand they come with could have been a clue) because it is listed on their turn dials. After that, the game went differently. In this case, I got his wizard down to 1 hit point, and he got my master wraith also down to 1 hp...and we ended the game because it was getting late. We both enjoyed the game, and we're planning on not using the campaign artifacts until they are "unlocked" via the campaign system. I look forward to more games.

So...ground units do appear, at first use, to be underwhelming.  http://boardgamegeek.com/thread/1265560/troops-seem-weak has a good thread on this, the key takeaways I got being:
* The Elves have the Reassemble upgrade, which would allow them to reform out of the area of effect after the dragon moved into firing range, and the Hobgoblins have Scatter, which is also very effective against these types of attacks too.
*Mage Armor on the Harper Elves

Being stuck without a way to engage a flying unit is a scary prospect, but anything with Ranged can be on the defensive, while ground units can help accomplish scenario objectives or deal with other ground units. It's a real concern, but this merely mimics real life - this is why we invented flying things, after all!

One quote from Andrew Parks, apparently one of the WizKids employees who frequents BBG: "One advantage of the Fly Spell is that it makes it harder for a dragon to blow past you and then slap you with its tail. When you're on the ground, a dragon who lands on top of you can just keep going, but not so when you're in the air. This becomes especially important when the higher level dragons are released, especially those who charge."

The REAL issue, however, seems to be terrain. As any miniature gamer knows, terrain can make or break a game, but D&DAW seems to have really glossed over it.

 http://boardgamegeek.com/thread/1264137/terrain is a fan's attempt at correcting this, and I'm going to copy it here for completion's sake, with my own unique modifications [in short, this is the rules I plan on trying]. I don't really like removing terrain from play, so I've cleaned some of this up:

Woods:
+1 Def Die if using Ranged Attacks in or through it (if attacking out, defenders get one, and if receiving a ranged attack, can benefit from cover)
If a Unit has more than 1 Range band of woods between it and another they can not see each other.

Area Effect Attacks against Units in the Wood will grant the +1 Def dice.

Small Based Ground Units can enter woods with no Issue.
Anything larger must take an Exhaustion Token if it enters via ground movement. [something about this doesn't sit well with me...]
If the Unit already has an Exhaustion Token it Stops at the edge of the Woods and can not enter.

Flyers may not Swoop in Woods.
Flyers may not Land in Woods unless their base is Small. 
*(something about rolling damage dice, and getting an exhaustion token or damage on a hit, or maybe crit only, seems more appropriate for harsh terrain like this..and big units? I'd think a giant would be much less hindered than a human. Maybe light woods vs heavy woods?)
 
Hills
Defender on a Hill gets +1 Def Die from Swoops.
+1 Def die if the ranged attack goes through a hill to get to Defender on other side.
+1 Def die if Defender is on the hill and Attacker did not start on it [higher ground].
+1 Attack die if Defender began and ended its turn below the attacking unit.
Ground only.

Walls, Trenches, and other Fortified Defenses
With Dragons and other Flyers I can see a lip for troops to duck into when the flyer came by being common in both.

+1 Def Die plus one Auto Dodge.
Only the +1 Def Die against Area attacks

Walls have 0 Agility, 2-4 Armor based on type, 4-6 Health based on type.
When destroyed 2 inches to either side will become Rubble, Ground units moving through take a Exhaustion Token.

Earth: 1 Armor 6 Health
Wooden: 2 Armor 4 Health
Stone: 3 Armor 5 Health
Magically Re-Enforced Stone Wall with Wards: 4 Armor 6 Health

Units on that Section of Wall when it falls, lose all Action Tokens, take 3 Attack Dice Damage.

If a model's base overlaps a solid structure (one that there would be no way he could go through, like a wall or building), back the unit up until it is no longer overlapping, then roll 1 attack die and suffer damage as normal.

Rough Ground (Rubble, destroyed buildings, broken rocks, other hard to move through stuff.)
If you have an Exhaustion Token when entering an area that gives one, or if the maneuver you are performing would give you one, you must stop at the edge of the area.

When a Ground Unit enters this type of Terrain it gets an Exhaustion Token.

Swamp:
Ground unit stops when it touches it and gets exhaustion token. Get exhaustion token if moving through it

Pond/Lake:Ground units can't move through

Mountains
Like Rubble they should be hard to Enter. Receive Exhaustion Token when entering.
Like Hills, Swooping and Ground attacks should be effected.
Defender on a Hill gets +1 Def Die from Swoops.
+1 Def die if Defender is on the hill and Attacker did not start on it.
(Ground only).
Mountains stop LOS, so if the Mountain is between you and your target you can not target it.
An angle may exist for you to place a Burst marker and then the Attack hit.

I may come up with more...but this is good for now.

Again, let me pitch Heroic Maps at http://rpg.drivethrustuff.com/browse.php?manufacturers_id=5371
I also found these neat terrain items: http://cigarboxbattlestore.bigcartel.com/product/supplemental-terrain-3x3-130

 Storage
 Anyone who has read any of my blog at all knows that storage is always a key concern for me. After doing some browsing, I came up with this Dewalt storage box:
http://www.homedepot.com/p/DEWALT-12-Compartment-Deep-Pro-Organizer-DWST14825/203367153?keyword=DWST14825
This is primarily because they stack:
I have filled about half of the capacity of one tray with Wave 1. I'll get more as needed.

So this is it for now. I enjoyed this game, and am looking forward to playing much more, and yes, I plan on buying the future waves. Thanks for now!