Sometimes you've got the perfect color scheme for a model. Other times, you work your way through the paint bottles on your table until you've used them all...but SOMETIMES you have the primary color (or an idea for something), but aren't sure what accent to use.
Well, check this out:
http://www.thonky.com/random-hex-color/
Visit it, and it'll give you a color. Match it the best you can, and bam, Bob's your uncle!
About Me
- Kealios Achilles-Fang
- My name is Gavin McClements. I am a wargamer and family man, living in Los Gatos, which is a suburb of San Jose, CA. Building terrain is one of my favorite aspects of the wargaming hobby - in fact, lately I've become more interested in making my battlefields "pop" than in actually playing.
Showing posts with label Painting. Show all posts
Showing posts with label Painting. Show all posts
Tuesday, November 24, 2015
Saturday, January 14, 2012
15mm Khurasan forces are COMPLETE!
How long ago did I begin this project? Too long ago, for sure.
BUT...after some mishaps with experimentation, let me present to you:

First, let me tell you about my experience with the Secret Weapon weathering pigments. I must say, after watching Robin of Gruntz make it look so easy on his videos, I bought a few and eagerly awaited the chance to use them. This meant that I purposefully left out my customary drybrushing, and after the paint and wash had dried, I coated them and moved on to the pigments.
Problem: Details matter. Did you know? Like, GLOSS COAT is not MATTE VARNISH. Using Gloss, like I normally do for protection, does NOT give the pigments any traction! I was quite dismayed as I began dusting on the pigments and see no noticeable effects, except for where they gathered simply by resting on a flat surface. After a quick reconsulting of the Secret Weapon tutorials and a post to their Facebook page, I realized my idiocy...and rushed out and purchased Krylon Matte Finish varnish from my local Ace Hardware. It was a whopping $5...and not too late.
The snippet from our FB discussion:
Me: SO, the steps should have been: 1. Paint 2. Matte coat 3. Weathering pigments 4. Matte coat?
SW: Yes, you've got it now. Although I'll add that it also depends on what else you're doing. For instance it might be:
Paint
Gloss
Decals
Gloss
Washes
Matte
Oils
Matte
Pigments
So...after I coated the minis in the Matte Varnish, I COULD have gone back again and reapplied the pigments, and then recoated in Matte to finish them off again, but I was just DONE with them. They are good enough for tabletop gaming, and while I will be annoyed at myself till the end of time for doing this incorrectly, I'll know for the future.
Without further ado:
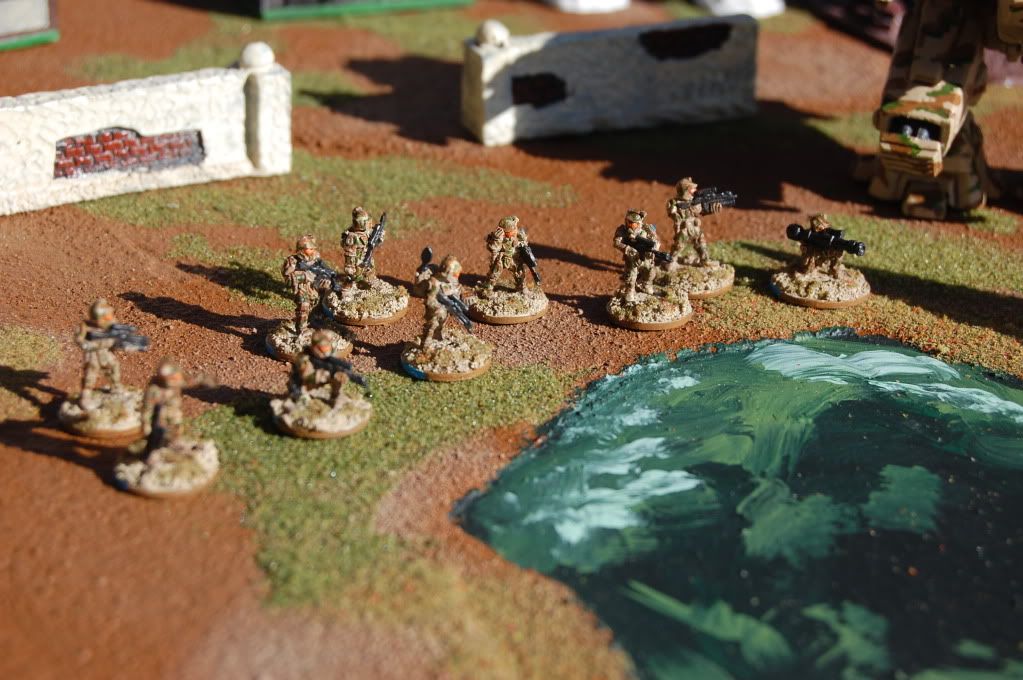
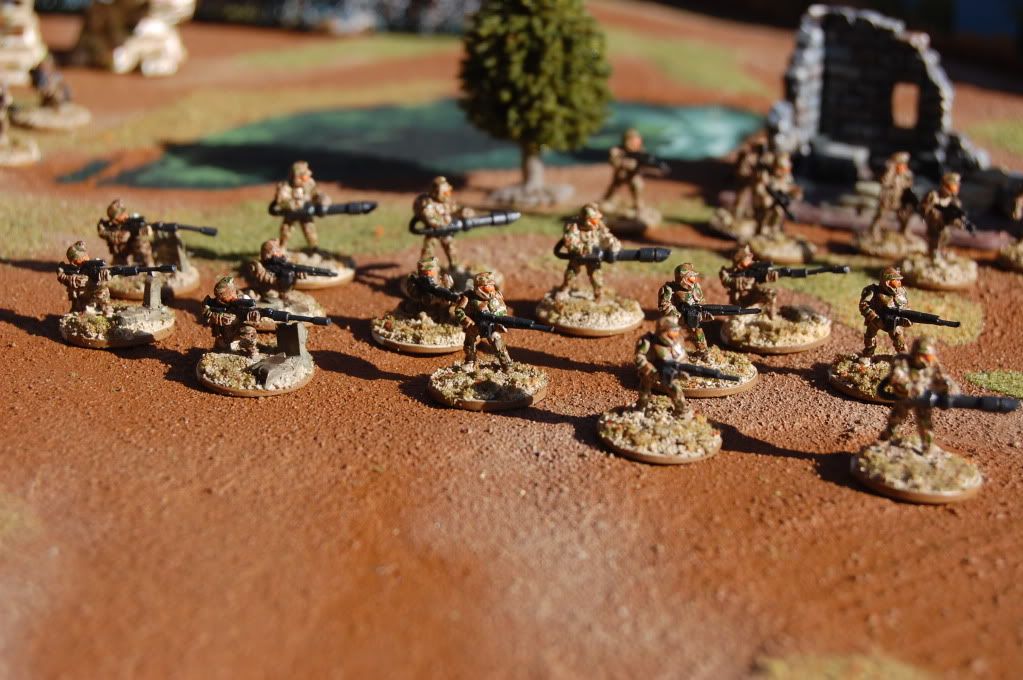
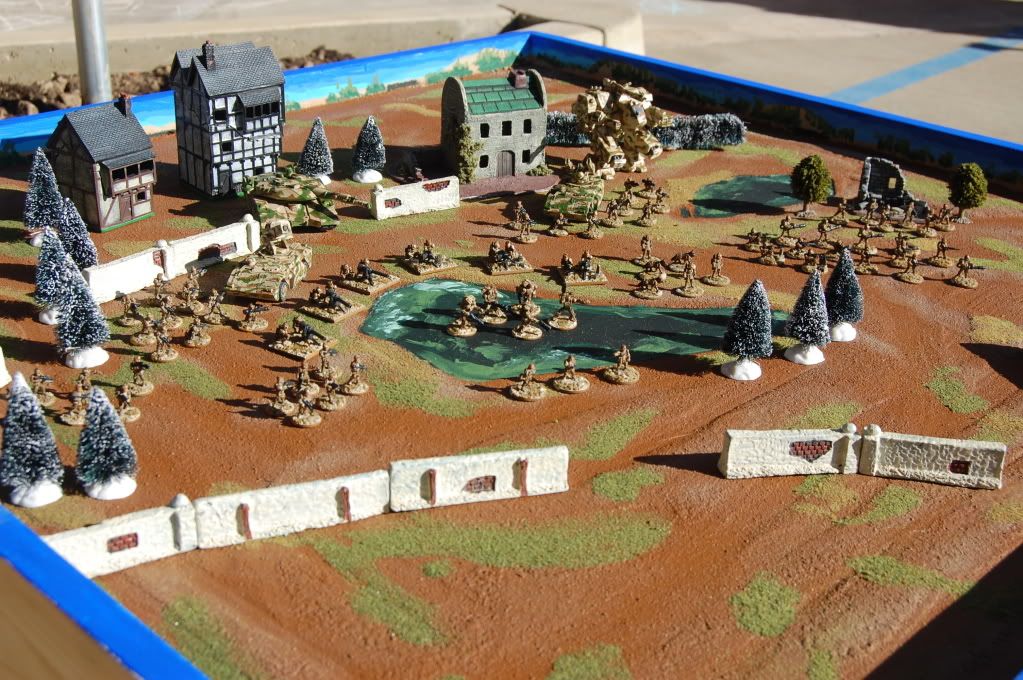
Blue Squad deploys in front of the town, enjoying the warm early morning sun:
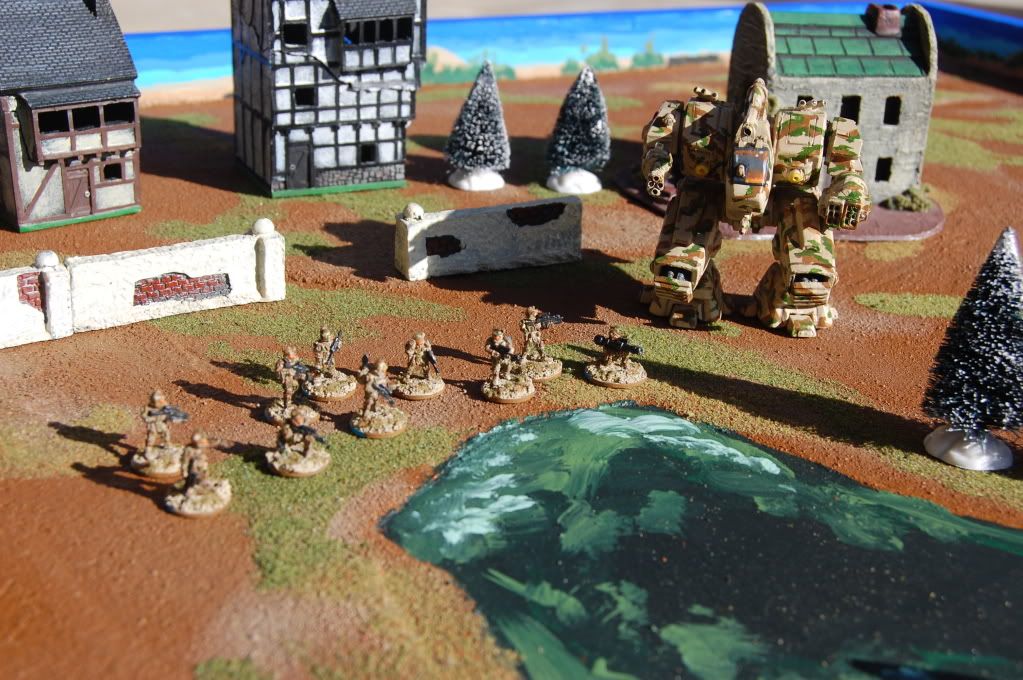
Blue Squad revels in their Walker escort:
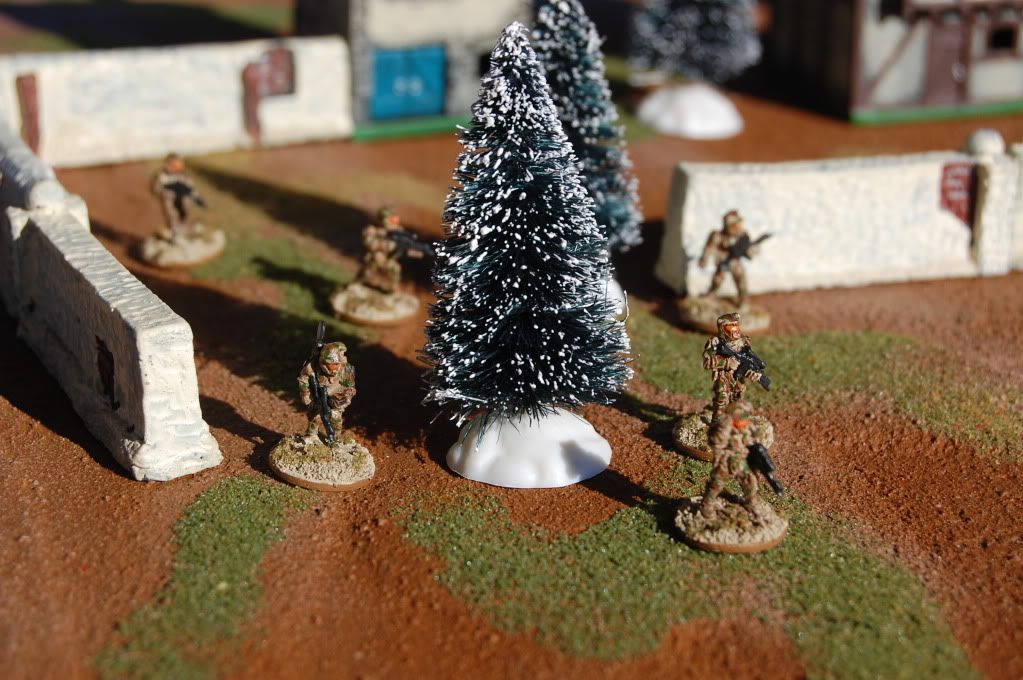
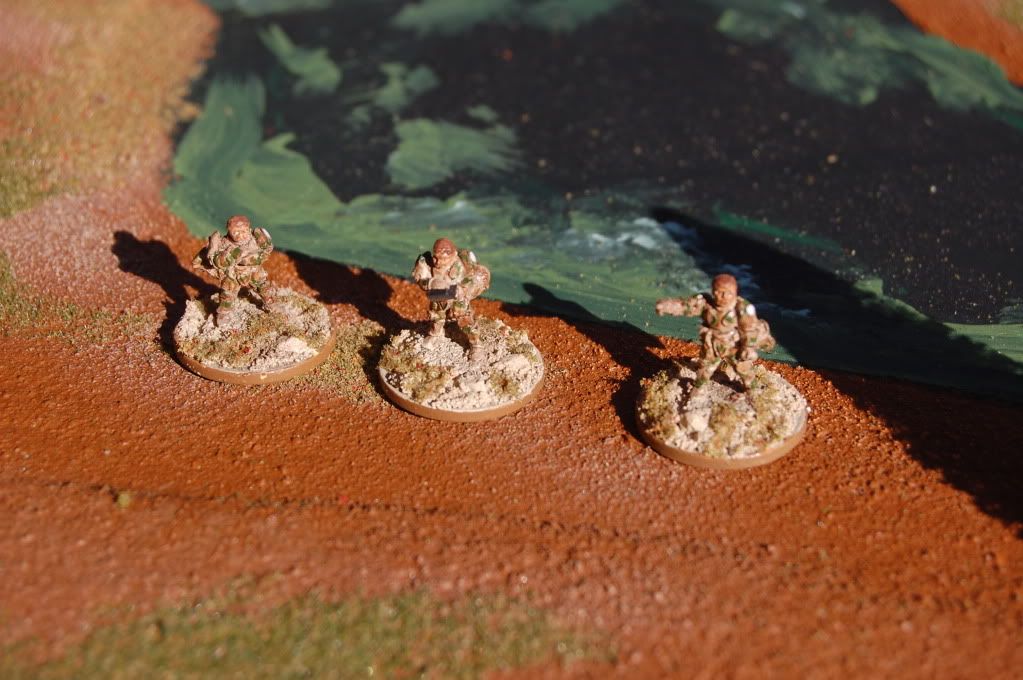
Green Squad checks the end of an alley for insurgents:
The Squad of Power Armor spots suspicious activity at the outskirts of town, and investigate...taking the short route:

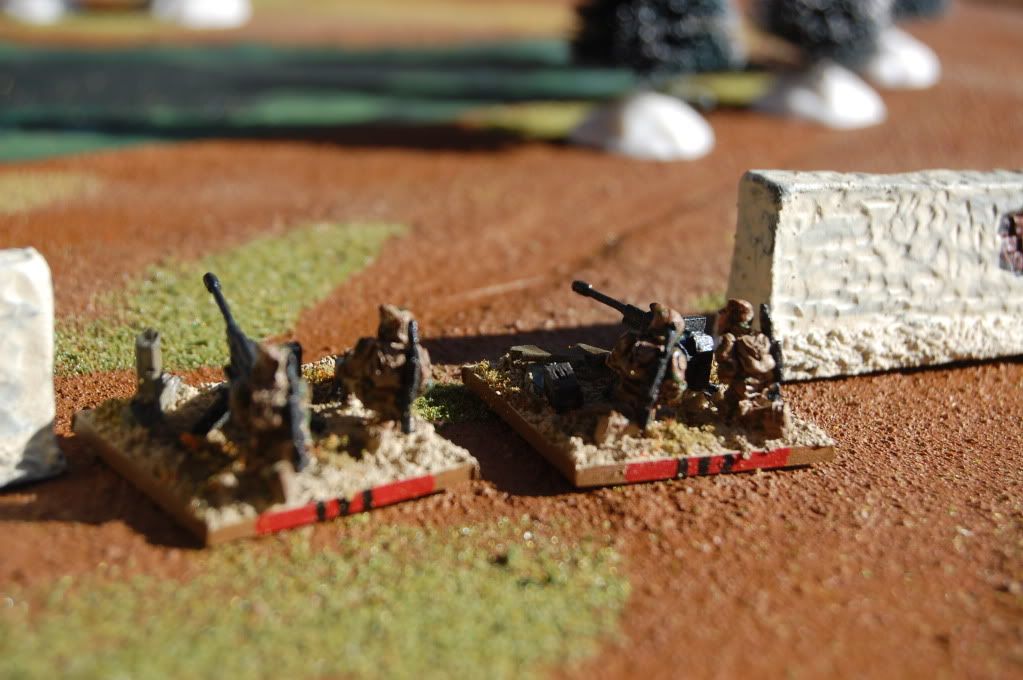
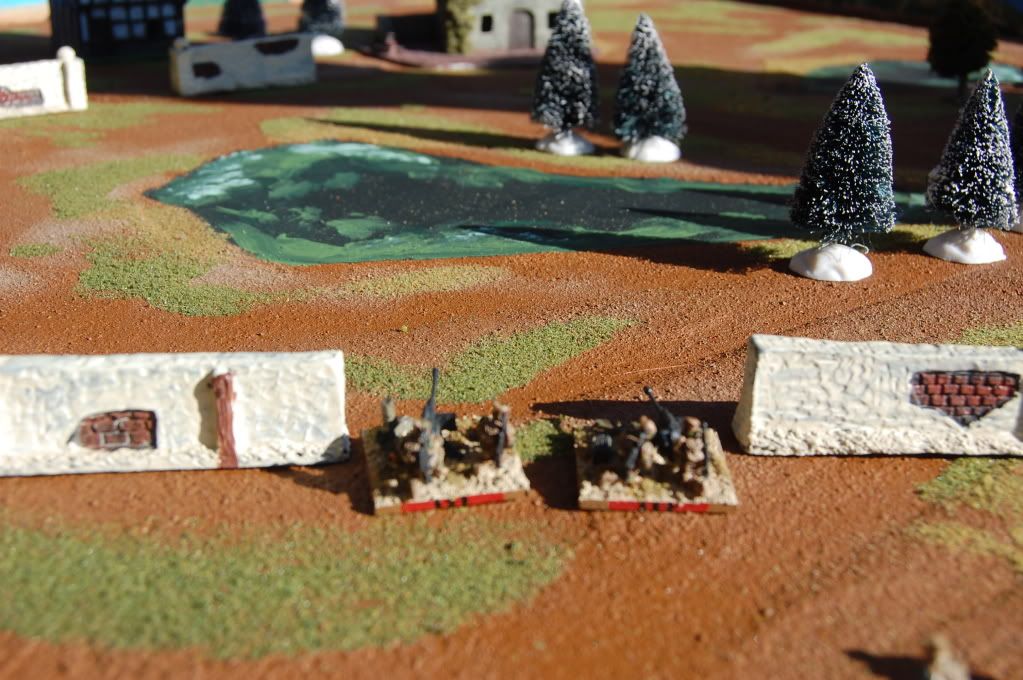
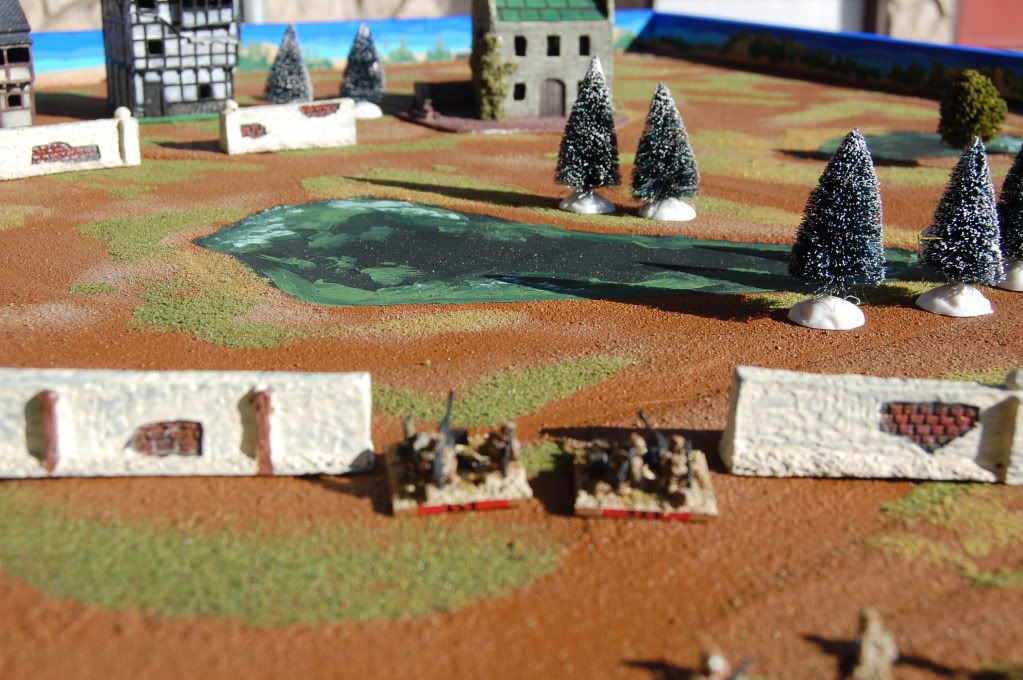
Two Heavy Machine Gun crews cover the town from across the way:
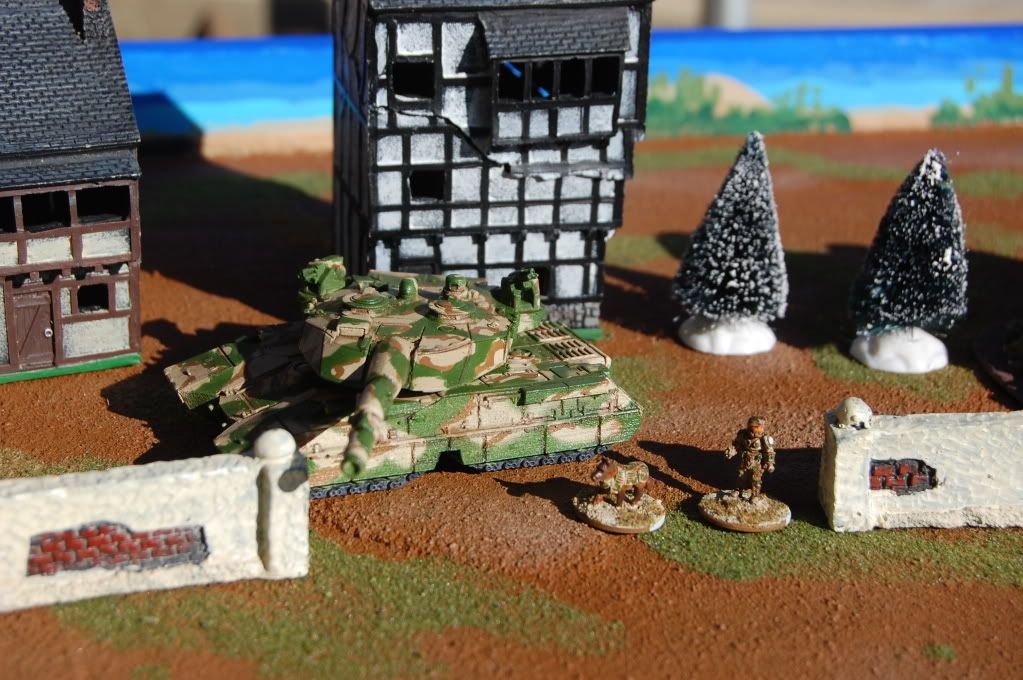
The Main Battle Tank cruises along slowly, escorted by its canine team and handler:
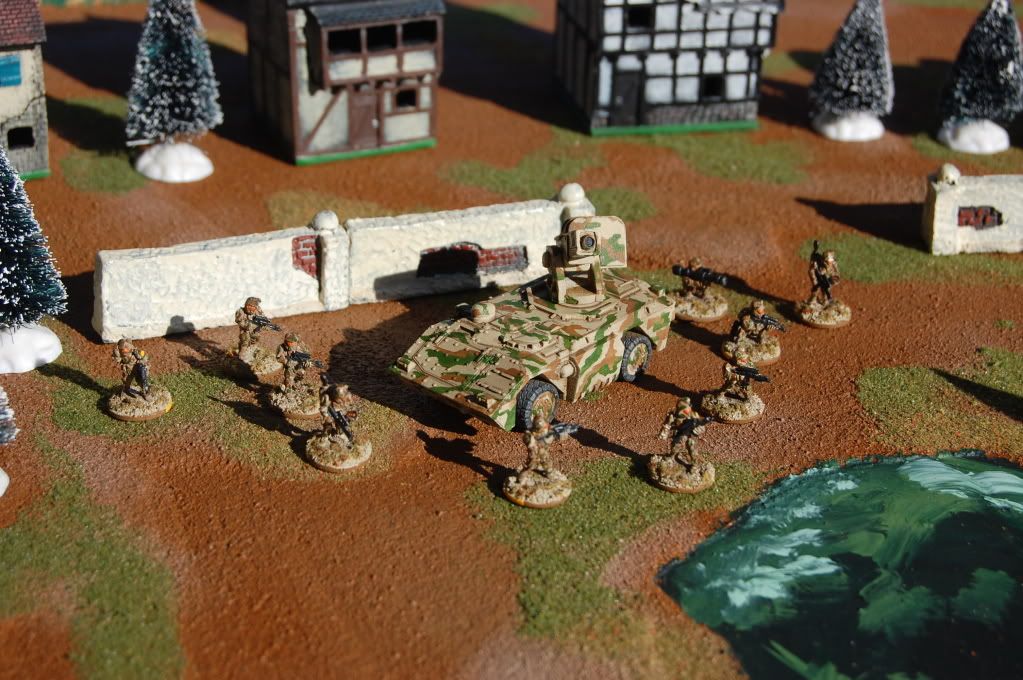
Yellow Squad jumps out of their APC, eager for action:
A mass of Company Support Assets, ready for assignment, cluster in the staging area:
Company Commanders huddle in conference, comparing notes and weighing options (note the US Nickel base, setting them apart):
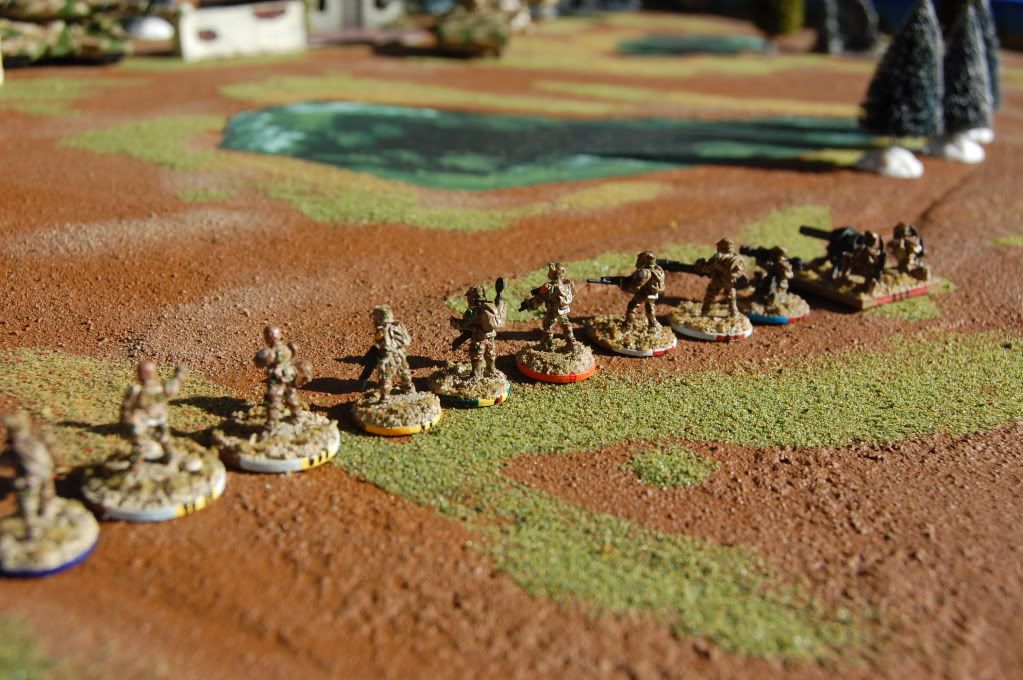
Representatives of the different squads gather for discussion (L to R: Purple squad, Senior Company leader, Company leader, Yellow Squad leader, Green Squad junior leader/Medic, Orange Squad medic, Company asset (unassigned) Light Support, Company asset Medium Support, Blue Squad Medium Support, Company asset HMG Heavy Support team):
Details of the Support Weapon markings:

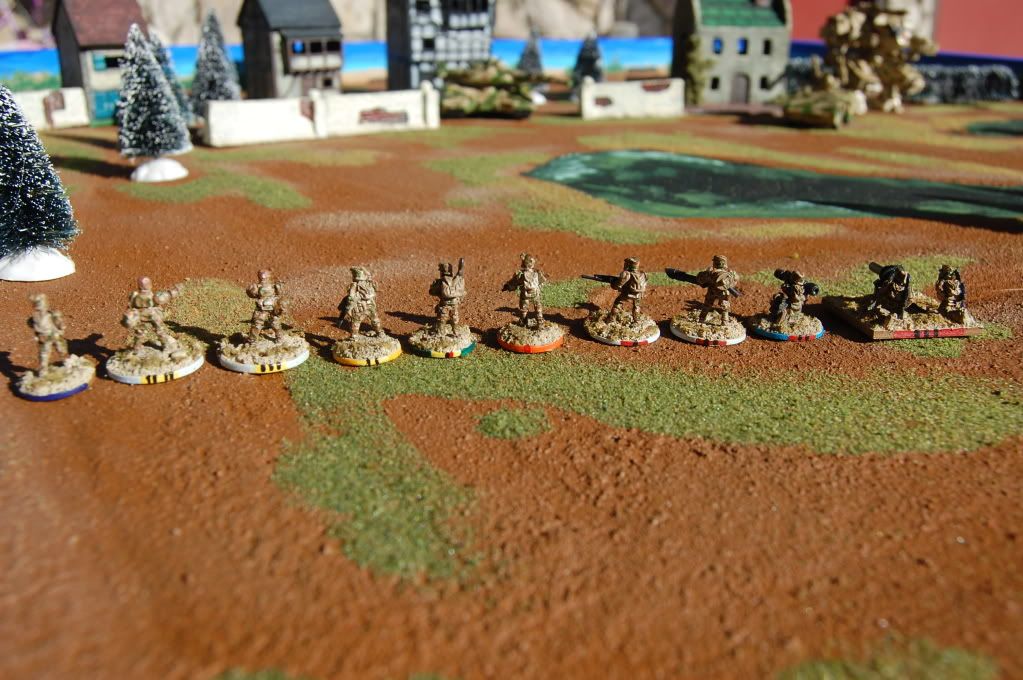
Leadership markings (note, the Junior Squad Leader on the left is also a Medic, and only the Squad level leaders have squad colorings. The others are "Unassigned" grey, meaning they can fit where ever they need to be):

Lastly, just a quick shot of two "guys". Purple squad is a regular trooper, and the Orange Squad is a Medic (see his right shoulder):

The overall group shot again, as they patrol the quiet border town in the early winter sun:
Our playtest of Tomorrow's War is on this coming Tuesday. I cannot wait!
And now, for a quick gratuitous mention of Battlefield 3:
I play a TON of Call of Duty on my Playstation, but recently got REALLY into flying helicopters on BF3. I want to show you my favorite video on Youtube, AND the free download of that AMAZING song by Emancipator that I cant get enough of:
And to get Maps for free:
http://emancipator.bandcamp.com/album/free-downloads
Have fun, and thanks for reading!
BUT...after some mishaps with experimentation, let me present to you:
First, let me tell you about my experience with the Secret Weapon weathering pigments. I must say, after watching Robin of Gruntz make it look so easy on his videos, I bought a few and eagerly awaited the chance to use them. This meant that I purposefully left out my customary drybrushing, and after the paint and wash had dried, I coated them and moved on to the pigments.
Problem: Details matter. Did you know? Like, GLOSS COAT is not MATTE VARNISH. Using Gloss, like I normally do for protection, does NOT give the pigments any traction! I was quite dismayed as I began dusting on the pigments and see no noticeable effects, except for where they gathered simply by resting on a flat surface. After a quick reconsulting of the Secret Weapon tutorials and a post to their Facebook page, I realized my idiocy...and rushed out and purchased Krylon Matte Finish varnish from my local Ace Hardware. It was a whopping $5...and not too late.
The snippet from our FB discussion:
Me: SO, the steps should have been: 1. Paint 2. Matte coat 3. Weathering pigments 4. Matte coat?
SW: Yes, you've got it now. Although I'll add that it also depends on what else you're doing. For instance it might be:
Paint
Gloss
Decals
Gloss
Washes
Matte
Oils
Matte
Pigments
So...after I coated the minis in the Matte Varnish, I COULD have gone back again and reapplied the pigments, and then recoated in Matte to finish them off again, but I was just DONE with them. They are good enough for tabletop gaming, and while I will be annoyed at myself till the end of time for doing this incorrectly, I'll know for the future.
Without further ado:
Blue Squad deploys in front of the town, enjoying the warm early morning sun:
Blue Squad revels in their Walker escort:
Green Squad checks the end of an alley for insurgents:
The Squad of Power Armor spots suspicious activity at the outskirts of town, and investigate...taking the short route:
Two Heavy Machine Gun crews cover the town from across the way:
The Main Battle Tank cruises along slowly, escorted by its canine team and handler:
Yellow Squad jumps out of their APC, eager for action:
A mass of Company Support Assets, ready for assignment, cluster in the staging area:
Company Commanders huddle in conference, comparing notes and weighing options (note the US Nickel base, setting them apart):
Representatives of the different squads gather for discussion (L to R: Purple squad, Senior Company leader, Company leader, Yellow Squad leader, Green Squad junior leader/Medic, Orange Squad medic, Company asset (unassigned) Light Support, Company asset Medium Support, Blue Squad Medium Support, Company asset HMG Heavy Support team):
Details of the Support Weapon markings:
Leadership markings (note, the Junior Squad Leader on the left is also a Medic, and only the Squad level leaders have squad colorings. The others are "Unassigned" grey, meaning they can fit where ever they need to be):
Lastly, just a quick shot of two "guys". Purple squad is a regular trooper, and the Orange Squad is a Medic (see his right shoulder):
The overall group shot again, as they patrol the quiet border town in the early winter sun:
Our playtest of Tomorrow's War is on this coming Tuesday. I cannot wait!
And now, for a quick gratuitous mention of Battlefield 3:
I play a TON of Call of Duty on my Playstation, but recently got REALLY into flying helicopters on BF3. I want to show you my favorite video on Youtube, AND the free download of that AMAZING song by Emancipator that I cant get enough of:
And to get Maps for free:
http://emancipator.bandcamp.com/album/free-downloads
Have fun, and thanks for reading!
Thursday, October 27, 2011
Mammoth is camo'd up, lined, and has a new, shiny cockpit
I got the lining done on the Mammoth this evening. Being a larger model, I felt that this sucker could lure me in with its wiles and trap me all night, so I went for a more minimalist approach than on the APCs by Khurasan. Still, it took me a bit and I was pleased with its results.

.That cockpit scared the tar out of me. I have never actually done one, but I always try to do my research and so came up with this. Of course, it made me realize that the sensor sticking out of the cockpit needs to be lined (tomorrow!) and I realize that the searchlights on the torsos just dont look quite right, but hey, Im like 99% happy. I need to splash some red on the missiles in the launcher on the left arm, add my battle damage to the vehicles as a lot, seal it, then add the weathering pigments from Secret Weapon, seal it again, and then maybe base it. 60mm base, anyone?
.That cockpit scared the tar out of me. I have never actually done one, but I always try to do my research and so came up with this. Of course, it made me realize that the sensor sticking out of the cockpit needs to be lined (tomorrow!) and I realize that the searchlights on the torsos just dont look quite right, but hey, Im like 99% happy. I need to splash some red on the missiles in the launcher on the left arm, add my battle damage to the vehicles as a lot, seal it, then add the weathering pigments from Secret Weapon, seal it again, and then maybe base it. 60mm base, anyone?
Pigment tutorial
While doing some quick video research on weathering pigments, I stumbled across this video on Youtube. I'd say its "quick", but maybe I should say FAST :) Anyway, worth a look because it shows "how to" in the way I like to see...just get it done, already!
Weather Model Train Cars: Oil wash, clear cote, rust pigments
Of course I'd be remiss if I didnt link Robin's also:
Washes and Pigments
Lastly, I found another video that has been helpful:
Hammer40k's Weathering Pigments
I'll admit I am a little confused on how to "finish" these models. Robin's pigments were brushed over a sealer, which is a step I dont plan on doing until the end when its done. Hammer's is finished with rubbing alcohol (wtf?), so Im still looking into this...
[AHA! Being the smart cave troll that I am, I went to the source: www.secretweaponminiatures.com and yea, they have a Tutorial section at the top. Including how to use their pigments. Check out their "super secret" unlisted Youtube video to see more...and yea, they use rubbing alcohol too. Guess what I'll be using?]
Outlining on the 15mm vehicles
After getting the camo mostly done, I wanted to do some outlining with Devlan Mud like I saw on one of Robin's videos on his Gruntz feed on Youtube. It went on nicely, I think, and gives a reasonably subtle hint of 3D when used only along creases and corners. Here are some quick shots of it.


Here you can see elements of the tank, such as the headlights, that I tried to throw in for detail. The are highlighted with 2 colors, but its really hard to tell from this angle and at this scale:

An overhead shot:

So at this point, Ive finished with the camo, the tired and treads, the head and tail lights, and the outlining. Well, the Mammoth hasnt been outlined yet, but I can only take so much cramping to my neck, back and hands in one sitting :) After I get the Mammoth highlighted, I will try some weathering pigments from Secret Weapon instead of my normal drybrushing. This is, after all, my project of experiments (new scale, new painting, new outlining, new weathering techniques...cool!)!
Here you can see elements of the tank, such as the headlights, that I tried to throw in for detail. The are highlighted with 2 colors, but its really hard to tell from this angle and at this scale:
An overhead shot:
So at this point, Ive finished with the camo, the tired and treads, the head and tail lights, and the outlining. Well, the Mammoth hasnt been outlined yet, but I can only take so much cramping to my neck, back and hands in one sitting :) After I get the Mammoth highlighted, I will try some weathering pigments from Secret Weapon instead of my normal drybrushing. This is, after all, my project of experiments (new scale, new painting, new outlining, new weathering techniques...cool!)!
Saturday, October 22, 2011
Balls to the wall...
Enough talk, I thought, and swiftly proceeded to set up the airbrush and grow a pair. You cant learn if you dont try, right?
First I used Blue-Tac (poster-tac, same thing) to wrap a few of my vehicles. It was kind of fun but definitely tedious and tricky. I found it an interesting exercise in thinking in reverse, in that the spaces I wanted to be tan, I had to cover, and the places that were to be green needed to be exposed. But of course, looking at it, I saw white (to be tan) and tan (to be green). Interesting to say the least:

Then I discovered that the airbrush I had came with no instructions. Awww man! Well, I powered through it, and was about to give it the college try:

I didnt mix enough paint and had it sputter on me very quickly. Turns out I used half of the bottle. Yikes. Anyway, I had some scary moments figuring out air pressure, etc, and had some sputtering and spitting while I did my test sprays, but in the end, well...I got the models covered :)

At this point I was a wreck. I couldnt tell if I had done a decent job, or if I had completely blown it. I was as nervous as a soon-to-be dad waiting outside of the delivery room! But eventually I came in after the paint was dry and slowly peeled it away...
...I felt like the Joker unwrapping his bandages for the first time...

Well HEY, not half bad, eh?
Still, there was WAY too much green for my taste (I used Vallejo's Model Color Medium Olive), and so I set about hand painting the other two vehicles to compare and contrast. Here are two APCs side by side. The darker green on the right is the airbrushed version, and the one in the foreground has been brushed:


Take a wild guess which I like better?


The APC weapon mounts havent been done as of this pic, obviously, and the washes, pigments, details, etc are still to be done, but overall I am really happy with this. The darker green versions arent my favorite, but will allow me to skirmish against myself (or a friend, lol) with 2 different forces using the same models, so that is cool.
The plus side of the airbrush was that my back didnt start killing me right away. I hunch when I paint, and as I type this I am squirming like a mother :( However, the brush was just too reliable and easy (more time, but big deal). Painting the resin was interesting, as it was porous enough that the paint sank right into it, but it made for easy blending.
Anyone want to buy an airbrush? :)
First I used Blue-Tac (poster-tac, same thing) to wrap a few of my vehicles. It was kind of fun but definitely tedious and tricky. I found it an interesting exercise in thinking in reverse, in that the spaces I wanted to be tan, I had to cover, and the places that were to be green needed to be exposed. But of course, looking at it, I saw white (to be tan) and tan (to be green). Interesting to say the least:
Then I discovered that the airbrush I had came with no instructions. Awww man! Well, I powered through it, and was about to give it the college try:
I didnt mix enough paint and had it sputter on me very quickly. Turns out I used half of the bottle. Yikes. Anyway, I had some scary moments figuring out air pressure, etc, and had some sputtering and spitting while I did my test sprays, but in the end, well...I got the models covered :)
At this point I was a wreck. I couldnt tell if I had done a decent job, or if I had completely blown it. I was as nervous as a soon-to-be dad waiting outside of the delivery room! But eventually I came in after the paint was dry and slowly peeled it away...
...I felt like the Joker unwrapping his bandages for the first time...
Well HEY, not half bad, eh?
Still, there was WAY too much green for my taste (I used Vallejo's Model Color Medium Olive), and so I set about hand painting the other two vehicles to compare and contrast. Here are two APCs side by side. The darker green on the right is the airbrushed version, and the one in the foreground has been brushed:
Take a wild guess which I like better?
The APC weapon mounts havent been done as of this pic, obviously, and the washes, pigments, details, etc are still to be done, but overall I am really happy with this. The darker green versions arent my favorite, but will allow me to skirmish against myself (or a friend, lol) with 2 different forces using the same models, so that is cool.
The plus side of the airbrush was that my back didnt start killing me right away. I hunch when I paint, and as I type this I am squirming like a mother :( However, the brush was just too reliable and easy (more time, but big deal). Painting the resin was interesting, as it was porous enough that the paint sank right into it, but it made for easy blending.
Anyone want to buy an airbrush? :)
15mm first layers of desert camo applied
I'm one of those guys who doesnt like doing things that he doesnt know how to do. In this case, Im stuck on using my airbrush. See, my wife bought me a cheapie years and years ago upon my request...and I've been too chicken to use it ever since. However, after watching Robin's video on airbrushing I decided to brave it.
LOL...so I havent done it YET! However, I have taken the bold move of preparing the models to be airbrushed. Brave, see?
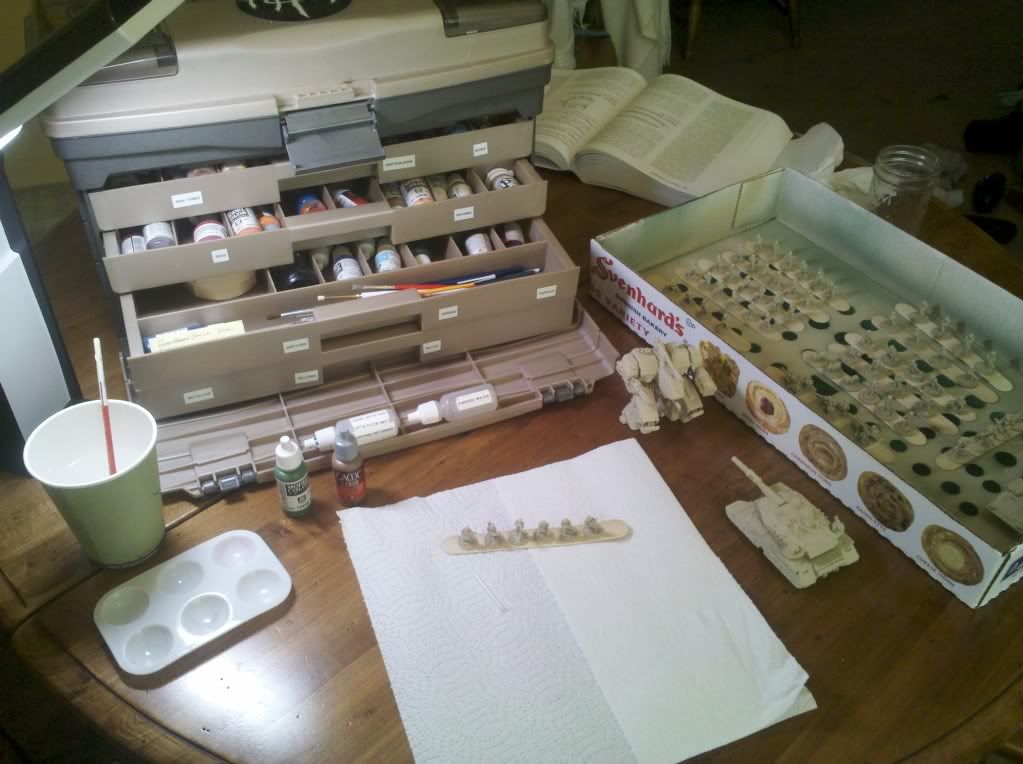
I decided on a simple, possibly even boring, US 3-color desert scheme for my test run. I started out with the Army Painter Skeleton Bone primer. After each model was primed, I used a drop of PVA glue to stick each member of a squad onto large craft sticks for ease of handling. These are my Khurasan 15mm Federal Marines models for use with Tomorrow's War and Gruntz.
Here is the lot ready to go:
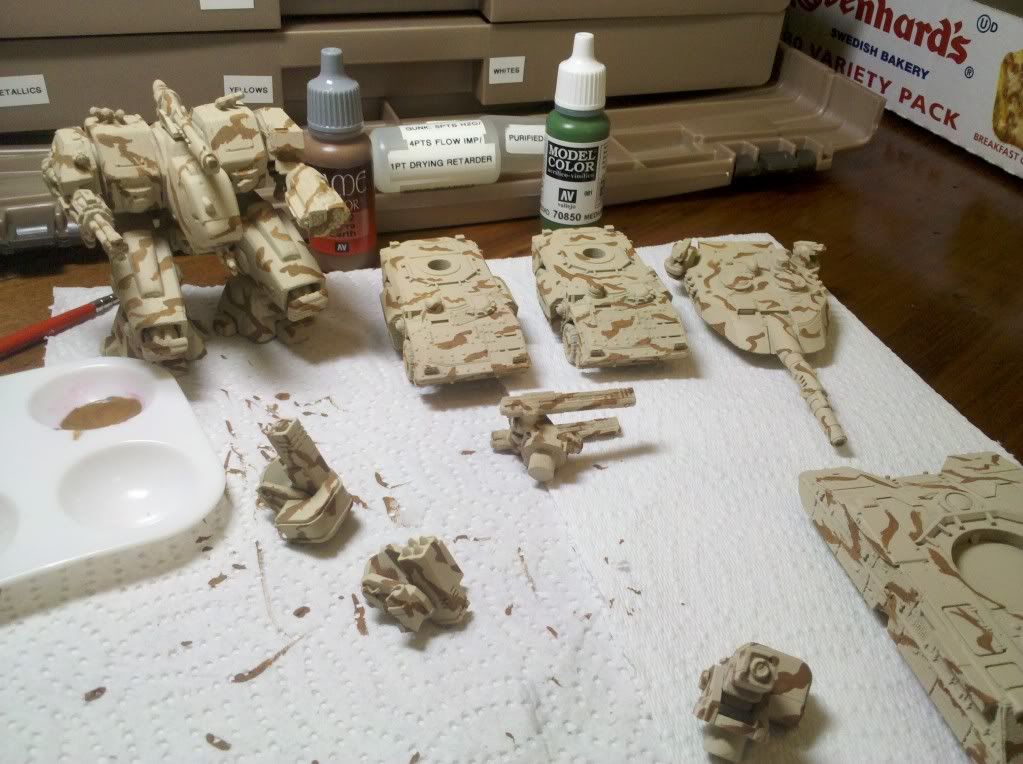
Next I added some Vallejo Game Color "Earth" to the models in large swaths, with an artistic free-flowing motion. The intent is to replicate what Robin did in his video (and I had seen elsewhere) with the poster-tac. I will overlay the poster-tac along the brown lines, intending to blend the green into it with the airbrush. We'll see how well that works :)
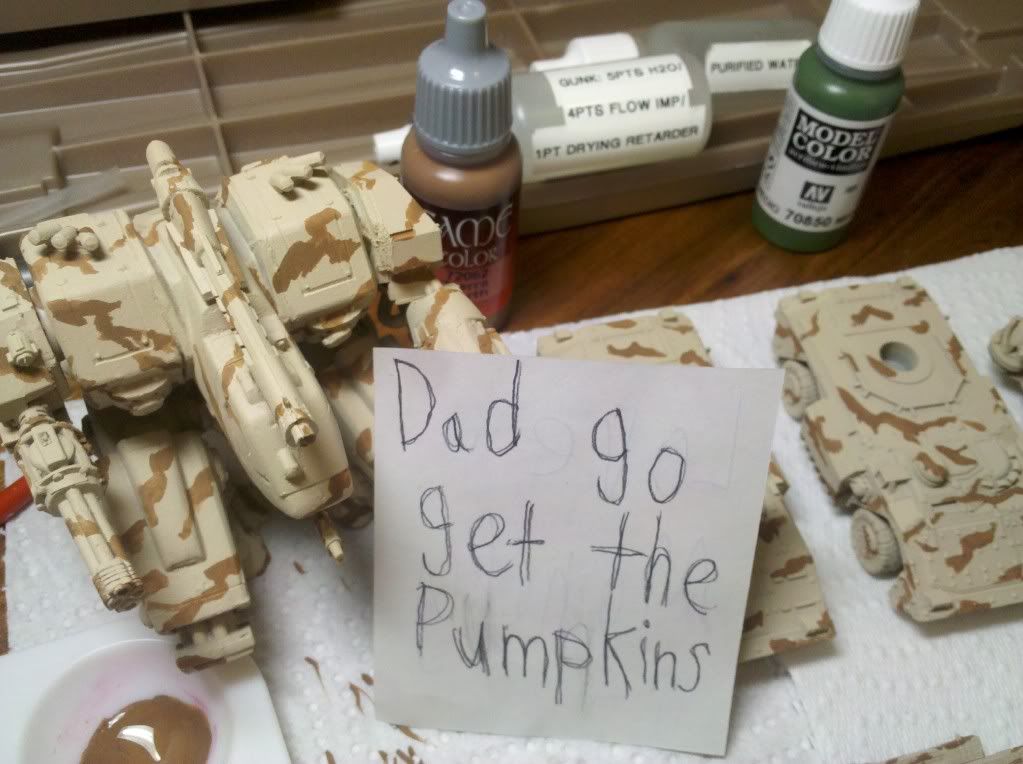
This is more of a close-up of my 6-year-old daughter's humorous "threatening" note to me to go get the pumpkins...lol...but it also shows the recipe for Gunk that I use as an additive when painting (I got it from the awesome article over at Reaper's forums:
I did manage to get brown onto one squad of 6 marines, but discovered as I started to do the second squad that some of the underparts of the infantry hadnt caught the primer. And since the primer is going to be, well, the primary color for the army, I ran them out and gave them another dusting of the Skeleton Bone. I will admit that with the craft sticks attached, it let me lay them on their sides and get a better angle. I should have done this first, I think.
LOL...so I havent done it YET! However, I have taken the bold move of preparing the models to be airbrushed. Brave, see?
I decided on a simple, possibly even boring, US 3-color desert scheme for my test run. I started out with the Army Painter Skeleton Bone primer. After each model was primed, I used a drop of PVA glue to stick each member of a squad onto large craft sticks for ease of handling. These are my Khurasan 15mm Federal Marines models for use with Tomorrow's War and Gruntz.
Here is the lot ready to go:
Next I added some Vallejo Game Color "Earth" to the models in large swaths, with an artistic free-flowing motion. The intent is to replicate what Robin did in his video (and I had seen elsewhere) with the poster-tac. I will overlay the poster-tac along the brown lines, intending to blend the green into it with the airbrush. We'll see how well that works :)
This is more of a close-up of my 6-year-old daughter's humorous "threatening" note to me to go get the pumpkins...lol...but it also shows the recipe for Gunk that I use as an additive when painting (I got it from the awesome article over at Reaper's forums:
I did manage to get brown onto one squad of 6 marines, but discovered as I started to do the second squad that some of the underparts of the infantry hadnt caught the primer. And since the primer is going to be, well, the primary color for the army, I ran them out and gave them another dusting of the Skeleton Bone. I will admit that with the craft sticks attached, it let me lay them on their sides and get a better angle. I should have done this first, I think.
Subscribe to:
Posts (Atom)