My name is Gavin McClements. I am a wargamer and family man, living in Los Gatos, which is a suburb of San Jose, CA. Building terrain is one of my favorite aspects of the wargaming hobby - in fact, lately I've become more interested in making my battlefields "pop" than in actually playing.
I have always loved 6mm stuff, even if I didnt know it (I started with Battletech back in 1986!). As I've gotten older, my love has remained, but now I like more expensive stuff (go figure).
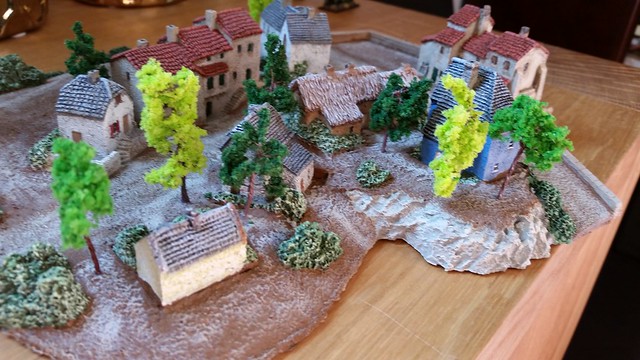
As I've been exploring 10mm fantasy, I have read numerous times that people use 6mm terrain and it works fine, since the ground scale isnt the same as the model scale. With that in mind, I invested pretty heavily into Total Battle Miniatures and Leven Miniatures 6mm lines. I intend to use these with Warmaster and Mayhem, specifically, but they'll also flesh out my 6mm sci-fi tables as needed. That's why I went the Napoleonic route - you can see this stuff across Europe still, and it wouldnt be so out of place with grav tanks floating by.
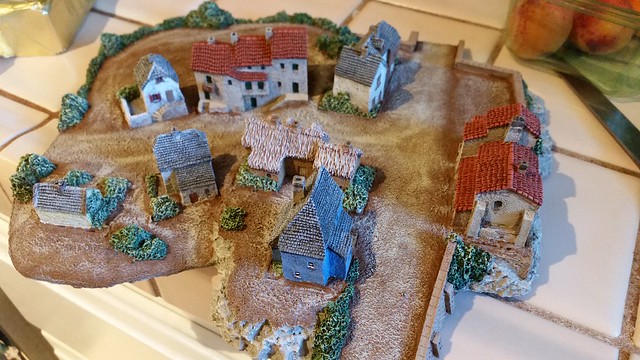
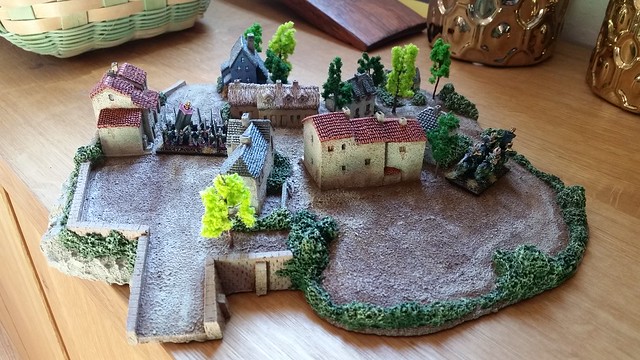
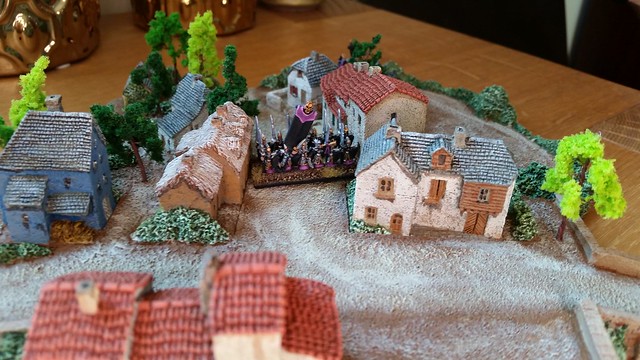
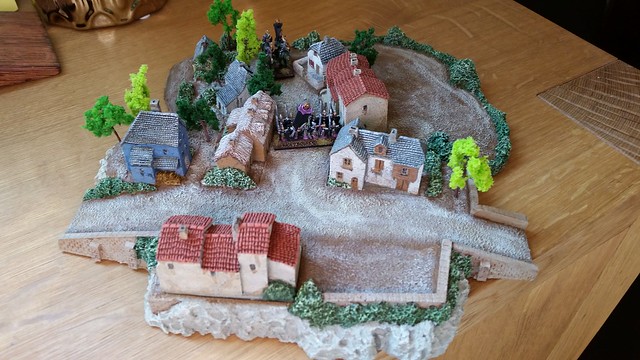
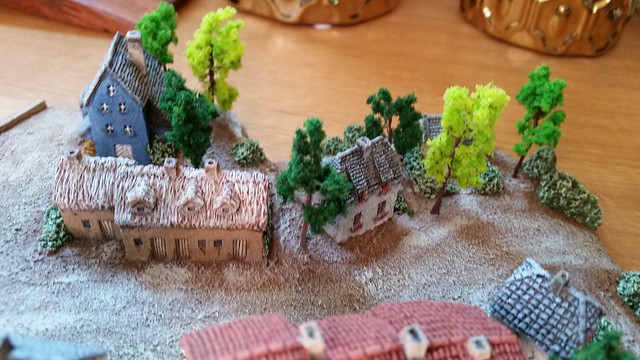
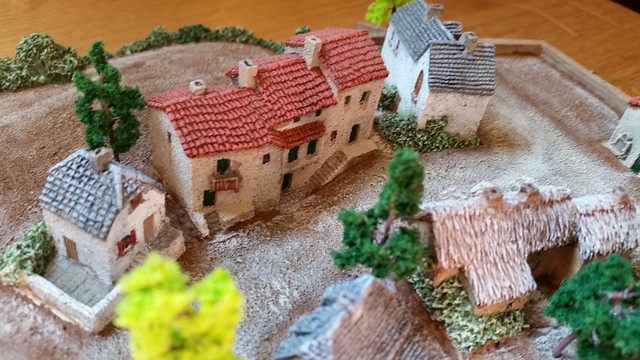
Here is my version of the Hill Town Tile 1 found here. Because I dont do historical gaming, I mix and match as I see fit; I looked into colors, but not extensively. Let me apologize for my photography. I HATE blurry photos, but some of these are.
This is the final painted version without any trees added. I will be flocking the appropriate areas as soon as the extras I have on order from Perfect Six arrive (wells, crates and barrels, etc).
I decided to add some trees here and there. I used a pin vise to drill into the resin, and superglued the trees in. The medium and dark green trees were from eBay vendors. The three light green ones were new from Leven Miniatures - since I love color variety, I was happy to get these in the 50mm variety.
With the GW Warmaster Dark Elf models in the town, I think they'll be fine on the table. Yes, there is a size discrepancy, but it isnt staggering (at least to my eyes), and I plan on moving forward with the 3 dozen other buildings I have :)
I love making terrain, and my wife loves calligraphy, scrapbooking, and pastel colors (Spring and early Summer are her favorite seasons). She is busy nightly with her crafts, while I have really only just recently gotten back into my creative mode. Our 15th anniversary is coming up, and since I was buying some fun stuff from Scenic Express, I chose this as an opportunity to get some of the "brighter" colored items and give them a test run.
Roughly 10"x5", the stackable "steps" inside are completely removable - and at only $10, it was a no brainer.
I started off with some trees, which allowed me to monkey with some of the different techniques I have been linking here.
A little 1/2" foamcore from Michaels, and I had the beginnings of the scene.
I use this grout material that I got at Home Depot years ago - it has a fine texture similar to buttercream frosting - I mix it in a bowl with a TINY amount of water, and I mean just enough to get it wet. It spreads nicely at that point, and it has adhesive in it already, so I have never felt the need to use white glue with it.
I coated it on the trees, the slopes, and any areas that I thought might need it. For the steeper slopes, I used foamcore offcuts under it - this doesn't really shrink much with drying, but I didn't want to push my luck. A few rocks from the fairy garden out front, and some air dry clay for the banks, and it was ready for a good dusting in sand. When I posted this WIP on Facebook, most of my friends (who really don't understand my hobbies at all) asked if I was making a cake...
My biggest dream for the garden was the use of the SuperLeaf products I had purchased - but given that I was making these trees from scratch and the polyfiber I had was green, I needed a solution to get the foliage onto the armatures. This was the look I wanted, after all:
What I really wanted was some kind of gauze that I could distress (like you would do to a cotton ball to make smoke or something) and stretch across the tree frame - but a quick visit to the local RiteAid came up with nothing (well, a few things, but they got relegated to the first aid kit once I discovered how unsuitable they were). I ended up discovering some Fine Mesh Gauze, which didn't distress like I was hoping it would, but seemed viable nonetheless.
Once the gauze was on and primed along with the rest of the board, I trimmed them a bit with scissors.
[NOTE: I want to do THIS next time with steel wool, which might give better body than the gauze...]
The steps were made from air dry clay. The wall in the back left was made from Pegasus Hobbies bricks. The cobblestone walkway was done with plasticard and was inspired by this:
By the way...I could look at "Japanese Garden" image searches on Yahoo and Google all day...well, maybe half of a day, before I just had to jump up and create something...
Some primer, some paint, and now I had this:
The green for the pond was a Moss color I got at Michaels...I love it. I am hoping it shows through the Realistic Water nicely...and you can see my Fall work in the background for my 6mm terrain.
The real fun began as I started to add color to the project. I flocked the grass in "Green Grass" fine flock from Woodland Scenics - I mottled in a bit of other colors, but figuring it would be covered by clump foliage and flowers, I didn't vary it too much. The colors were mostly from Scenic Express' Spring and Summer flower assortments - basically colored turf, and it was wonderful.
This is with the excess flocking still on the base:
The next step is to get the color on the trees, and once that is done, I'll need to do the water portion.
As I was unsure about how to stop the water effects from coming off the end of the board, I looked about and found this easy tutorial on how to accomplish that:
The Terrain Studio is such a great channel - this is his method that I feel was personally uploaded just for me - so I was quite happy when he put it up.
This is another option - I may combine the two when I pour mine.
I also found a good discussion on water and how it is modeled here. Basically, I can do "dirt" and flock all day long, but I don't tend to do water much - so this helps: http://www.diorama-dreamland.at/index.php?id=26
Of course, TerranScapes has an excellent video on his Water Effects works:
I'll get more up as I get closer to finishing this.
Now that my bocage project is done, I want to make more trees to round out my table. I actually own more than I can use, but colors, man, colors! So many tables are drab...and Spring and Fall (and heck, even summer!) offer such natural beauty!
As there are more ways to make trees than there are rulesets to play in 28mm...
I did some research, as always, and finally decided that these two videos were what I wanted to replicate. The first is by an Aussie (?) who is clearly a master woodworker and into making terrain "on the cheap". The second is a more conventional project.
I made the jig from the first video for pines, and hand-twisted wire trees to replicate the second. I hope to have something to show soon.
As mentioned, there are so many other worthwhile tutorials out there - here are a few more.
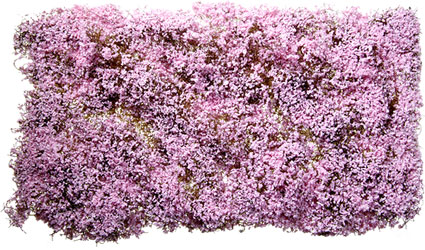
I made some fun purchases at Scenic Express last week. One of them (some of them?) were Super Leaf packs in many Spring colors - pinks, purples, etc, so I can continue in my quest to add color to my boards. I already have Fall colors for my trees, but I decided that Spring has great color and I wanted to experiment.
A Japanese Flowing Cherry tree:
Flowing Dogwoods:
Purple Leaf Plum Trees
One problem I found with my desire to add Spring trees to my table was
the apparent lack of ways to do so. I usually either buy trees off Ebay,
or use various methods combined with Clump Foliage to make them - but
this didnt seem like an option for Cherry, Dogwood, or Plum trees.
I found this product: http://www.sceneryexpress.com/JAPANESE-CHERRY-LEAF-PETALS-16OZ-SHAKER/productinfo/653-6542/ and shortly after found this review by TerranScapes...but as you can see, it still doesnt really give a good example of how to make these trees (yet?). Skip to 2:16 for the review...or follow the link he adds in the upper right hand corner as the video starts.
I'm still at a bit of a loss on how to do this, even though I have this neat product - because it doesnt seem thick enough to make trees with in my usual way.
More research is needed. I'm wondering if anyone has experience with this product?
NOTE: I found a new item in Catalogue #17, called "Pull Apart Plant Cluster" (an example is here):
It looks to be an undercoating, if you will, in the vein of the Polyfiber product. I may look into this.