As promised, I put together a scenario this week and gave Tomorrow's War a second shot last night. I was inspired by the fact that another blog found life in their second game, and with what I hoped was a firmer understanding of the rules, I hoped for a similar experience.
The scenario is called Foot Patrol Ambush, and can be found HERE. It basically entails a raiding group coming back from another successful sabotage when they are pounced upon by a waiting group of ambushers. Their sole desire is to flee and exit the board safely, but beset by attackers, there is plenty of mayhem to go around.
The Ambushers, called Blue Force, set up 3 fireteams of 5 soldiers in various hiding spots, and also received a Medium Machine Gun team and a Sniper team. The beleagured team, Red Force, is heading north along a trail that they must stick to until the ambush is revealed.
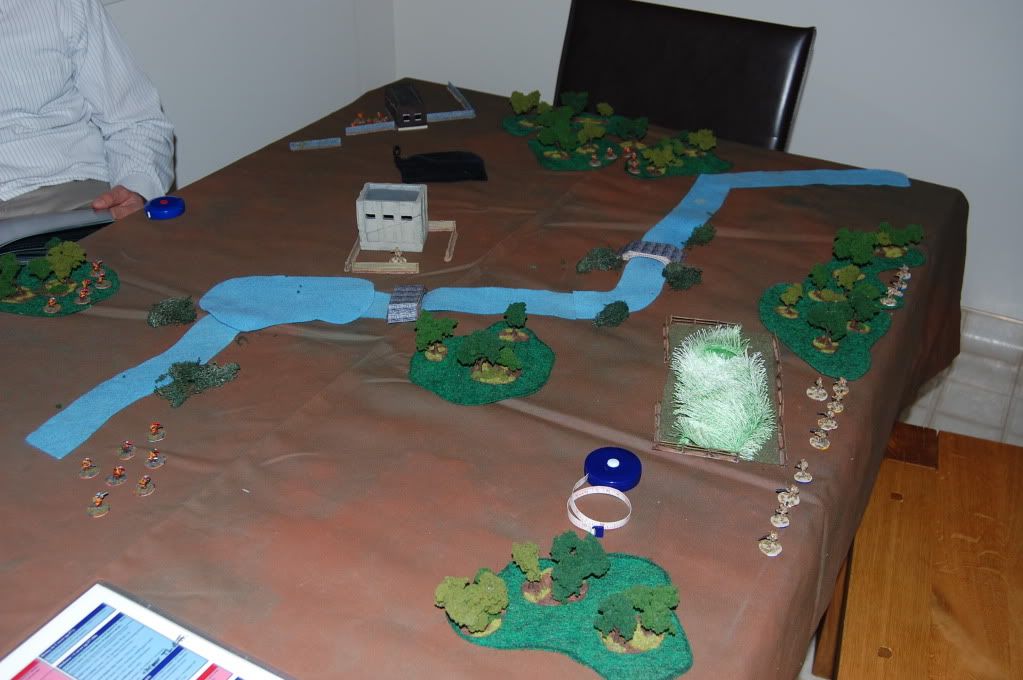
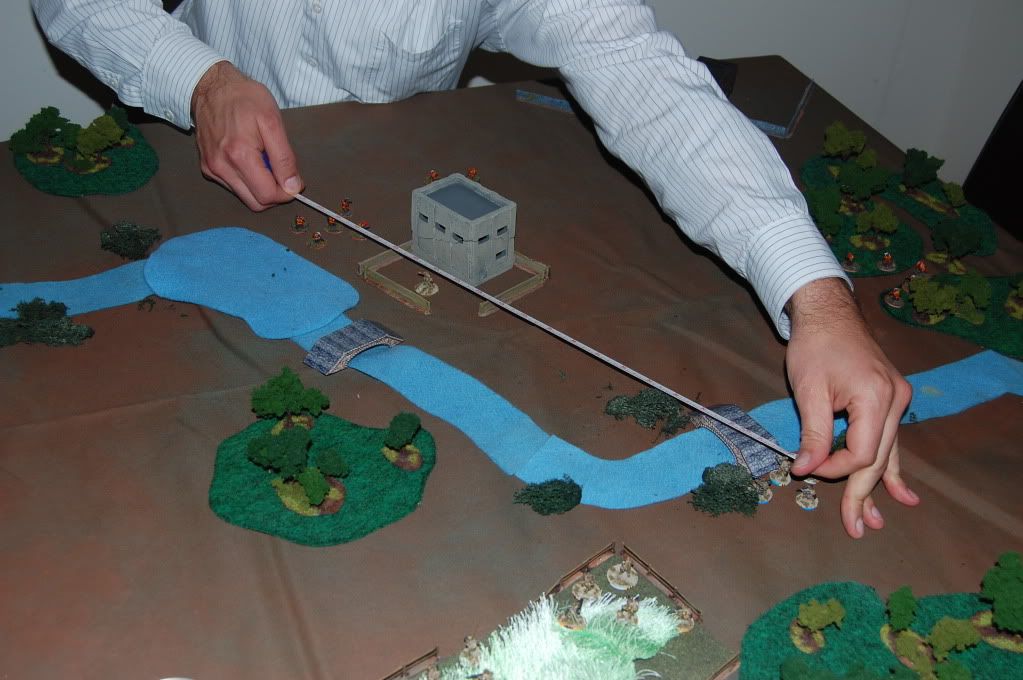
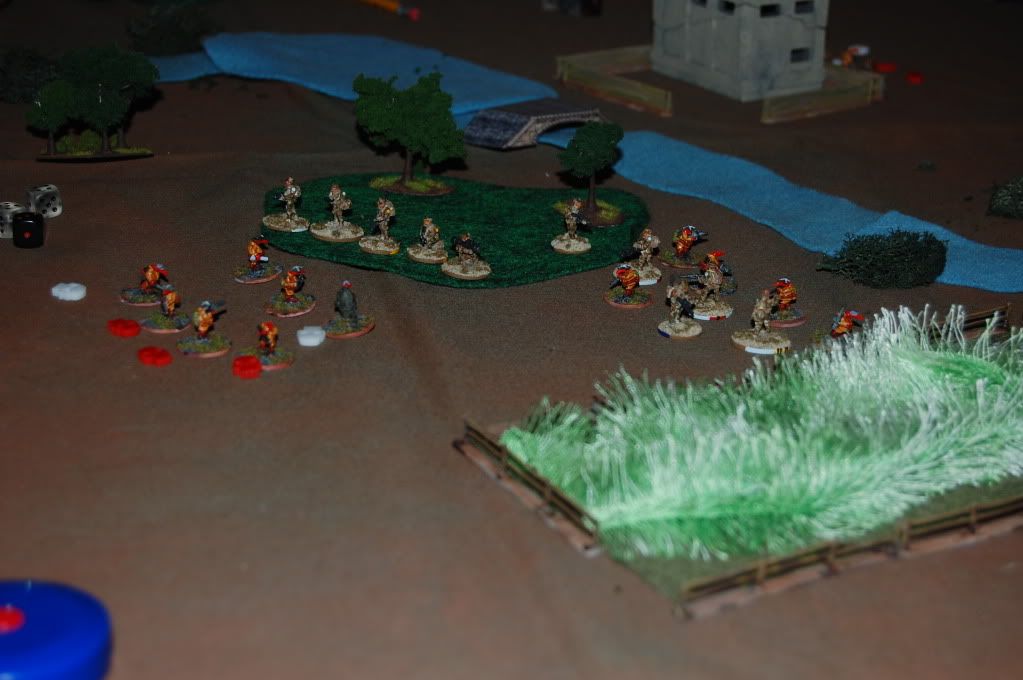
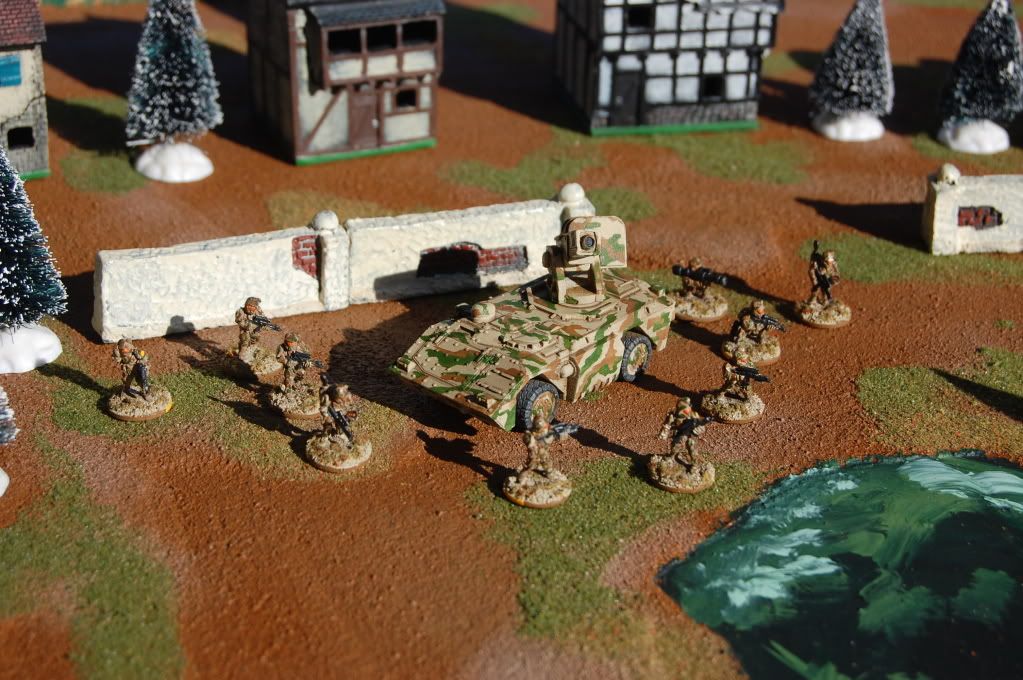
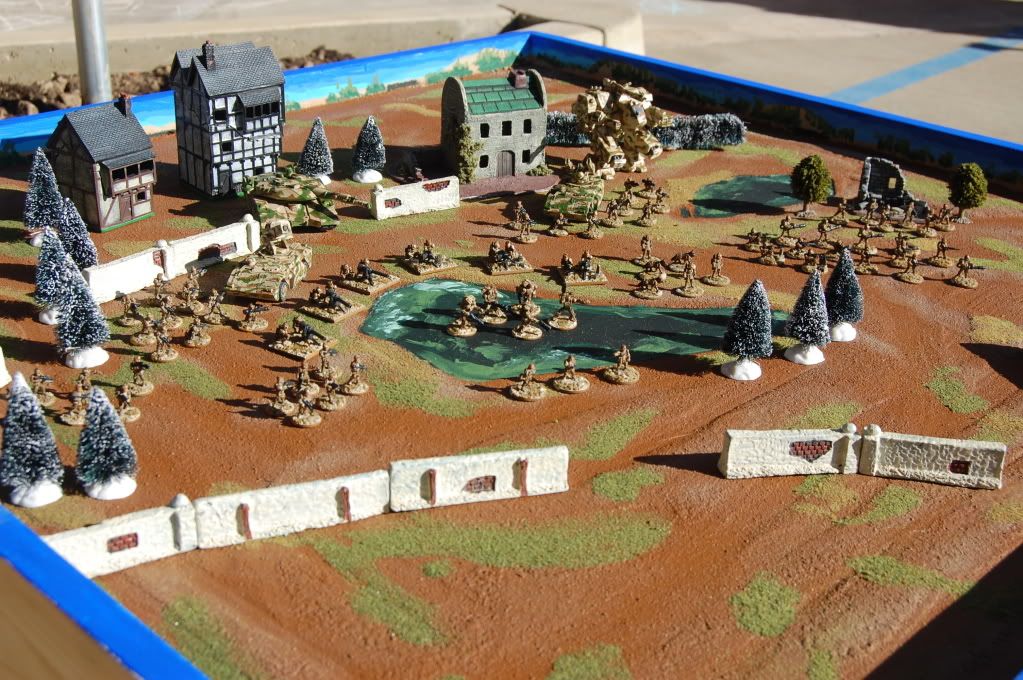
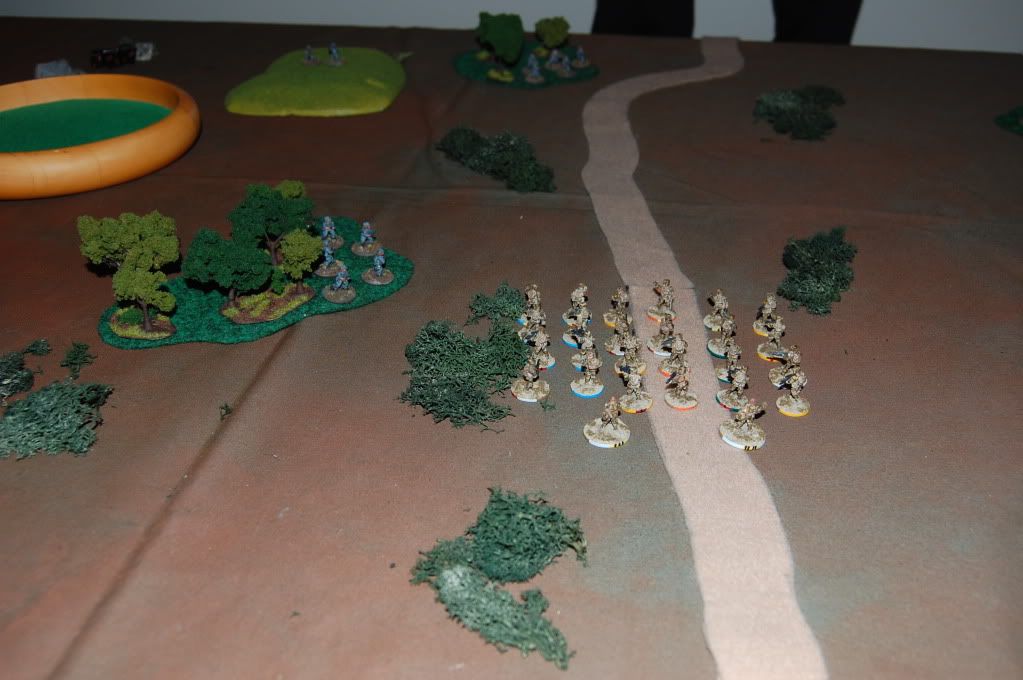
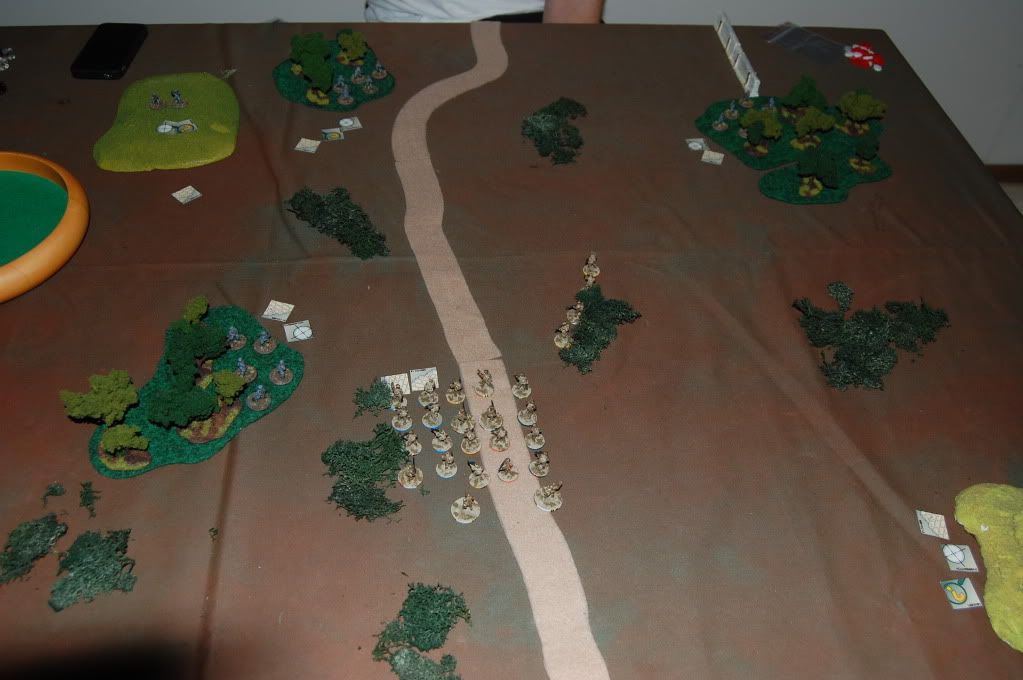
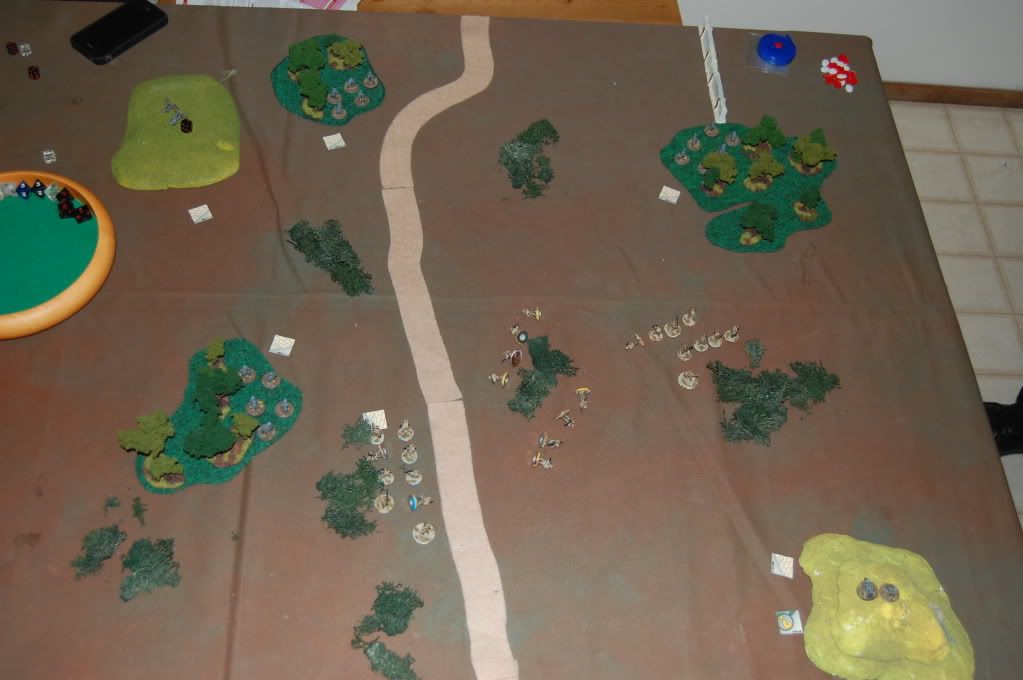
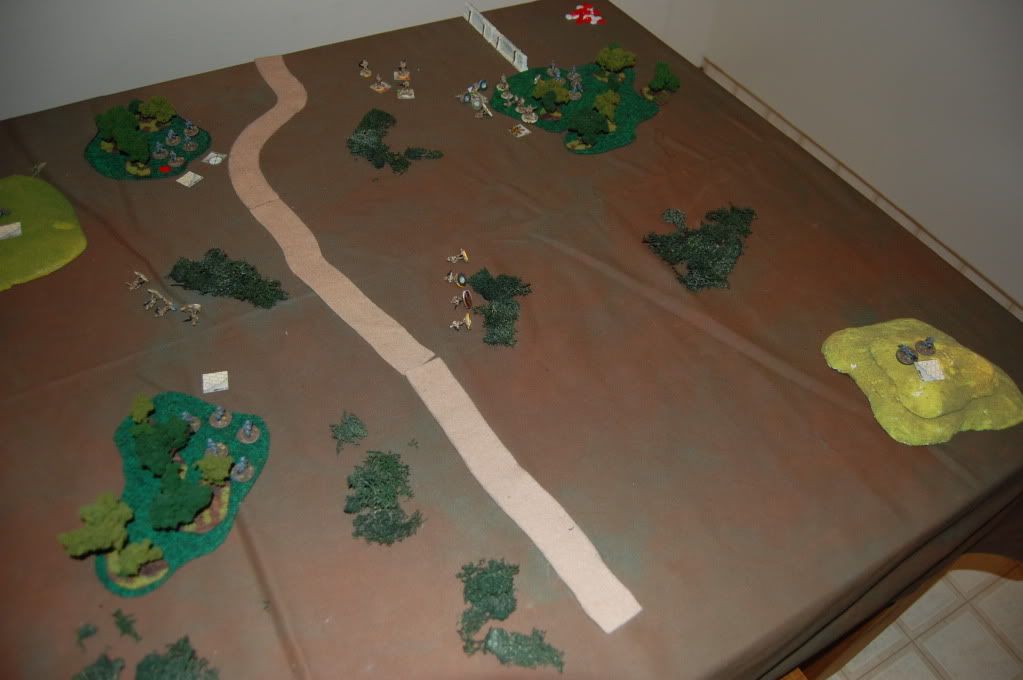
The setup:
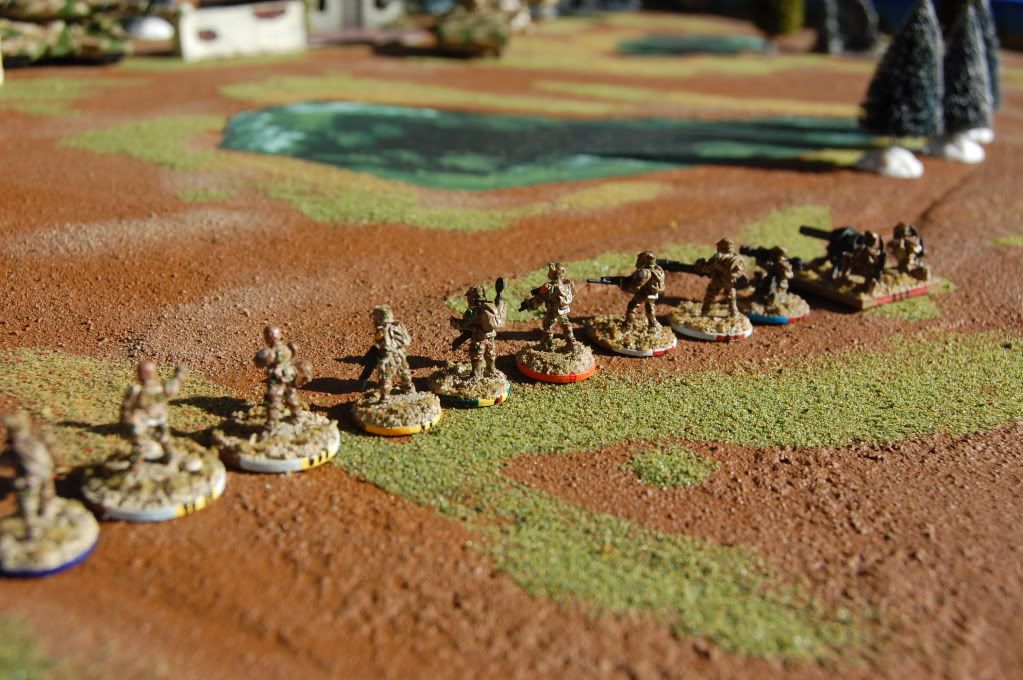
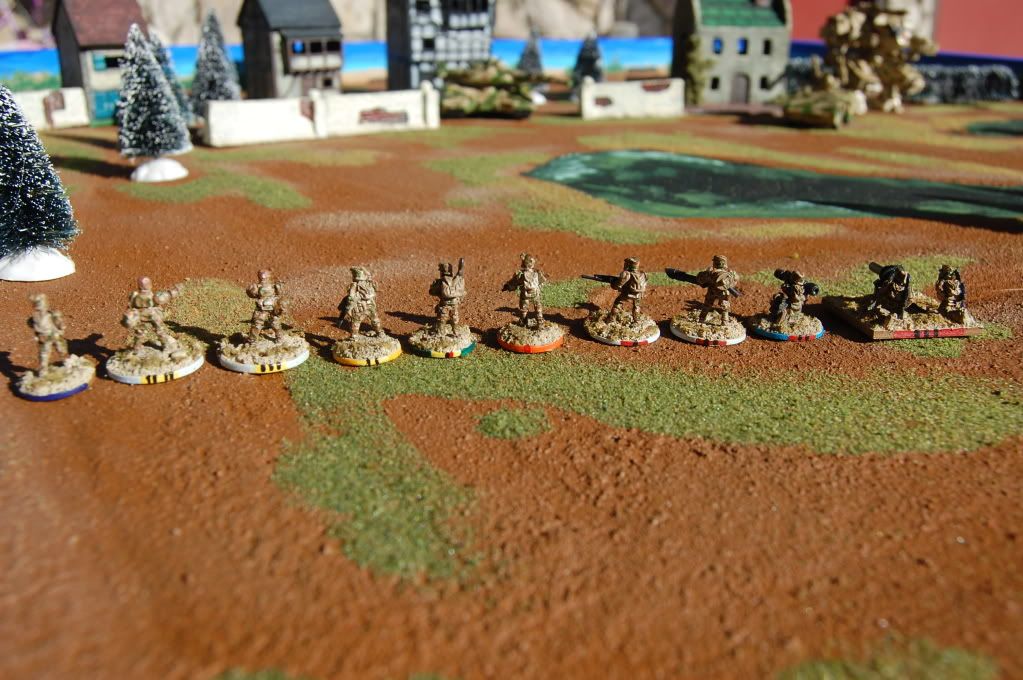
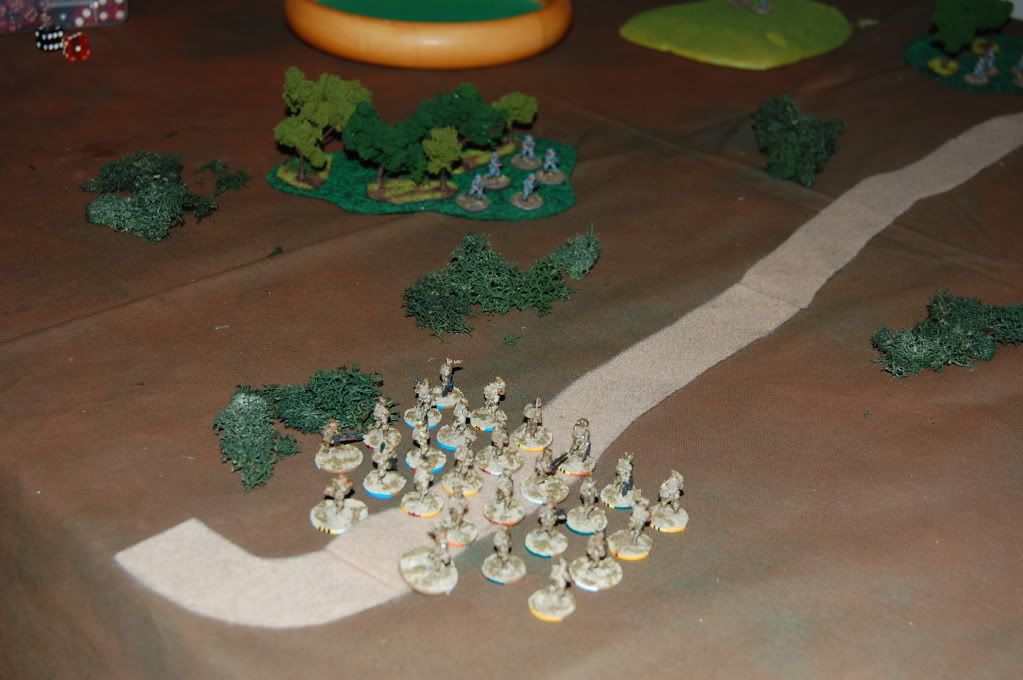
I played the Red Force (after all, I dreamed this craziness up, so it was only right that I took the boot to the teeth on its first playtest!) and we set up as written in a 6" x 6" box along the path. An alternate deployment scheme was to keep 2 of the 3 Squads back in reserves, but I wanted to test out the crowded method :)
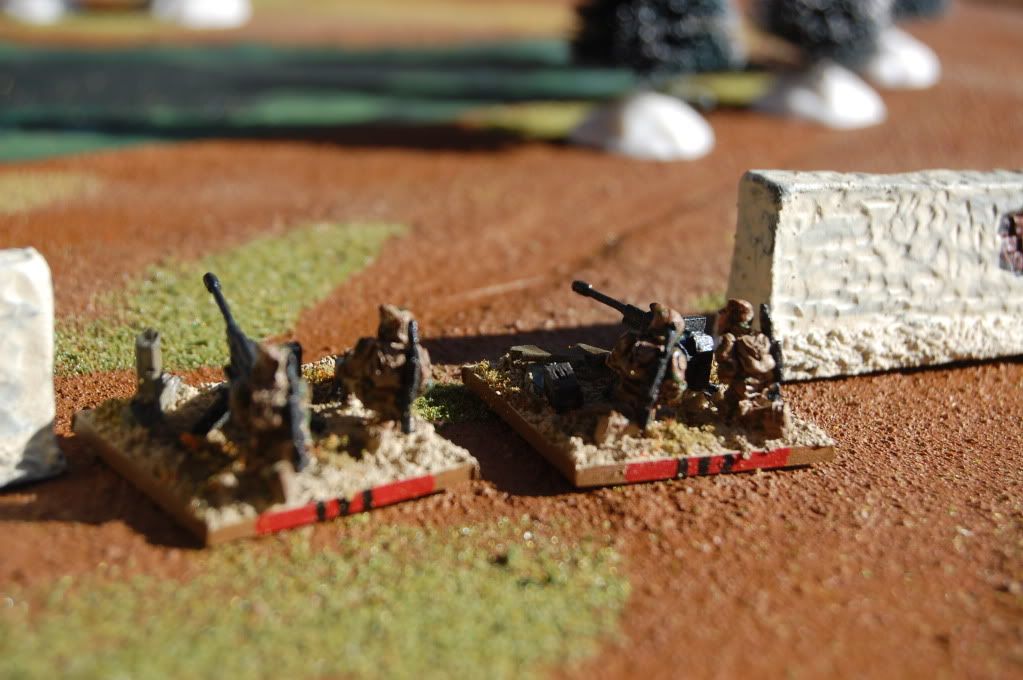
My Medic can be seen in the back left, with the 3 black bars on his base. The Platoon Leader is to his right, cockeyed on the road, with 4 stripes.
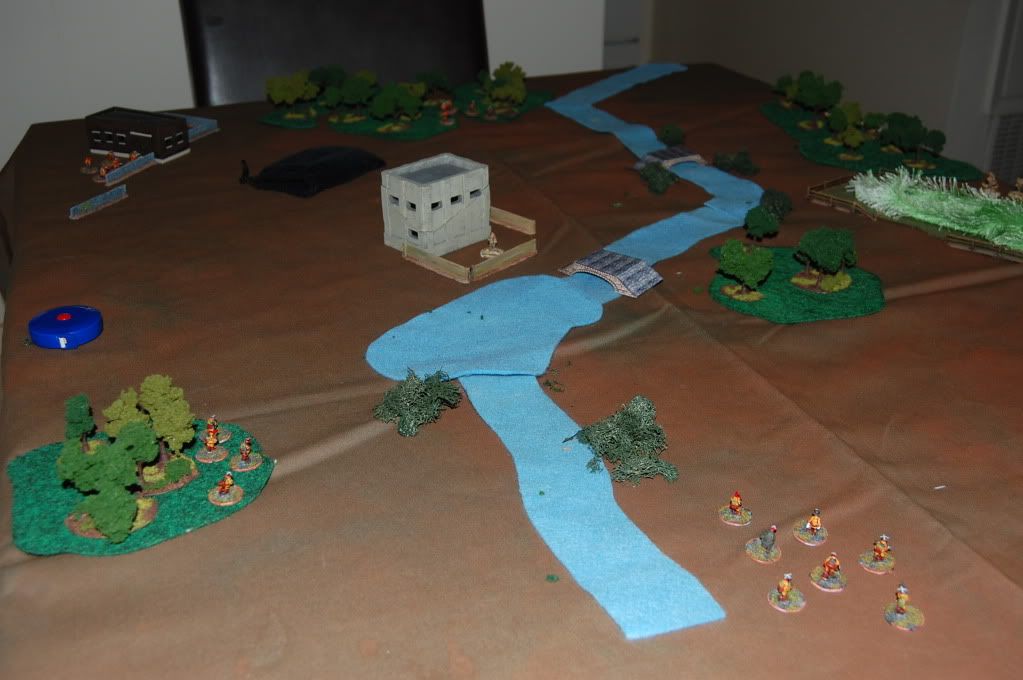
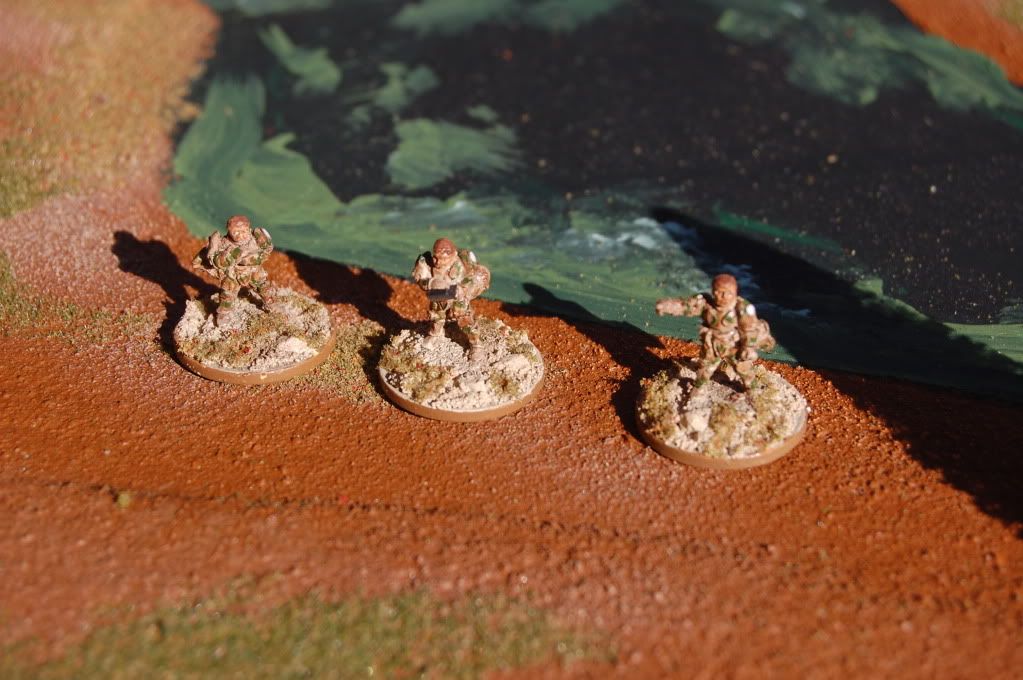
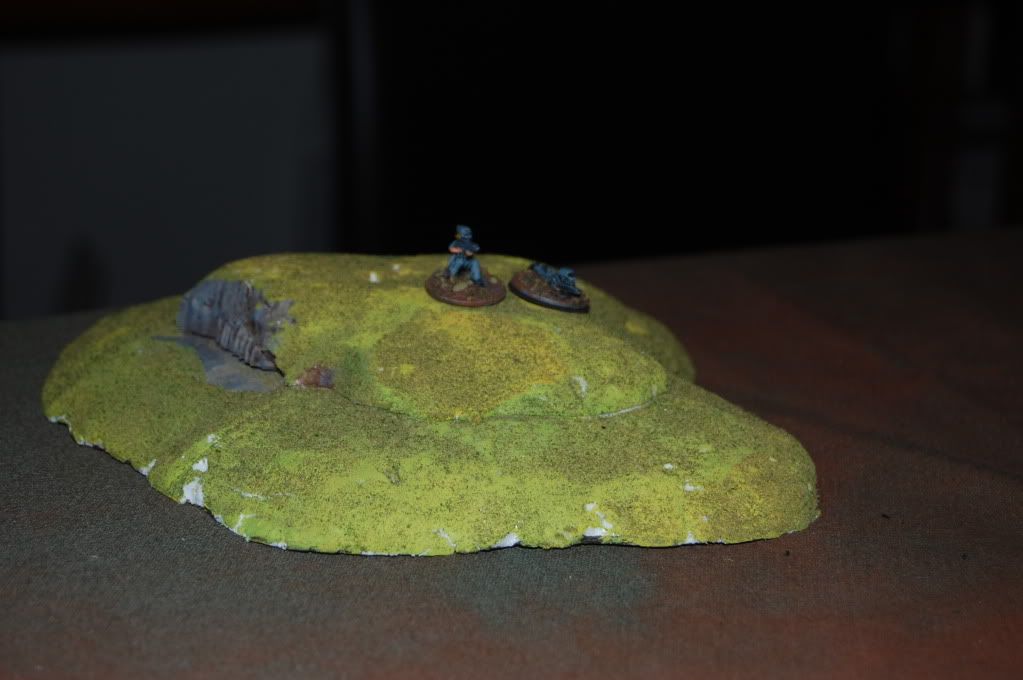
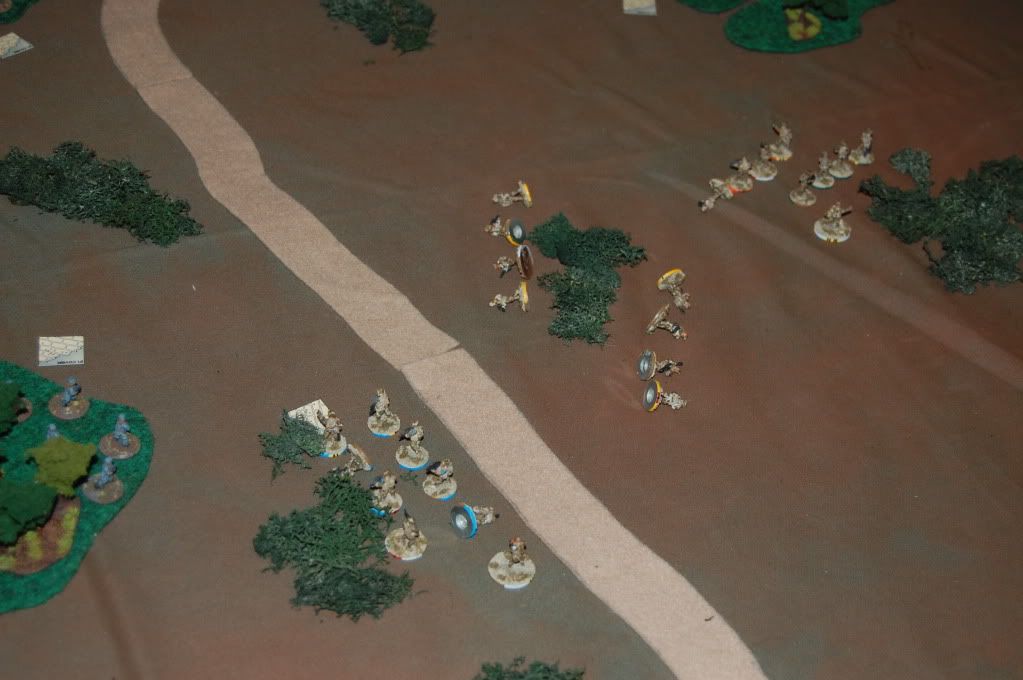
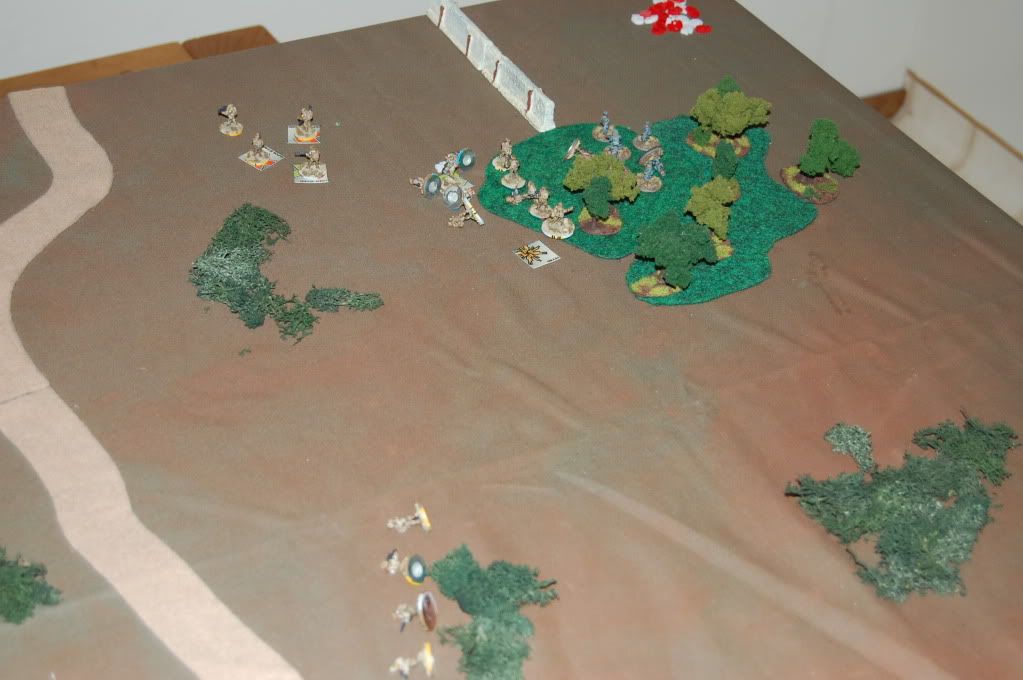
No ambush can be complete without a cast of villains, and the Blue Force showed up in spades. Their Company Command loaned the reinforced Squad their best sniper, seen here lurking directly to the right of the emerging Red Force, where he lays hidden on a hill:
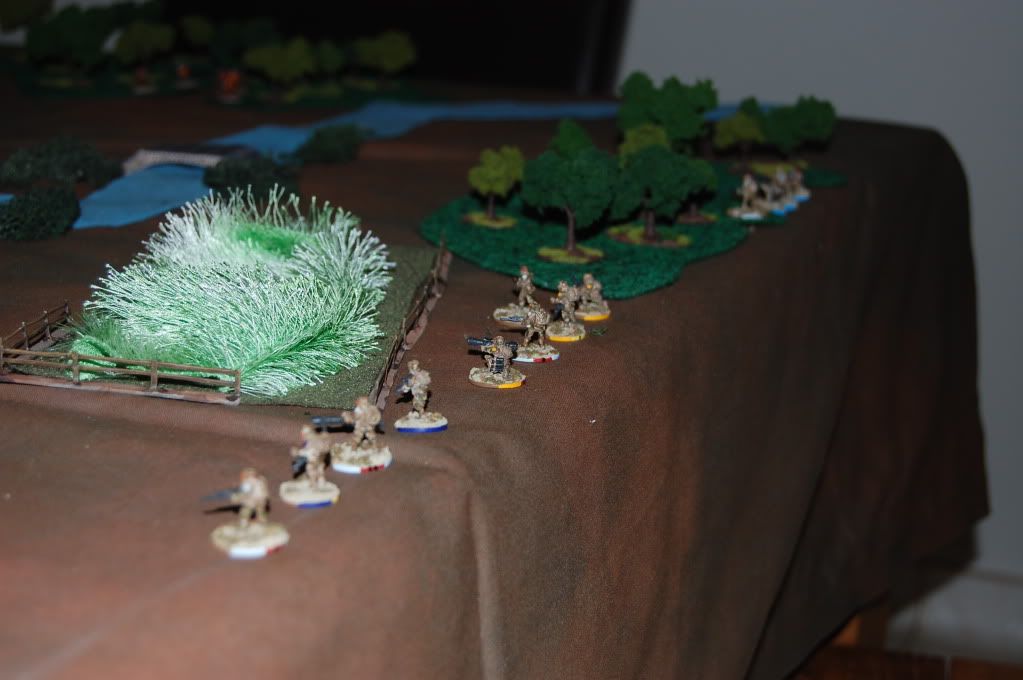
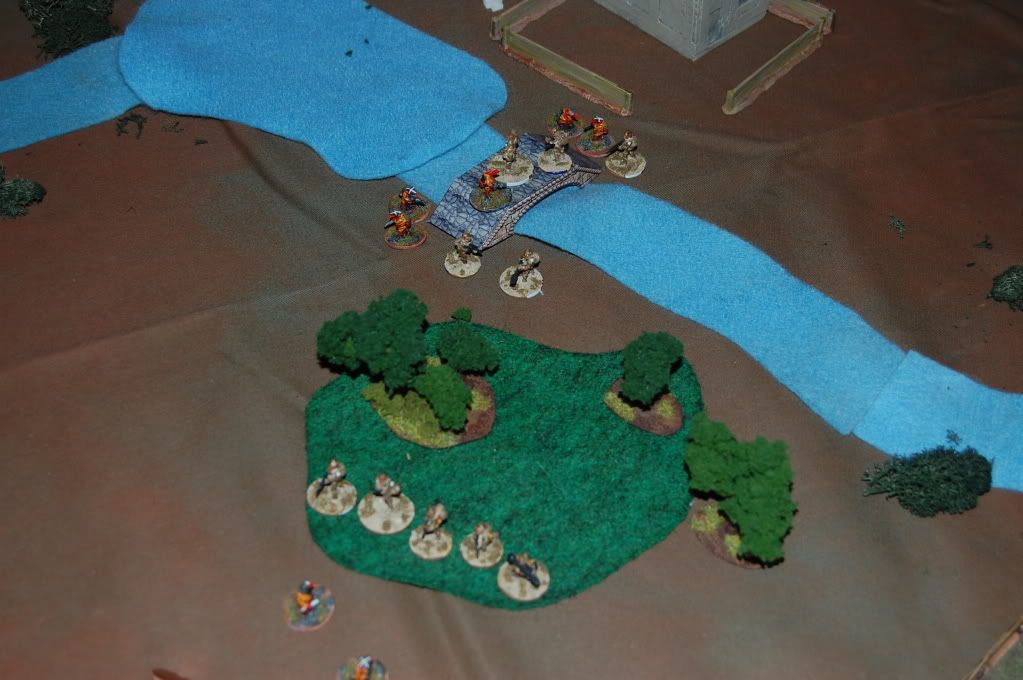
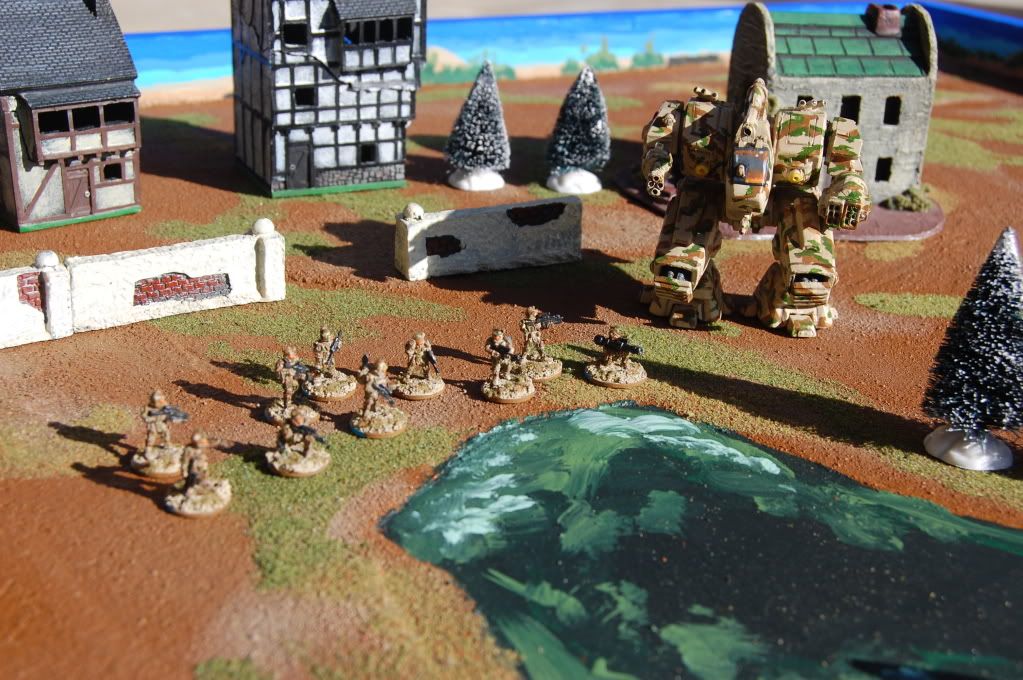
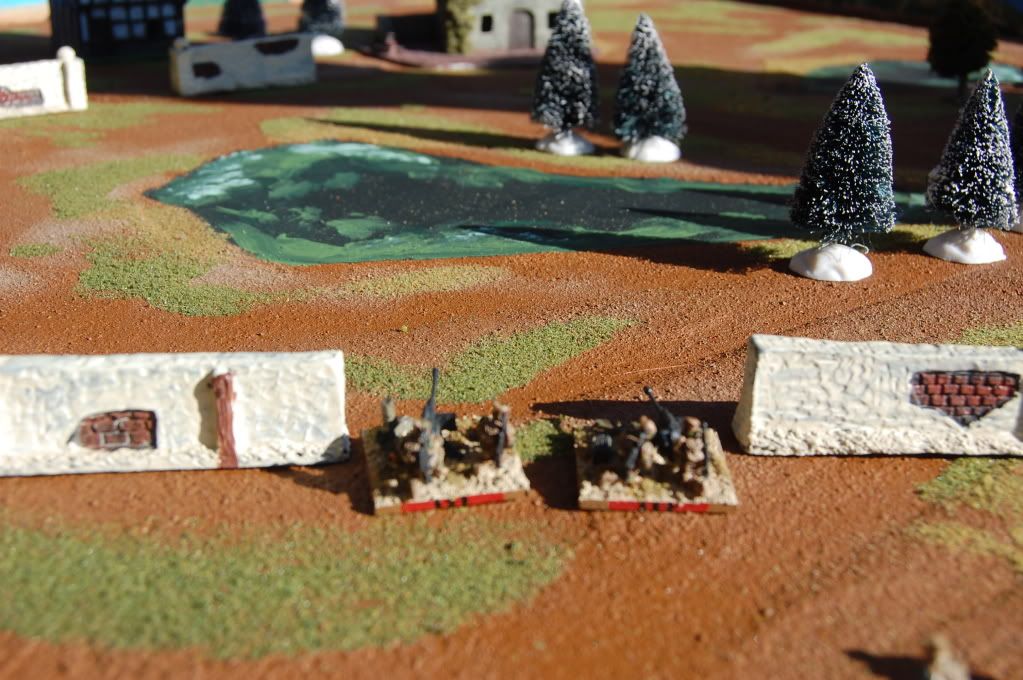
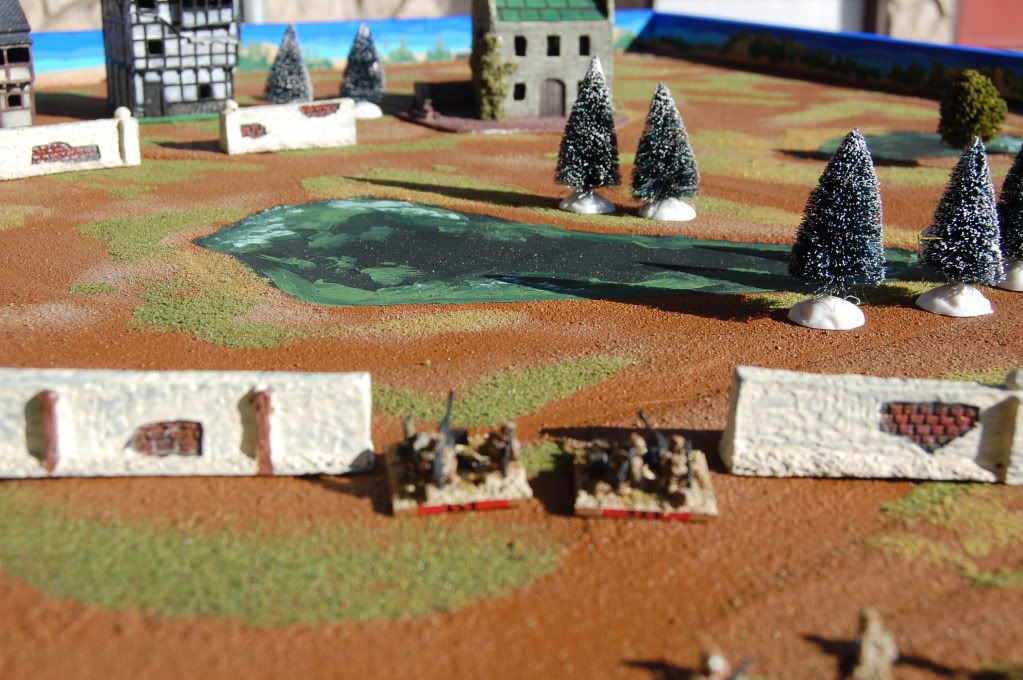
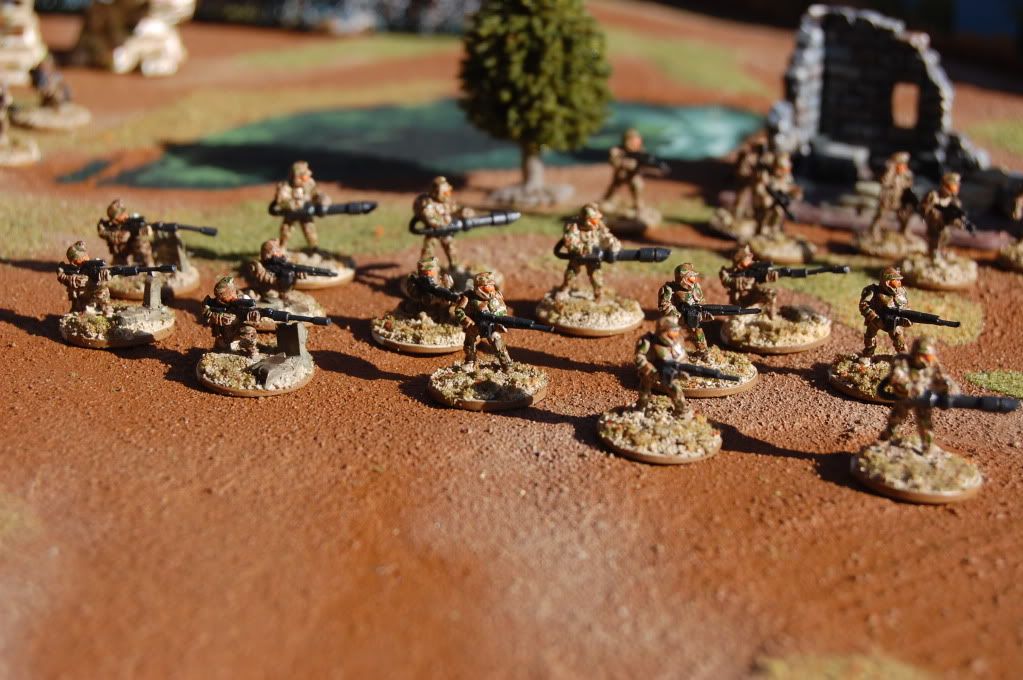
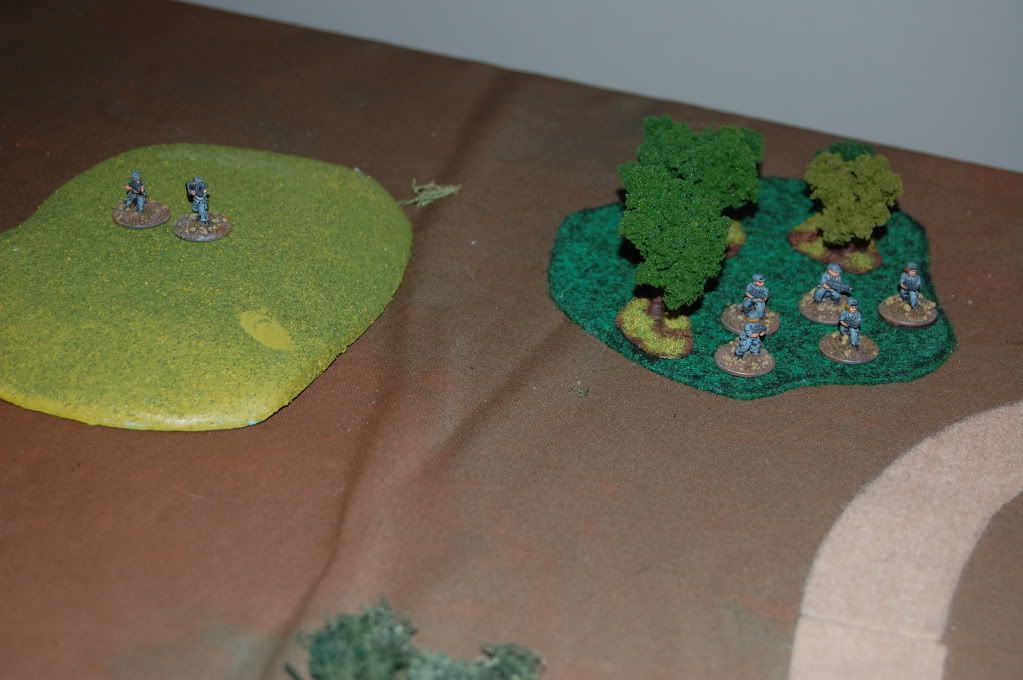
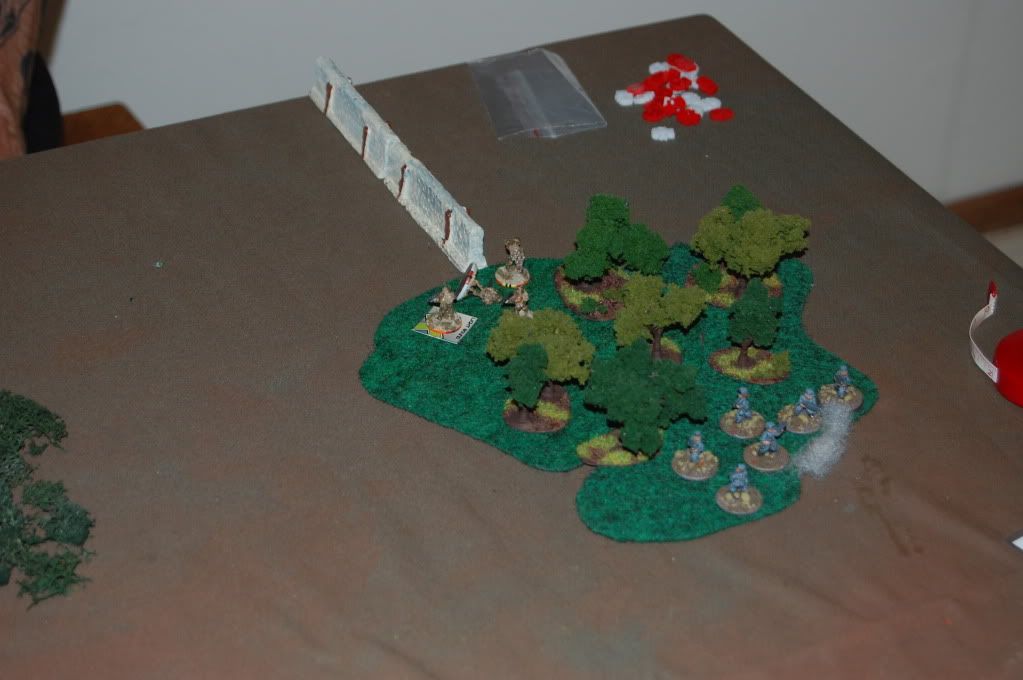
To the Northwest, up ahead and to the left of the advancing Red Force, Blue team #2 can be seen in the trees, with the MMG team up on the hill above them:
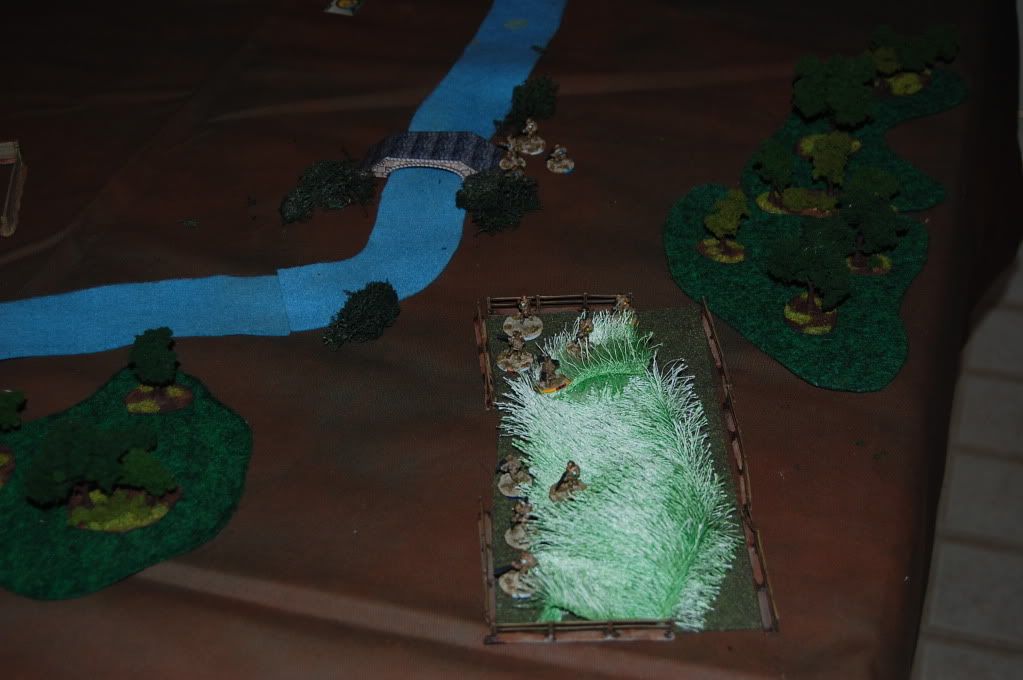
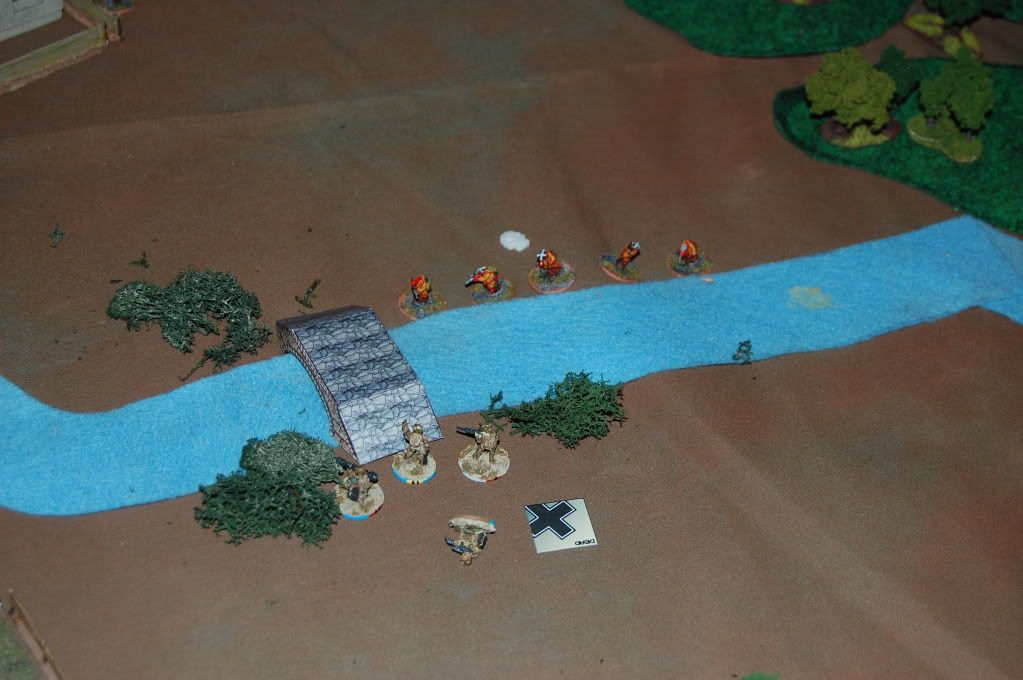
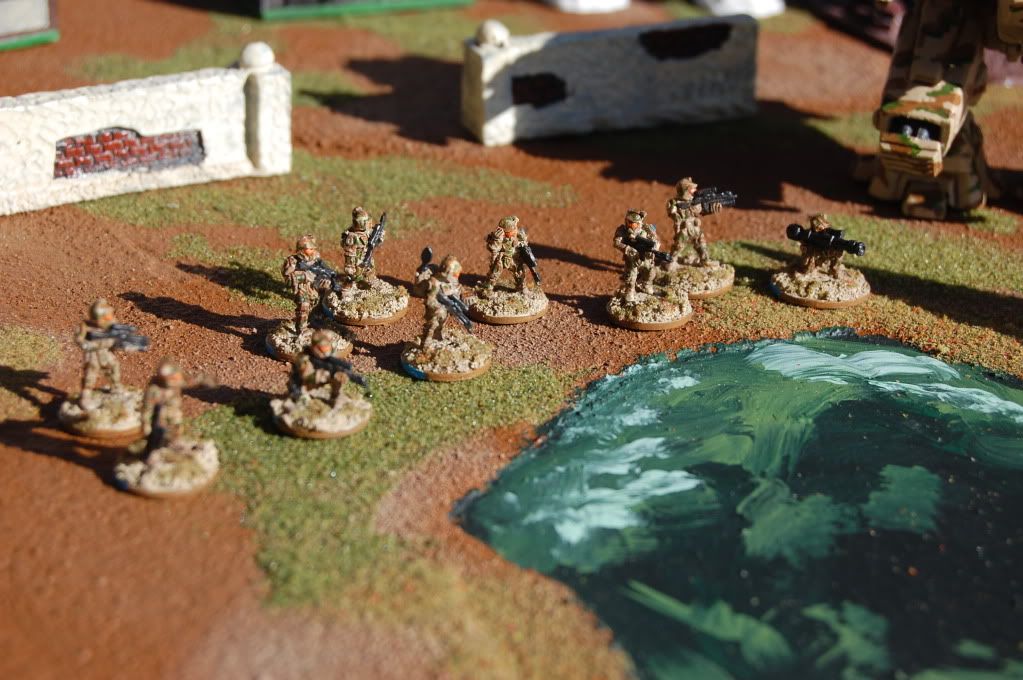
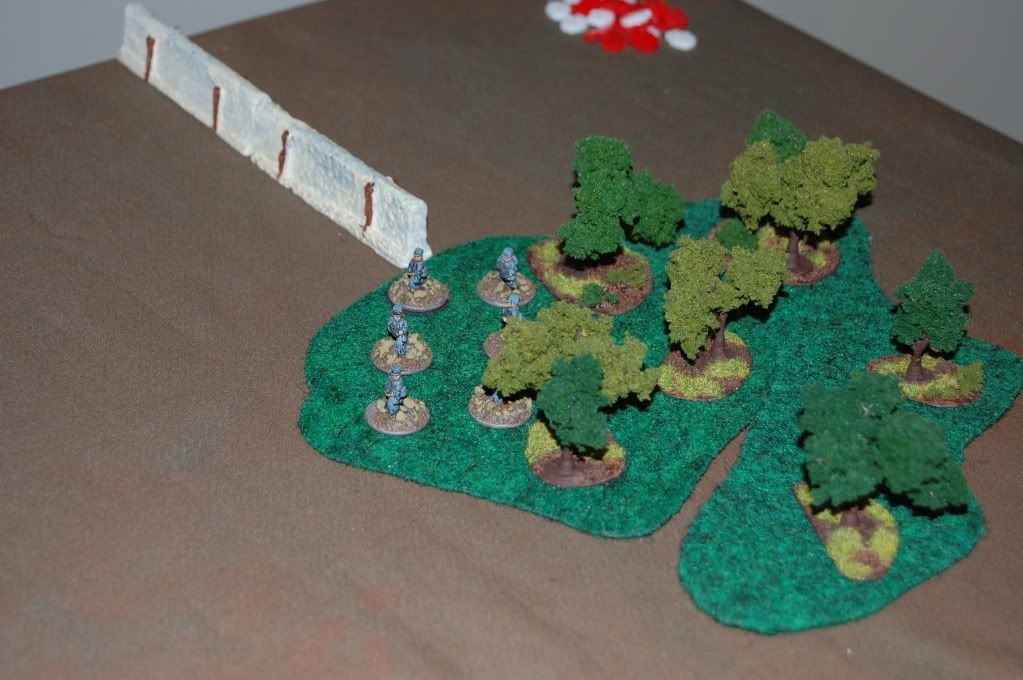
Across the board from these guys lurk Blue #3 in the Northeast:
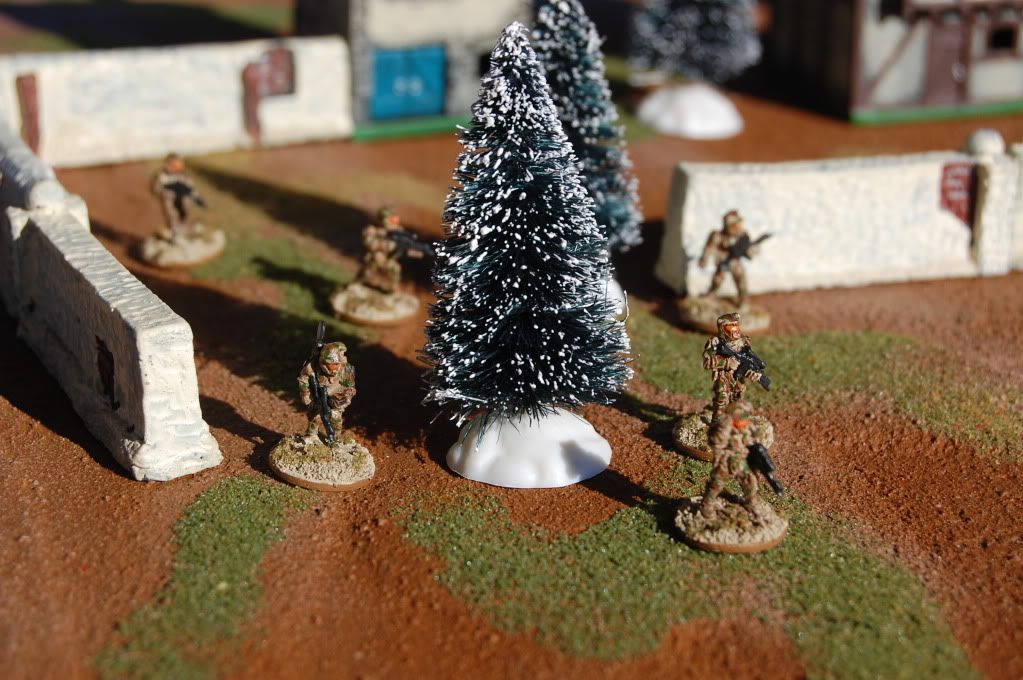
Oh, the pain isnt over. Hidden to our heroes' left is Blue #1, bold and brash in their concealed location just outside of detection range:
The basic rules are this: The Red Force is going to advance down the center along the path. Blue wants to avoid firing until Turn 3, if they can, to get the Reds into their Kill Zone, and as such must pass Troop Quality tests any time they could conceivably react to a Red action. To complicate things, darkness falls at the beginning of Turn 4.
Designers Note: The scenario was written such that Blue #'s 1 and 3 were out of LOS of the deployed Red Team (those trees block LOS 3" into them, and all LOS through them). Once the models were placed, however, the Blue player decided he was comfortable with their location, and so we moved forward as it was.
Turn 1:
Red Force has Init on Turn 1 per scenario rules. One of my fireteams take a Tactical (6") move forward along the edge of the trail, and Aron holds his breath as all 4 of his teams take a TQ test to hold their fire (the sniper doesnt need to test, as his resolve is made of iron). All four pass, and the rest of my fireteams advance unaware.
We decided that since "Spot Hidden Unit" was an actual action, that my units wouldnt be able to passively search, so even though they closed within Optimal Range of the Blue #1 here, no alarm was sounded.
Turn 2:
Initiative is rolled and Blue Force wins it. All 5 units go on Overwatch and dig in their heels as their prey draws closer.
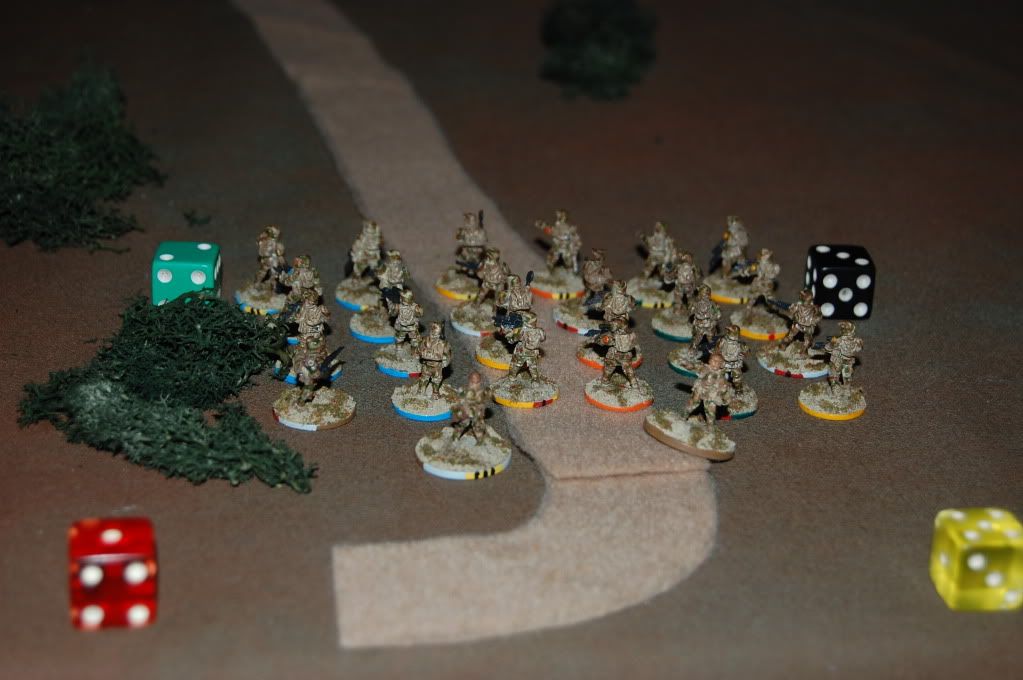
My rightmost fireteam advances...
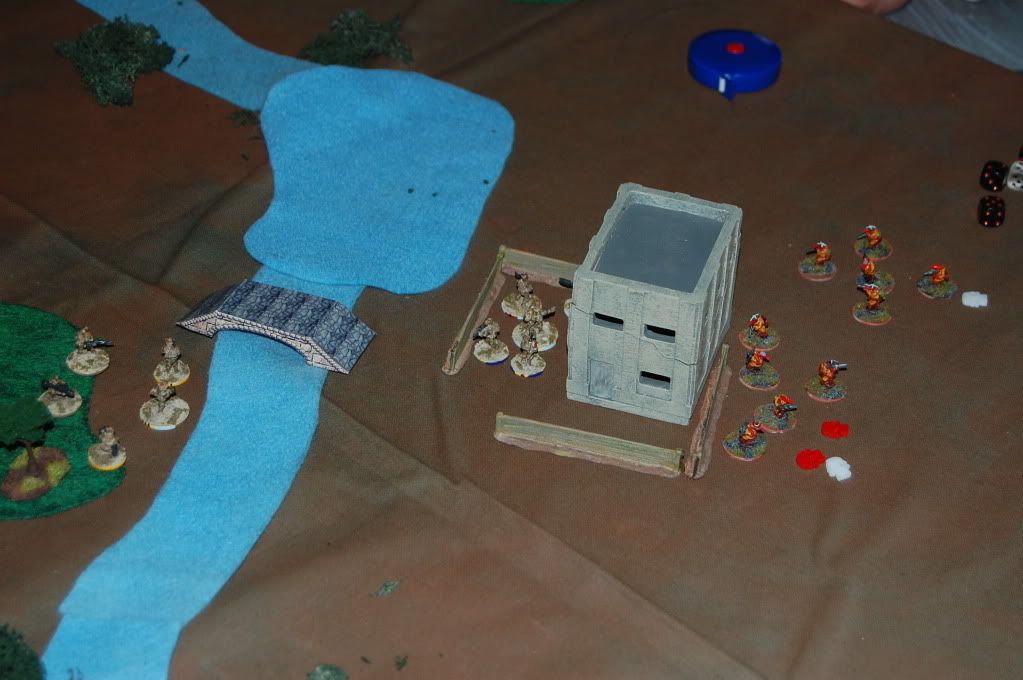
...and those same four Blue teams take their TQ test. Teams #1 (on my left) and #3 (back right) fail and open fire, using their Overwatch to fire first in the Rounds of Fire. Blue #3 tossed 7d vs 6d and scored 7 hits against my 2 saves, so all 4 of the team members drop:
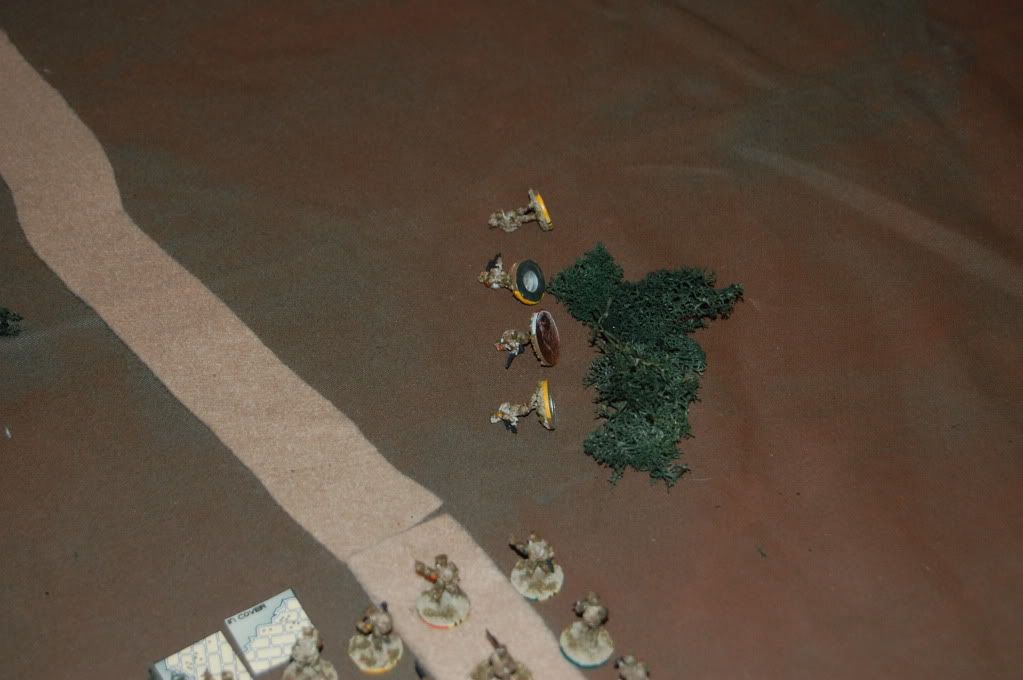
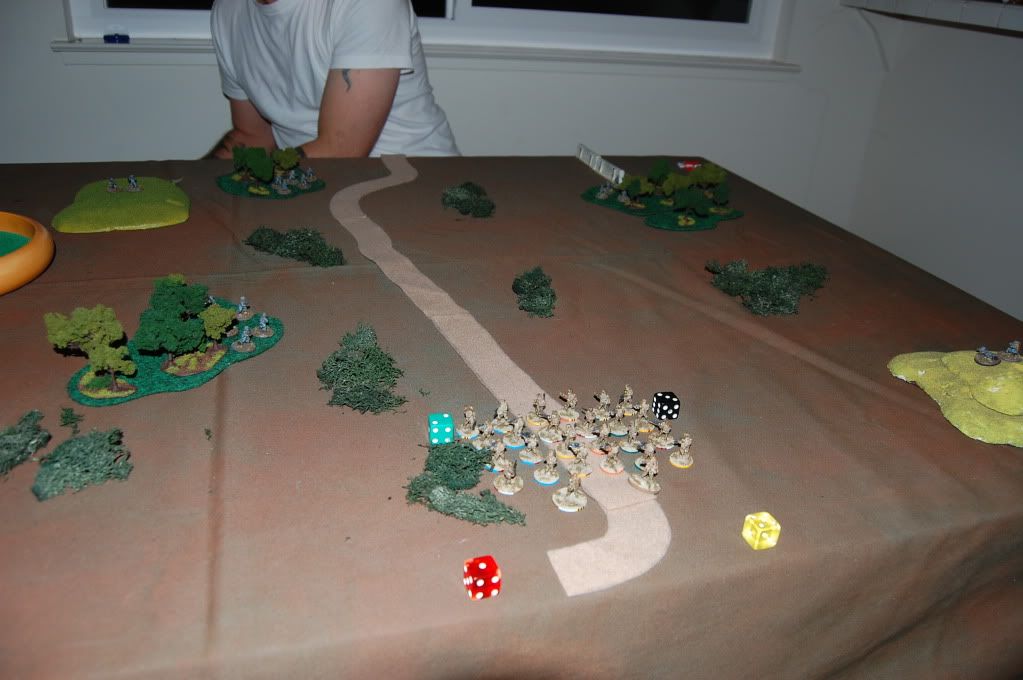
Without all the grizzly details, my teams scattered, and began dashing for cover now that the ambush had been revealed. We had one rules question come up: In the photo below, one of my teams is moving along the length of the tape, and the clear d6 is the intended point that the Overwatching teams are firing at them. Once that fire is resolved, the Round of Fire gives me the chance to return fire...which I do from that clear die? Then, once that is complete, my team advances the rest of the way along their intended route until they reach their destination. At THAT point, the other teams that failed their Reaction tests get to fire...right?
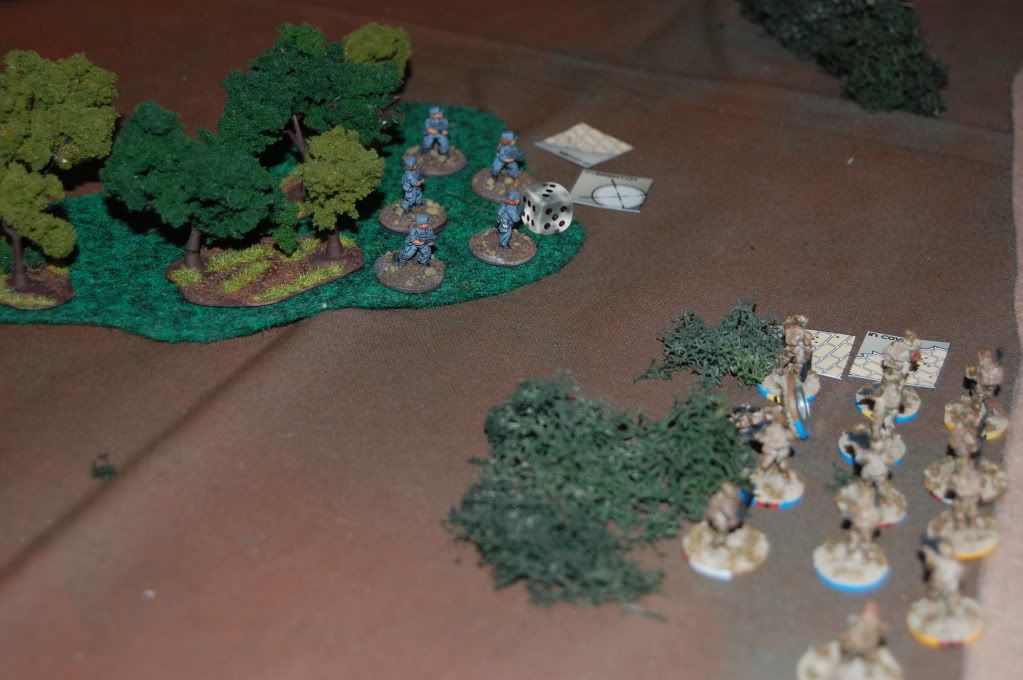
Deciding they have cover, my leftmost team has had enough and declares Fire on Blue #1 in the woods closest to them. The Medium Machine Gun team on the hill breaks their ambush and pours fire into my team but I saved his 4 hits. My return fire was ineffective. Then #1, using Overwatch, fires for their third time this turn but I saved, and my return fire was again ineffective. Then my team gets to perform their actual action, and I shoot up the trees pretty good...and Blue #1's return fire dropped one of my men (his 4d vs my 7d and I cant save! Meep!)
I end up sprinting a few teams to the right, and end up dropping the Machine Gunner's assistant with some return fire (while they have excellent Firepower, small weapon teams dont seem to have much survivability!). A few of my units are halted in their progress by failing key Morale Checks due to casualties (Intimidating weapons didnt scare my boys, which was nice, even though I was rolling d8's for Morale until most of the way through the game when I bothered to check my own notes!).
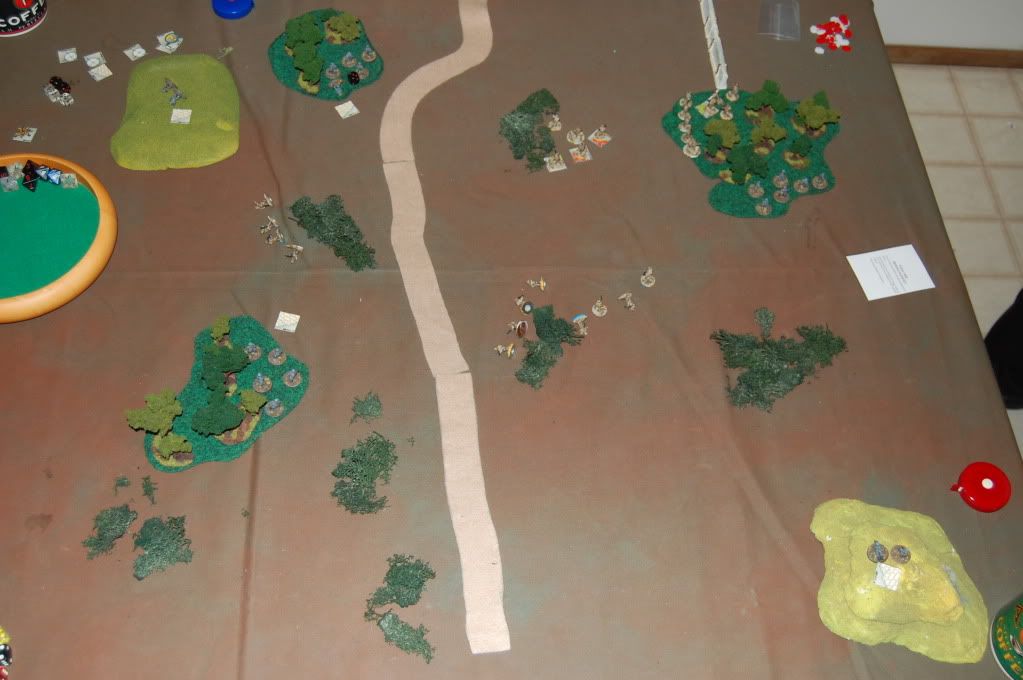
Another round of fire eventually drops the Machine Gunner himself, and Turn 2 ends:
Turn 3:
2d8 vs 3d6 gives the Initiative back to Team Blue. The Red Force calls its medic over to one of the wiped out teams, and First Aid rolls are pretty gentle to me, with no KIA this turn:
Blue #1 and #2 go on Overwatch. The sniper contines to survey the field from his hilltop, and Blue #2 adjusts their location inside their woods. I argued with myself for a minute or two, but finally decided NOT to react to this movement at all, figuring I would get to fire from any Rounds that came my way, and wanted to move on my own at the end of the turn. He decides to fire at my Platoon Leader's fireteam on my right. Question: My fireteam hadnt moved yet this turn. Does it get the In Cover defense die when it is fired upon? We decided NO, because it was hoping/planning/going to move later that turn, but predicating rules on assumed future actions is iffy, I think...anyway, fire on both sides was ineffective.
Finally the sniper slips the safety off, sights on the backs of some sprinting Red Force soldiers, holds his breath, and unleashes hell. One of my units had broken the halfway point in its mad dash for cover on my right, but the sniper blows his Overwatch roll and a storm begins to blow in, reducing Optimum Range to 6" for everyone (not that it mattered, really). Unit #1 also fails their Overwatch test, but Blue #2 doesnt. At the point of impact, my team is Exposed and moving Rapidly, but for all that (his 8d vs my 5d) I only take 1 hit and scamper into the safety of the trees. With LOS now blocked, the sniper eases off the trigger and sighs, as do Blue #1 (well, "sighing" for the grunts was more likely "cursed uncontrollably").
More running, another Red fireteam is wiped out, and I generally get closer to safety...or so I hope. Darkness decends and Turn 3 is done.
Turn 4:
Again with the 2d8 vs 3d6 and Blue wins Initiative. I end up suffering one KIA in the woods to the right, and then Blue comes in with the plan to break the rush once and for all.
Blue #1 uses Suppression Fire on my Platoon Leader's fireteam. I pass the MC for Suppression, but take a casualty, and that MC results in the team being pinned. Mrrr! I had hoped to get my leader off the board this turn, and now he was stuck in cover and wouldnt risk his neck leaving it. Blue had hoped to keep their heads down for another reason however:
Blue #3 declares a Close Assault at my second unit in their woods. My Defensive fire drops one of the charging maniacs, and the Morale Check is a Pinned...until we realize he threw one too few dice. The extra die is a success, and Hand to Hand is joined. After two rounds of it, my men were dead or captured. The remaining fireteams on my side made moves as best they could, and we called it.
The night was drawing late (in real life, not just in the scenario!), and the scenario had quite some moves to be made before it could rightfully be resolved. We did some quick math, made some educated guesses, and declared it "too close to call", giving an exceptionally Marginal Victory to the Red Force for surviving so long.
Brutal.
I have to say, the game was really enjoyable. The balance for the scenario felt JUST about right, and both of us had much better knowledge of the game than the first time. In fact, if I hadnt been taking copious notes and taking pictures, we likely would have finished the entire game, but then you wouldnt have known how it turned out, would you? You should be grateful! :)
Actually, all kidding aside, the game really was fun. We were calculating and throwing dice fairly quickly. We had a few complications (like Overwatch, which added a layer of crunchiness to the order of things) that we spent time looking up, but it really did flow much better this time around. That being said, the game is CRUNCHY. I look at games on two extremes: Beer & Pretzels, and "Let's drink our beer AFTER the game so we can come down off the brain fry". Tomorrow's War was certainly the second for us; maybe a splash too crunchy for a relaxing evening of gaming. I am not planning on shelving it out of disgust or for any other silly reason, but may not be breaking it out until I try a few of the other 15mm options out there for comparrison. I will, however, give it more props than I did originally: it worked for me this time around (see my previous blog: I read Force on Force to get some needed clarification...)
Oh yea: I updated my Quick Reference Sheet HERE. It worked really well this time.
Thanks for reading.
About Me

- Kealios Achilles-Fang
- My name is Gavin McClements. I am a wargamer and family man, living in Los Gatos, which is a suburb of San Jose, CA. Building terrain is one of my favorite aspects of the wargaming hobby - in fact, lately I've become more interested in making my battlefields "pop" than in actually playing.
Showing posts with label Tomorrow's War. Show all posts
Wednesday, January 25, 2012
Saturday, January 21, 2012
Contemplating my next game of Tomorrow's War
Ive been reading Force on Force to get a better understanding of the rules of Tomorrow's War, so that our next game goes a little better.
Things I know now:
Models that are knocked over or have Serious Wounds do not contribute dice to Morale Checks, Firepower Dice, OR Defense Dice.
Wounds caused to a unit will be wasted if more wounds are caused than there are models.
Despite TW claiming they dont have record keeping, there is quite a bit of work to be done to figure out which model takes a hit or a wound. I think, of all the problems we had with our first game of TW, that this was the thing that bugged me the most.
Let's walk through an example:
I have a Regular fireteam of 4 models. 1 Leader, 2 SAWs, 1 soldier.
Turn 1: They take 1 hit. The regular soldier is chosen to be tipped over.
Turn 2: The hit turns out to be a Serious Wound, so now, effectively, the Fireteam has 3 models in it. The team takes another round of fire later in the turn, and ends up taking 1 more hit. At this point, no dicing is needed because the hit is going to be a SAW soldier. Think about it...anyone can be a Leader in a Regular unit, so he will basically be the last alive. He might end up having a SAW, but there will likely always be a Leader. Arguments for or against?
Turn 3: The hit from last turn is a Light Wound. The actual model of the SAW soldier with the wound is marked. It cannot be "generic", because this might make a difference later.
*The wounded 3-man team take fire again. They take 1 wound. It is randomly decided that the wounded SAW gunner takes the hit. He is knocked over again.
*The now-2-man team takes fire again on this same turn. 1 hit is taken, and for giggles the SAW gunner is knocked over.
Turn 4: The two First Aid checks are made at the beginning of the turn. A KIA and an OK! result are rolled. THIS is why its so important to mark the individual models and declare who gets hit with what, etc. If the KIA was the previously-wounded model, then the Fireteam will be unencumbered with the Casualty penalty and will be good to go...for now. If the KIA was the other SAW model, then our wounded buddy gets to bounce back up, but will still be wounded.
So...we go back in time and point to the wounded soldier and make the roll: He is KIA. We point to the second soldier and roll, and his comes up with the OK! result. We pick up the wounded model and his Light Wound marker and make the TQ roll to see if the fireteam can act as normal. Rolling 3d, they pass and can and do.
Why does this bother me? I think its because I am playing this in 15mm. I expect this to occur in 28mm games, which by its size invites such close examination of each model in a team. But when I think about the level of abstraction I get in 6mm (Epic: Armageddon, for example), I think I want something a little in-between when I put my 'tweeners on the tables (you know, 15 is 'TWEEN 6 and 28?! lol). I know the game CAN be played in 28mm, and many people do. But this just feels wrong to me.
I am, however, preparing to play again. I am working on a scenario that has 2 roughly equal d8 forces squaring off. One team will likely have to cross the board intact and the other team will be shooting them up. I dont quite know how to balance it, except that I want a few things: The ambushers will have at least one weapon team, or maybe two (a sniper and a LMG team, likely) in addition to their compliment of fireteams. The other, the "runners", will have a few turns to get across. This will give them the choice to stand and fight and run the risk of not getting off the board in time, or they can run like hell and take their chances.
Problem this this scenario idea? All units can return fire, regardless:
Force on Force, pre-Osprey version, p.31, "Round of Fire" says, "Any unit, whether it is an Aggressor or Defender, may return fire at a unit that attacks it."
It does not state this as clearly in the Osprey version of TW, but it does say:
Tomorrow's War, p. 56, "Rounds of Fire", "If the unit receiving fire first survives, it will return fire unless it has suffered some morale effect that prevents it from doing so, has been completely wiped out, or has no remaining Firepower dice."
So the Running team can run down the middle of the map with Rapid moves, and on a 3'x3' board, can be off in 3 turns. What makes this not so attractive? Aha! Give them an incentive for keeping people alive! DUH :) Let's imagine a trail running right down the middle. The ambushers are off to either side, firing into the center. If there is no terrain on the path, the running team could be Exposed, giving the bad guys +1d, and moving Rapidly would also give the firing units +1d. Keeping the Tech Level the same, this could mean that the attackers in this case could get quite an advantage on the runners.
Should this be rewarded? Let's say the Ambushers have 4 fireteams of 4 and 2 weapon teams of 2 (1 sniper and 1 LMG nest). The runners get 4 squads of 4, with Light Support weapons only (SAWs and Grenade launchers, no bazookas). We COULD say this is happening at dusk, and the ambushers have no night vision (TW p.80), meaning they lose 1D when firing and have their Optimum Range halved. Maybe not a bad idea if you give them 2 or 3 turns of unhindered fire, and starting on turn 4 you lower the curtain of light on the table...
Hmmm. so how long should it last? On a 3'x3' board, a team full out running can get off in 3 turns, assuming they have Initiative or choose to Move for their reaction every turn. Is this likely? No. So let's say it'll take them 4 turns. Now give them a chance to fire back. 6 turns? What if they get a Serious Wound. No chance to move quickly is a bad thing. 8 turns? Now we're in the same ballpark as Lost and Found (TW p.96).
My gut says 6 turns. Some kind of points based on how many bad guys killed for the Ambushers, and how many live soldiers make it across, combined with how fast they do it for the runners. Hmm...starting to shape up. Looking good for now. More thoughts later.
Wednesday, January 18, 2012
Tomorrow's War gets put through its paces
I got a chance to finally play the game that compelled me to get into 15mm in the first place: Tomorrow's War by Ambush Alley Games. We prepped all week, making sure our cheat sheets were in order, the scenario rules and forces were jotted down on reference sheets, that tokens and Fog of War cards were cut and ready...and then the night arrived and I was very excited.
Having read the TMP forums over the past few months, Ive gotten to see what other people have to say about the game, and so I deliberately chose to play Scenario 1, "Lost and Found", because a) its the first scenario (Duh!) and because it has received a lot of attention by naysayers for its imbalance. I wanted to see for myself.
I played the US Marines, using my Khurasan Federal troops, while my opponent and friend used his Quar as the DPRG. In this scenario, a USMC pilot is down and hidden in a building surrounded by an enemy patrol. The Marines must get in, make contact with the pilot, and escort him off the table by the end of turn 8. We imagine that the DPRG have called in reinforcements, and if the Marines dont get away, it'll be too late...
Deployment:
TURN 1: With the DPRG hidden per the scenario rules, the Marines had no one to engage, and the first turn was spent advancing cautiously towards the pilot. No reactions were revealed by the ambushers:
After the Marines advanced, two units of DPRG appeared, sprinting for cover behind the pilot. No shots were fired at them, as the Initiative units (the Marines) could only react to being fired at.
TURN 2: Initiative is rolled for the second turn, 2d8 vs 3d6. The DPRG take the initiative with 3 successes vs 2 by the Marines. One of the units that dashed behind the center building open fire at the Marines by the bridge.
No, we didnt need to measure the range, but old habits die hard...
The Marines won the opposed Reaction test, spot the Fire action, and bring their own guns to bear. I threw 8d8 (4 models, 1 SAW +1, 1 SLAM +2, 1 for a Tech Level difference) vs 9d6 (5 models, +2 armor, Intervening terrain +1, +1 for "In Cover") and scored 4 unsaved hits vs the DPRG. The one soldier remaining threw a few dice back and bounced all shots. The DPRG succeeded on his Morale Check for taking casualties, rolling 5d6 (one for each model in the unit, not just the 1 for the sole standing model) and getting 4 successes.
His second unit that moved last turn then opened fire on the same unit of Marines, and the results were similar: Marines won the contested Reaction roll, and throwing 7d (-1 for the second reaction) managed 1 unsaved hit. The DPRG have better luck with their shots, and score 1 hit of their own.
Finally, the hidden unit on my right open on the Marines by the bridge, inflicting no wounds and taking 2 in return. This is the third reaction test the Marines won...and in fact, the rest of the game, the Marines won every contested reaction test when they were fired upon. d8 vs d6 with hot dice is not fair...
After the firefights die down, the Marines in the field make Rapid moves into the woods near the pilot's bridge.
TURN 3: 1d8 vs 4d6 for Initiative results in 1 success for both sides, but the Marines' 7 beat the DPRG's 6, so the Marines go first.
Casualties are rolled, and the Marine shot over by the bridge died to head trauma. His unit, shocked at the loss, hunker down and sweat (they could not act that turn, except to return fire). A number of wounds was spattered among the DPRG units.
The 5-man Marine fireteam on my left threaten one of the enemy units by the house, lose the opposed reaction test, and watch in frustration as their intended targets scurry out of LOS behind the building. This leaves the other Marine fireteam to advance over the bridge to meet the pilot.
As they broke cover and moved low over the bridge, the final hidden DPRG team on the left opened up and inflicted a hit on the Marines. Because the Marines didnt declare a "Move and Fire" action, we didnt have the Marines return fire in the Round of Fire, but I have a feeling this was wrong.
His second unit lurking behind the pilot's refuge declared a Close Assault on the Marines who have drawn close, but failed their TQ check and stayed put. At this point, his unit on my right advanced to the river and opened fire on the Marines nearby.
As happened every time this game, the Marines anticipate the gunfight and fire first, inflicting 2 hits. The DPRG unit fails their Morale Check, and being pinned, lose their opportunity to fire (their d6 TQ die dropped below d6 from being pinned, disallowing fire this turn).
His last unit on my left sprint out into the open, staying out of LOS of the Marines and attempting to cut off their eventual retreat. (My unit in the woods on the left advanced at some point to fire on the sprinting unit, but I dont remember exactly when...)
An overview of the end of Turn 3:
TURN 4: DPRG wins Init again. He declares a charge, successful this time, against the Pilot's escorts. My Marines failed their TQ check and so got no Defensive Fire, and with their Dependent in tow, were prevented from fleeing as a reaction. Thus, it got bloody really quickly. When the scuffle was over, 4 DPRG scrubs were down, the Marines had taken no wounds, and the DPRG were pinned/surrendered, and thus captured and were now under armed escort as POWs.
Not wanting to suffer a similar fate, the other DPRG unit behind the central building open fire on the depleted Marines by the right bridge. The Marines inflict 3 hits and take 1.
The Marines with the grip full of POWs and the Pilot move slowly over the bridge.
Over the next few turns, a few things happened: My Marines kept the DPRG outgunned in every firefight. The Escorts moved slowly towards the board's edge...
And finally:
TURN 8: My marines move to within ONE INCH of the table edge...
The Team Leader is the unit on the left. One inch from victory, and we checked...there was just no way they could have gotten off the board. Not being able to move rapidly with the Dependents made it hard, and the POWs just made it worse.
Overall, the DPRG took a POUNDING but won. Go figure. Im actually glad they did, because the pounding they took made it really unfair. The Tech difference on all Marine shooting AND defending? I had a 5 man squad tossing 10 dice a number of times!
My thoughts?
There was WAY too much record keeping for a game of this size. "Record keeping? There isnt any record keeping!" Sure there is. Each individual soldier matters, their equipment matters, and you have to know who has what. Beyond that, though, I peppered certain DPRG units with shot after shot. Wounds started adding up...then when one died, which soldier died? Why does it matter? Because a unit with 5 soldiers and 2 Serious Wounds and 4 Light Wounds...one dies...which wounds go away? EVERY time I hit a unit after the first, we diced off to see which model took the hits...
At 15mm, that's a lot of bookkeeping. It is easily as much, if not more, than I need to keep track of in your average 28mm game.
I was also surprised that for a 15mm game, I had fewer models on the board than a typical 28mm skirmish game. Ok, maybe not LESS, but Ive played Infinity with more than 13 models. It was nice being on a 3x3 board, but it was more fiddly playing TW with 15mm than I expected. The colored dots I placed so carefully on the backs of the bases just werent that visible. My bad. I need them to be visible from the top down...oh well.
Tomorrow's War was a lot less bloody than I expected! My Marines went to TOWN on the defenders, but all in all, there were 4 deaths between our forces: I had 1, and Aron had 3. He had a ton of wounds scattered about, as mentioned above, but other than taking time to figure out who had what, it didnt do much more than keep his unit from doing anything other than reacting to being fired upon. I suppose that is a good in-game effect after all.
Once we figured out who was in our units and how to count Firepower or Defense dice, we got much faster at it. Still, there was always something we felt like we were forgetting. There are tangibles to count: Support weapons, number of models. There are intangibles: Tech level, optimum range. It was mostly the intangibles that kept us referring to the chart.
And Tech Level? The Marines had Overall TL 3 vs the DPRG's Overall TL 2. That means that every time a Marine unit fired, they added 1 extra firepower die, and everytime they were fired upon, they got an extra defense die. Every time. For free...That made a difference.
Speaking of Tech level, the SAW the DPRG forces were carrying was a TST (Traditional Slug Thrower) at TL1. We ignored this because we assumed that it would only ever come into play if the SAW was the ONLY weapon firing at a Marine unit on any given turn, because otherwise the Marines would get TWO extra defense dice due to the Tech difference.
Going back to the point that I made at the top: the scenario has received a lot of negative attention, which really made me want to play it. And I have my verdict now: Ambush Alley Games chose the wrong scenario to be the intro game. The forces were too disparate. The d8 vs d6 was gigantic, but there werent any balancing features to the weaker force! Even adding 2 extra regular troopers to each Fireteam would have gone a long way to making the DPRG a competitive force. The problem in our game was that, even though they "won", the beating the defenders took was so brutal that it wasnt FUN. My opponent was a fantastic sport, and a great guy, but I kicked the shit out of him. My dice were hot...admittedly, they were. So what? He won by 1 inch, which is about the very definition of "by the skin of your teeth", and the bruises suffered along the way were nasty.
Two points to follow up on this: The DPRG cannot use Overwatch because their TQ is d6, and a d8+ is needed for Overwatch, and Suppression fire doesnt do any good against High Confidence troops unless you can reduce that Confidence. The only way I found to do that was to add Stress Tests to the game, which we didnt. This put the defenders at the mercy of firefights, having their (almost guaranteed) casualties dictate what they would or could do the following turn. The Ambush rule merely kept them alive on the first turn, assuring they werent just picked off at long range. They were, instead, picked off at medium and short range.
All in all, I WANTED to like this game. No, that's not even correct. I wanted to LOVE this game, because it convinced me to get into the 15mm craze. I am "over" playing my 28s for the most part, and while I LOVE 6mm, I just didnt see a need for yet another scale. But this game had me psyched up for 15mm, and I collected and painted and finished my force and was excited about it. I just dont think TW lived up to the hype.
AAG really, REALLY needs to get their points calculator in place. I will play again, and likely soon, because I need another experience to have another chance to learn the rules more.
And then I will go play Gruntz like people said I should....
LASTLY: I am going to post the email that my opponent sent out last night after the game (he stayed up later than I did, apparently!) so his thoughts are recorded here as well:
Well drat, Tomorrow's War isn't exactly what I hoped it would have been. I was looking for something a bit more like the feel I had from a single play of Ambush Alley. Sadly TW misses the mark for me right now, couple of observations:
- Quality disparity can be pretty devastating. I had quality at a d6 vs an opponent with quality d8. TW is basically an opposed roll system counting successes, with the key mechanic being the reaction check. Target number for a success is 4. Count your successes vs. your opponents successes to yield a result. TW is also a bucket o dice system, which is kind of fun to roll lots of dice
Here's a basic example of a fire fight that illustrates the two above points.
- Declare a unit will fire on a target
- Firing unit and target unit dice quality and check for successes to see who fires first. Ties to the initiative player.
- Firer counts the number firepower dice which vary, usually about 5 for a small or exhausted vs 10 for a large or fresh unit
- Defender counts defense dice, 1 per figure plus body armor and cover usually about 7 to 10
- Defense successes will cancel Attack success of an equal or lesser value
- So here's what happened pretty consistently for my lower quality troops. Declare to fire, fire second (every damn time), take x number of casualties that will reduce returning fire power, return fire and score 3 or 4 hits, which are then easily saved by the high quality defense dice.
- Tech level disparity (which I suffered from too) is an effective +1d modifier in my opponents favor for every opposed roll we make. Yes, every single opposed roll . . . and if the tech was more disparent it could be +2d or more.
- The game feels broken with quality disparity, but maybe that's the way it is supposed to be (british paras beating up on argentinian regulars)?
- I only killed one of those paras, vs 3 kia for my side
- So it's not a casualty heavy game, even for all that dicing
- The rulebook is painfully fluffy and not laid out very well, I would need to write a summary set of rules on a couple of pages to logically cover what is written in 30 or so [ed: we had 4 gamers (2 of us playing, 2 helping with cheat sheets and going through the book...and it took all 4 of us sometimes to get things answered. Yes, the index helped, but there is a lot going on in the game...]
- That's not to say that there aren't some good rules there, they are just needlessly buried.
- It felt a bit like playing WRG [ed: Wargames Research Group, the guys who did DBA, etc], factor factor factor factor I still need a 6 type of thing.
What did I like?
- The action / reaction system is pretty cool. The chance to respond to your oppents action either by fire or movement is neat. However, I think there needs to be a limiter on the reaction by fire. Maybe pooling the total available fire power for the responding unit and dolling it out through out the turn. That means that the reacting unit if high quality couldn't lay down more fire as an inactive player than they could as the active player.
- The initiative system is pretty cool too, that works well enough. Throw 1 quality die per 2 units, plus some basic modifiers . . . but then again having initiative doesn't net you a lot, just means you get to go first and see if you get shot first in reaction.
I'm going to have to play TW a couple of more times to make sure I'm not missing something, but I'm not looking forward to that. I'd rather play Star Grunt or Hammer's Slammers, both of those sets seem to provide a more enjoyable game.
Saturday, January 14, 2012
15mm Khurasan forces are COMPLETE!
How long ago did I begin this project? Too long ago, for sure.
BUT...after some mishaps with experimentation, let me present to you:
First, let me tell you about my experience with the Secret Weapon weathering pigments. I must say, after watching Robin of Gruntz make it look so easy on his videos, I bought a few and eagerly awaited the chance to use them. This meant that I purposefully left out my customary drybrushing, and after the paint and wash had dried, I coated them and moved on to the pigments.
Problem: Details matter. Did you know? Like, GLOSS COAT is not MATTE VARNISH. Using Gloss, like I normally do for protection, does NOT give the pigments any traction! I was quite dismayed as I began dusting on the pigments and see no noticeable effects, except for where they gathered simply by resting on a flat surface. After a quick reconsulting of the Secret Weapon tutorials and a post to their Facebook page, I realized my idiocy...and rushed out and purchased Krylon Matte Finish varnish from my local Ace Hardware. It was a whopping $5...and not too late.
The snippet from our FB discussion:
Me: SO, the steps should have been: 1. Paint 2. Matte coat 3. Weathering pigments 4. Matte coat?
SW: Yes, you've got it now. Although I'll add that it also depends on what else you're doing. For instance it might be:
Paint
Gloss
Decals
Gloss
Washes
Matte
Oils
Matte
Pigments
So...after I coated the minis in the Matte Varnish, I COULD have gone back again and reapplied the pigments, and then recoated in Matte to finish them off again, but I was just DONE with them. They are good enough for tabletop gaming, and while I will be annoyed at myself till the end of time for doing this incorrectly, I'll know for the future.
Without further ado:
Blue Squad deploys in front of the town, enjoying the warm early morning sun:
Blue Squad revels in their Walker escort:
Green Squad checks the end of an alley for insurgents:
The Squad of Power Armor spots suspicious activity at the outskirts of town, and investigate...taking the short route:
Two Heavy Machine Gun crews cover the town from across the way:
The Main Battle Tank cruises along slowly, escorted by its canine team and handler:
Yellow Squad jumps out of their APC, eager for action:
A mass of Company Support Assets, ready for assignment, cluster in the staging area:
Company Commanders huddle in conference, comparing notes and weighing options (note the US Nickel base, setting them apart):
Representatives of the different squads gather for discussion (L to R: Purple squad, Senior Company leader, Company leader, Yellow Squad leader, Green Squad junior leader/Medic, Orange Squad medic, Company asset (unassigned) Light Support, Company asset Medium Support, Blue Squad Medium Support, Company asset HMG Heavy Support team):
Details of the Support Weapon markings:
Leadership markings (note, the Junior Squad Leader on the left is also a Medic, and only the Squad level leaders have squad colorings. The others are "Unassigned" grey, meaning they can fit where ever they need to be):
Lastly, just a quick shot of two "guys". Purple squad is a regular trooper, and the Orange Squad is a Medic (see his right shoulder):
The overall group shot again, as they patrol the quiet border town in the early winter sun:
Our playtest of Tomorrow's War is on this coming Tuesday. I cannot wait!
And now, for a quick gratuitous mention of Battlefield 3:
I play a TON of Call of Duty on my Playstation, but recently got REALLY into flying helicopters on BF3. I want to show you my favorite video on Youtube, AND the free download of that AMAZING song by Emancipator that I cant get enough of:
And to get Maps for free:
http://emancipator.bandcamp.com/album/free-downloads
Have fun, and thanks for reading!
Subscribe to:
Posts (Atom)