My name is Gavin McClements. I am a wargamer and family man, living in Los Gatos, which is a suburb of San Jose, CA. Building terrain is one of my favorite aspects of the wargaming hobby - in fact, lately I've become more interested in making my battlefields "pop" than in actually playing.
I love making terrain, and my wife loves calligraphy, scrapbooking, and pastel colors (Spring and early Summer are her favorite seasons). She is busy nightly with her crafts, while I have really only just recently gotten back into my creative mode. Our 15th anniversary is coming up, and since I was buying some fun stuff from Scenic Express, I chose this as an opportunity to get some of the "brighter" colored items and give them a test run.
Roughly 10"x5", the stackable "steps" inside are completely removable - and at only $10, it was a no brainer.
I started off with some trees, which allowed me to monkey with some of the different techniques I have been linking here.
A little 1/2" foamcore from Michaels, and I had the beginnings of the scene.
I use this grout material that I got at Home Depot years ago - it has a fine texture similar to buttercream frosting - I mix it in a bowl with a TINY amount of water, and I mean just enough to get it wet. It spreads nicely at that point, and it has adhesive in it already, so I have never felt the need to use white glue with it.
I coated it on the trees, the slopes, and any areas that I thought might need it. For the steeper slopes, I used foamcore offcuts under it - this doesn't really shrink much with drying, but I didn't want to push my luck. A few rocks from the fairy garden out front, and some air dry clay for the banks, and it was ready for a good dusting in sand. When I posted this WIP on Facebook, most of my friends (who really don't understand my hobbies at all) asked if I was making a cake...
My biggest dream for the garden was the use of the SuperLeaf products I had purchased - but given that I was making these trees from scratch and the polyfiber I had was green, I needed a solution to get the foliage onto the armatures. This was the look I wanted, after all:
What I really wanted was some kind of gauze that I could distress (like you would do to a cotton ball to make smoke or something) and stretch across the tree frame - but a quick visit to the local RiteAid came up with nothing (well, a few things, but they got relegated to the first aid kit once I discovered how unsuitable they were). I ended up discovering some Fine Mesh Gauze, which didn't distress like I was hoping it would, but seemed viable nonetheless.
Once the gauze was on and primed along with the rest of the board, I trimmed them a bit with scissors.
[NOTE: I want to do THIS next time with steel wool, which might give better body than the gauze...]
The steps were made from air dry clay. The wall in the back left was made from Pegasus Hobbies bricks. The cobblestone walkway was done with plasticard and was inspired by this:
By the way...I could look at "Japanese Garden" image searches on Yahoo and Google all day...well, maybe half of a day, before I just had to jump up and create something...
Some primer, some paint, and now I had this:
The green for the pond was a Moss color I got at Michaels...I love it. I am hoping it shows through the Realistic Water nicely...and you can see my Fall work in the background for my 6mm terrain.
The real fun began as I started to add color to the project. I flocked the grass in "Green Grass" fine flock from Woodland Scenics - I mottled in a bit of other colors, but figuring it would be covered by clump foliage and flowers, I didn't vary it too much. The colors were mostly from Scenic Express' Spring and Summer flower assortments - basically colored turf, and it was wonderful.
This is with the excess flocking still on the base:
The next step is to get the color on the trees, and once that is done, I'll need to do the water portion.
As I was unsure about how to stop the water effects from coming off the end of the board, I looked about and found this easy tutorial on how to accomplish that:
The Terrain Studio is such a great channel - this is his method that I feel was personally uploaded just for me - so I was quite happy when he put it up.
This is another option - I may combine the two when I pour mine.
I also found a good discussion on water and how it is modeled here. Basically, I can do "dirt" and flock all day long, but I don't tend to do water much - so this helps: http://www.diorama-dreamland.at/index.php?id=26
Of course, TerranScapes has an excellent video on his Water Effects works:
I'll get more up as I get closer to finishing this.
Now that my bocage project is done, I want to make more trees to round out my table. I actually own more than I can use, but colors, man, colors! So many tables are drab...and Spring and Fall (and heck, even summer!) offer such natural beauty!
As there are more ways to make trees than there are rulesets to play in 28mm...
I did some research, as always, and finally decided that these two videos were what I wanted to replicate. The first is by an Aussie (?) who is clearly a master woodworker and into making terrain "on the cheap". The second is a more conventional project.
I made the jig from the first video for pines, and hand-twisted wire trees to replicate the second. I hope to have something to show soon.
As mentioned, there are so many other worthwhile tutorials out there - here are a few more.
Before I show you the rest of my project, let me say that I love seeing new products, and Shawn Morris at the Terrain Studio has some very cool Youtube tutorials (his latest seems to be this amazing WW2 European field for 15mm; see below).
Skip to 2:30 to see a walkthrough of some items from Scenic Express that look like they might be fun to use. 4:20 is where he talks about the plowed fields - I bought 2 on this recommendation and am looking forward to seeing them in action.
Back to the Hedges!
Here are the Hedgerows with 2 layers of paint: Beastial Brown and Graveyard Earth. The third, lighter color was Country Tan by Apple Barrel - I've never really been happy with the highlight color to go onto the Earth color. Khaki was recommended to me, but this was what I had on hand. I also hit the scouring sponges with a bit of English Ivy color, also from AB.
As you can see, the sand that I sprinkled on during the clay phase is mostly still there. The primer I painted on was quite thick, and basically glopped it on. The rocks are highlighted with 2 colors of gray.
Finally, the fun part. I mixed up a few different colors of flock, including Woodland Scenic's Green Grass, and some tans, browns, and an Earth mix. A 50/50 water/PVA solution is the usual suspect here:
The English Ivy, once dried, barely showed. I hope to go back with a lighter Leaf color just as an accent.
You can clearly see that there was indeed shrinkage with the clay, and it is evident on many of the ends of the hedgerows. This is probably the most frustrating part of the project for me. It is certainly something I can live with, but it is there nonetheless.
The other thing is that I made some of the berms very narrow. This worked artistically, but when it came time to add the clump foliage, didnt give me a lot of room to balance some of the pieces very well. Still, it turned out OK, I think. See for yourself:
As I ran the Hob-e-Tac along the berms and let it sit, I started sorting the clump foliage. When you pull the pieces out of the package (or the bins I keep them in, in my case), there are all sorts of dingledangles and gribbly bits hanging off them. I pulled a lot of this off and made three piles: bigger pieces (for where the berms were flatter or wider and could accommodate a larger piece), small bits (for the narrower spots), and the leftovers (for filling in places, or covering left over glue bits).
Here are some 15mm scale shots, with models from Khurasan:
Here are some 6mm scale shots, with bits from my Eldar Epic collection:
Of course, some obligatory storage shots:
There you go. I cannot wait to get them onto the table!
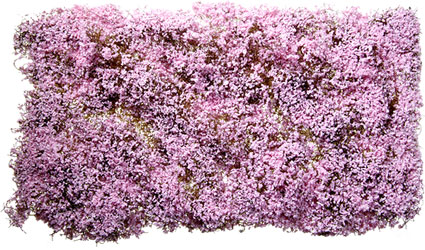
I made some fun purchases at Scenic Express last week. One of them (some of them?) were Super Leaf packs in many Spring colors - pinks, purples, etc, so I can continue in my quest to add color to my boards. I already have Fall colors for my trees, but I decided that Spring has great color and I wanted to experiment.
A Japanese Flowing Cherry tree:
Flowing Dogwoods:
Purple Leaf Plum Trees
One problem I found with my desire to add Spring trees to my table was
the apparent lack of ways to do so. I usually either buy trees off Ebay,
or use various methods combined with Clump Foliage to make them - but
this didnt seem like an option for Cherry, Dogwood, or Plum trees.
I found this product: http://www.sceneryexpress.com/JAPANESE-CHERRY-LEAF-PETALS-16OZ-SHAKER/productinfo/653-6542/ and shortly after found this review by TerranScapes...but as you can see, it still doesnt really give a good example of how to make these trees (yet?). Skip to 2:16 for the review...or follow the link he adds in the upper right hand corner as the video starts.
I'm still at a bit of a loss on how to do this, even though I have this neat product - because it doesnt seem thick enough to make trees with in my usual way.
More research is needed. I'm wondering if anyone has experience with this product?
NOTE: I found a new item in Catalogue #17, called "Pull Apart Plant Cluster" (an example is here):
It looks to be an undercoating, if you will, in the vein of the Polyfiber product. I may look into this.
Not sure if these are relevant still or not, but this seemed like a good place to mark some of the things I've found over the past month while surfing the internet.
THE most inspiring Blog I've found on Napoleonic building as
mini-dioramas - and because of this, my wallet went KA-BLAM over at
Total Battle Miniatures and Levin Miniatures! https://sologeneral.wordpress.com/terrain-and-scenery/
While doing some quick video research on weathering pigments, I stumbled across this video on Youtube. I'd say its "quick", but maybe I should say FAST :) Anyway, worth a look because it shows "how to" in the way I like to see...just get it done, already!
I'll admit I am a little confused on how to "finish" these models. Robin's pigments were brushed over a sealer, which is a step I dont plan on doing until the end when its done. Hammer's is finished with rubbing alcohol (wtf?), so Im still looking into this...
[AHA! Being the smart cave troll that I am, I went to the source: www.secretweaponminiatures.com and yea, they have a Tutorial section at the top. Including how to use their pigments. Check out their "super secret" unlisted Youtube video to see more...and yea, they use rubbing alcohol too. Guess what I'll be using?]